## Opening the URL Configuration Dialog
1. Open the **View settings** tab in the right panel.
2. Click the **Configure URL** button (next to **View URL**, with the active method shown as a `POST` / `GET` badge). The **URL Configuration** dialog opens.
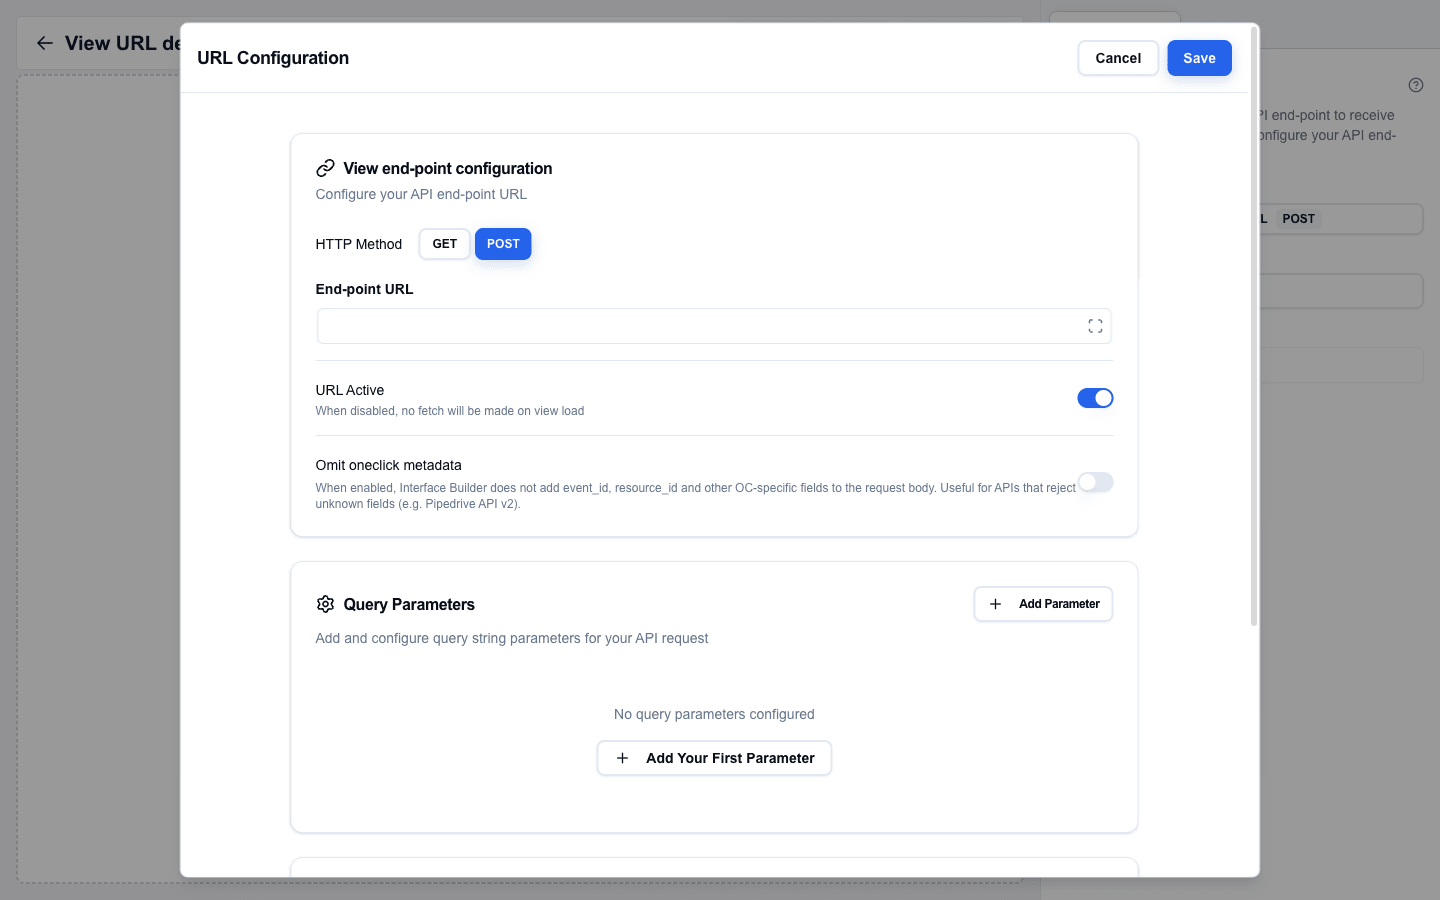 The dialog is divided into cards, in this order: **View end-point configuration**, **Query Parameters**, and **Manage Headers**. Click **Save** in the top-right to apply changes, or **Cancel** to discard them.
## HTTP Method
In the **View end-point configuration** card, pick **GET** or **POST** with the toggle buttons next to **HTTP Method** (default: **GET**).
- **POST** -- sends a request body with deal/person/organization context.
- **GET** -- appends parameters to the URL.
## End-point URL
Enter the full URL of the external API endpoint in the **End-point URL** field. This is the URL the view calls to fetch data when it opens. The field supports the Data Picker, so you can build the URL from variables.
## URL Active
Turn on the **URL Active** switch to enable the external data source. The helper text reads _"When disabled, no fetch will be made on view load."_ When off, no request is made and the **Custom** tab in the Data Picker remains empty.
## Omit oneclick metadata
The **Omit oneclick metadata** switch tells Interface Builder not to add `event_id`, `resource_id`, or other OC-specific fields to the request body. Turn this on for APIs that reject unknown fields, such as the Pipedrive API v2.
## Query Parameters
In the **Query Parameters** card, click **Add Parameter** (or **Add Your First Parameter** when the list is empty) to append a row.
- Each row has a **Key** input and a **Value** input. Values support the Data Picker.
- The **Trash** icon at the end of the row removes that parameter.
- Keys must be 1--255 characters, values 1--512 characters. Duplicate keys are flagged with `Duplicate key not allowed`.
## Manage Headers
In the **Manage Headers** card, click **Add Header** (the empty state shows _"No headers configured yet"_). Each header has:
- **Key** -- the header name. Must contain only letters, numbers, and hyphens, cannot start or end with a hyphen, and cannot start with `x-oc-` (reserved for system headers).
- **Value** -- the header value. Supports the Data Picker, so you can use dynamic values such as `{{variable.api_key}}`.
:::note[OneClick-level headers are merged in automatically]
If the OneClick button this interface is attached to has its **Headers** toggle enabled (configured outside the builder, on Pipedrive's **Edit a Button** page), every header listed there is sent with this request. You only need to set per-call headers here for values that differ between requests. See [OneClick-Level Headers](/docs/buttons/interface-button/interface-builder/explanation/architecture#oneclick-level-headers) for the merge order and the reserved `x-oc-*` keys.
:::
## Using the Data
Once the URL is active, the external API response fields appear in the Data Picker under the **Custom** tab.
1. Open any Data Picker field.
2. Switch to the **Custom** tab.
3. Browse the response fields and click to insert chips that compile to placeholders like `{{custom.field_name}}`.
The data is fetched at render time using the configured method, headers, and parameters. The response is parsed and made available as selectable fields.
## How the Response Reaches the View
When the view opens, the builder calls your data source URL and then waits for your response. The view stays in a loading state until the response arrives, and renders as soon as it does. The total wait is capped at roughly **20 seconds**.
If nothing arrives in that window, the user sees a `Request timed out. No custom data received.` toast. If the data source URL returns an HTTP status outside 2xx, the user sees `Data loading failed (status 500)` (or whichever status came back).
For the exact request shape your endpoint receives — body, headers, system metadata — see the [View Data Source reference](/docs/buttons/interface-button/interface-builder/reference/data-binding/view-data-source). For the parallel-fetch state machine and the differences between Test, Preview, and live render, see [External Data Flow](/docs/buttons/interface-button/interface-builder/explanation/external-data-flow).
## Responding with a Message View
Sometimes the "data" you have for the user is a message, not records -- the record cannot be found, the session expired, or a step is still missing. Return a message-view response instead of real data:
```json
{
"oneclick_data": {
"error_message": {
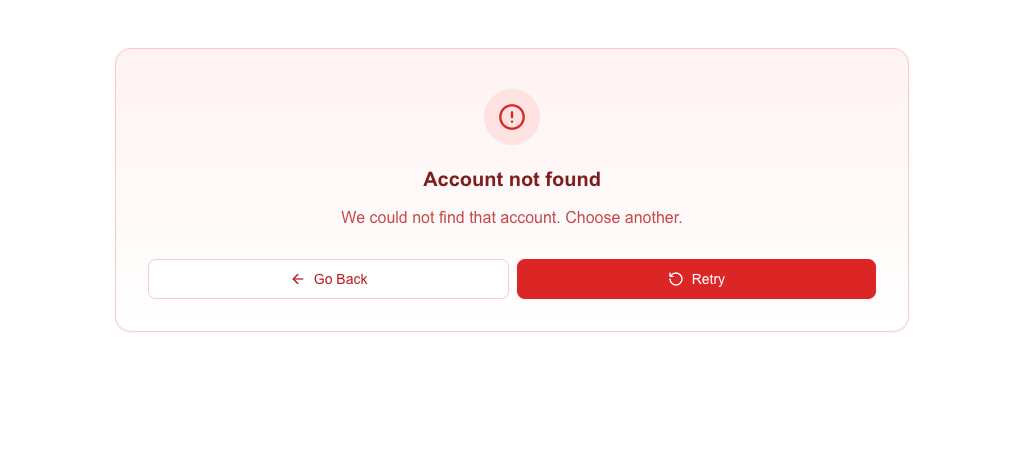
"title": "Account not found",
"message": "We could not find that account. Choose another."
}
}
}
```
The view shows a full-page message view with your title and message, plus **Go Back** and **Retry** buttons. Use this instead of a toast when the user cannot proceed -- they cannot miss a full-page card. The object form also accepts optional `hideRetry: true` and `hideBack: true` flags to hide the corresponding button.
 If you only need a single-line message, use the string form. It gets the title "Error":
```json
{
"oneclick_data": {
"error_message": "Something went wrong"
}
}
```
### Lists and variants
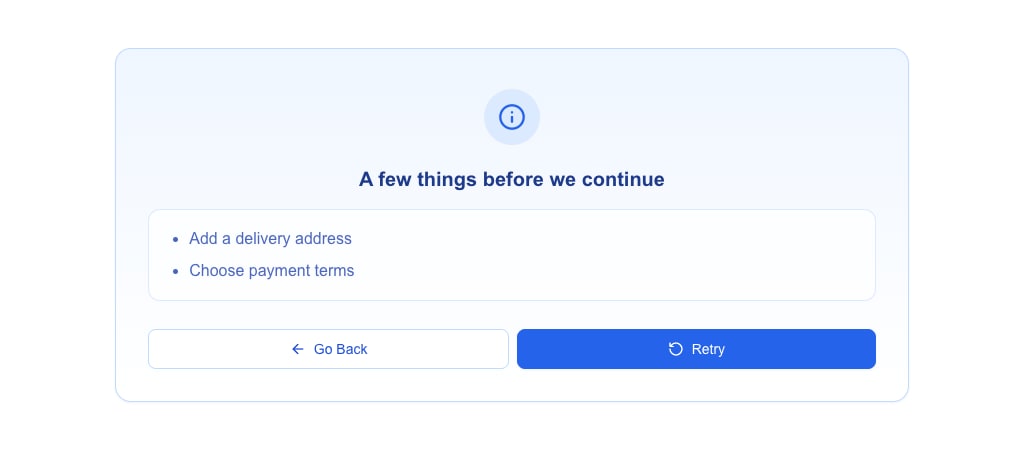
To list several items, send `message` as an array of strings. The message view shows them as a bullet list. Add `variant` to change the colours and icon -- `destructive` (default), `warning`, `info`, `success` or `default`:
```json
{
"oneclick_data": {
"error_message": {
"title": "A few things before we continue",
"message": ["Add a delivery address", "Choose payment terms"],
"variant": "info"
}
}
}
```
 ### `message_view` for messages that are not errors
When the message is not an error -- for example a `success` or `info` note -- send it as `message_view` instead of `error_message`. The fields and the view are the same; only the name is neutral. `message_view` takes the object form only:
```json
{
"oneclick_data": {
"message_view": {
"title": "Almost there",
"message": "Customer created. Add a contact person and press Retry.",
"variant": "success"
}
}
}
```
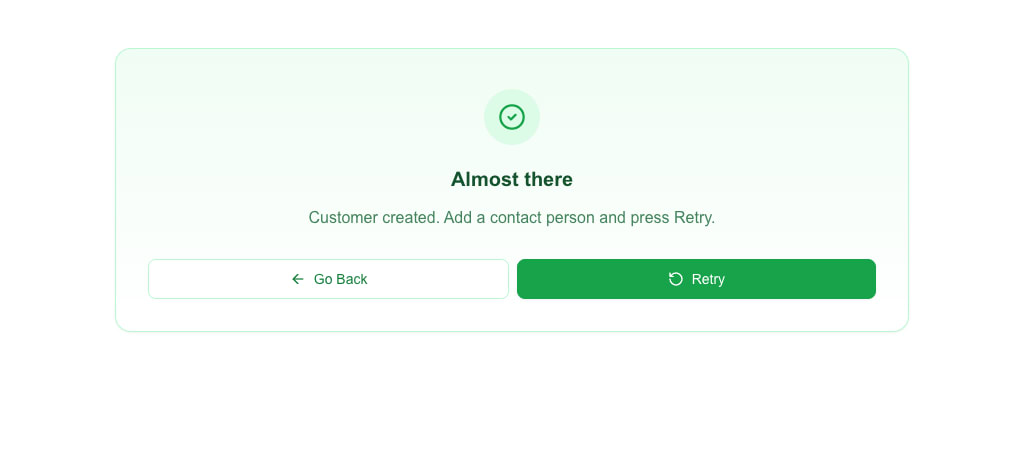 - `variant` changes the look only. The buttons stay **Go Back** and **Retry**, and the response is still not a success response.
- A missing `variant` is `destructive`, as with `error_message`.
- If a response carries both fields, `error_message` wins and `message_view` is ignored.
Both fields support a small HTML subset in the message text. See the [Messages & Toasts reference](/docs/buttons/interface-button/interface-builder/reference/data-binding/messaging) for the allowed tags and link behaviour, and [HTTP Response Format → `message_view`](/docs/buttons/interface-button/interface-builder/reference/data-binding/http-response-format#message_view) for all rules.
## Responding with a Redirect
If the data source should divert the user to another view instead of rendering, return a redirect:
```json
{
"oneclick_data": {
"redirect_view": {
"id": "target-view-id",
"params": { "deal_id": "123" }
}
}
}
```
The view shows a "Redirecting..." toast and navigates to the target view. If the target ID does not exist, the view falls back to a full-page message view with the message _"View with ID ... was not found"_.
See [HTTP Response Format](/docs/buttons/interface-button/interface-builder/reference/data-binding/http-response-format) for the full list of accepted shapes.