## Adding a Row
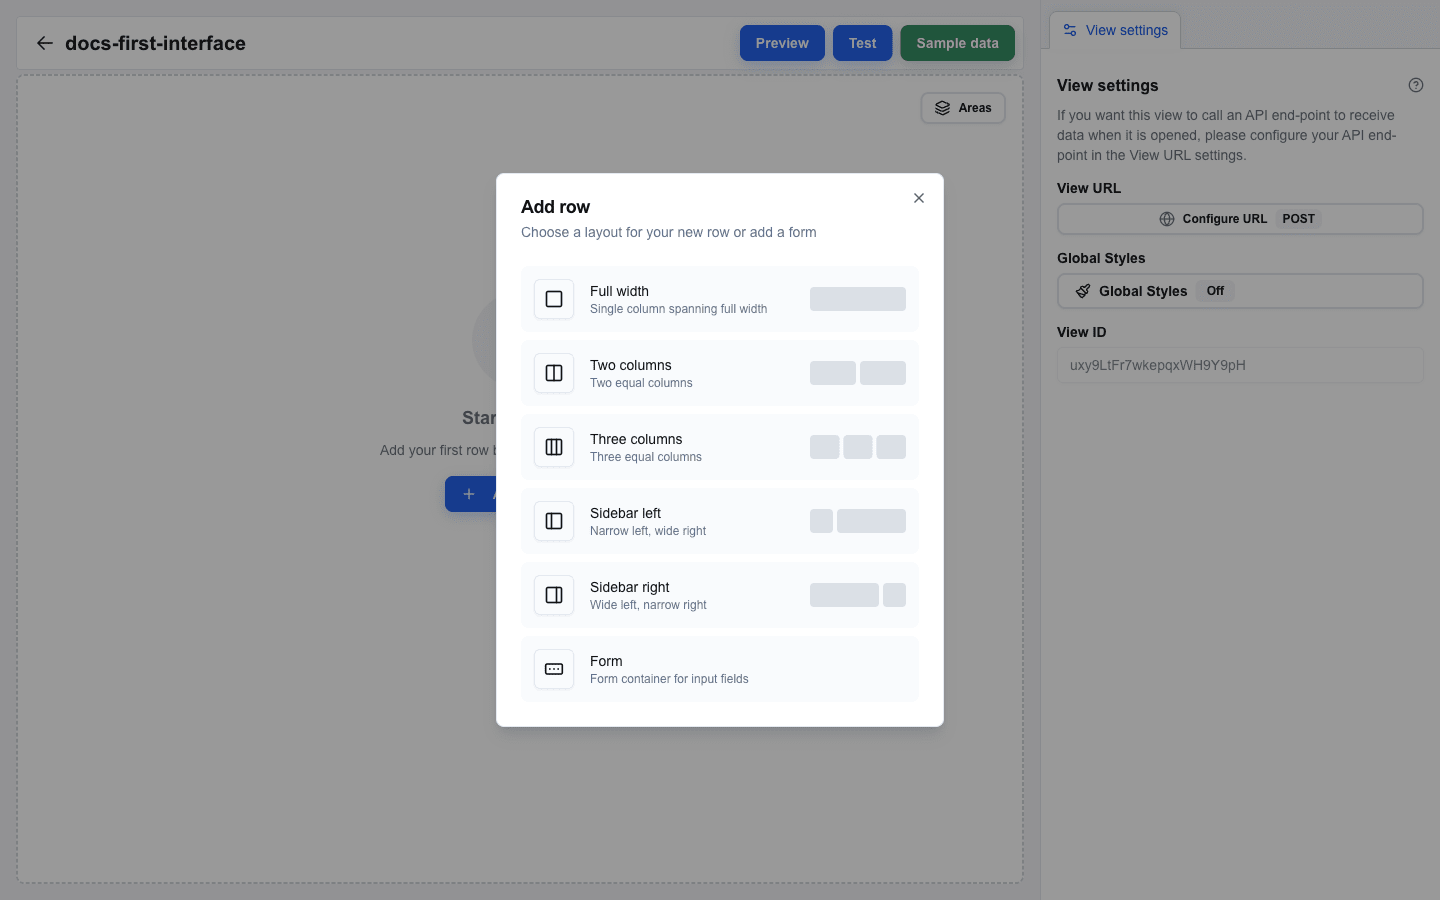
Hover the gap between two rows on the canvas (or above the first row) — a small `+` button appears. Click it to open the **Add row** dialog and pick a layout:
| Layout | Description |
|---|---|
| **Full width** | Single column at 100% width |
| **Two columns** | Two equal columns, 50% each |
| **Three columns** | Three equal columns, 33% each |
| **Sidebar left** | 25% on the left, 75% on the right |
| **Sidebar right** | 75% on the left, 25% on the right |
| **Form** | Adds a Form Start + Form End marker pair (hidden when you are already inside a form) |
 If you need a row with more than three equal columns, start with one of the layouts above and use **Add column** (see [Adding More Columns to a Row](#adding-more-columns-to-a-row) below).
## Reordering Rows
Drag a row up or down on the canvas to reorder it. Areas and form boundaries adjust automatically as the rows move.
## Opening Column Settings
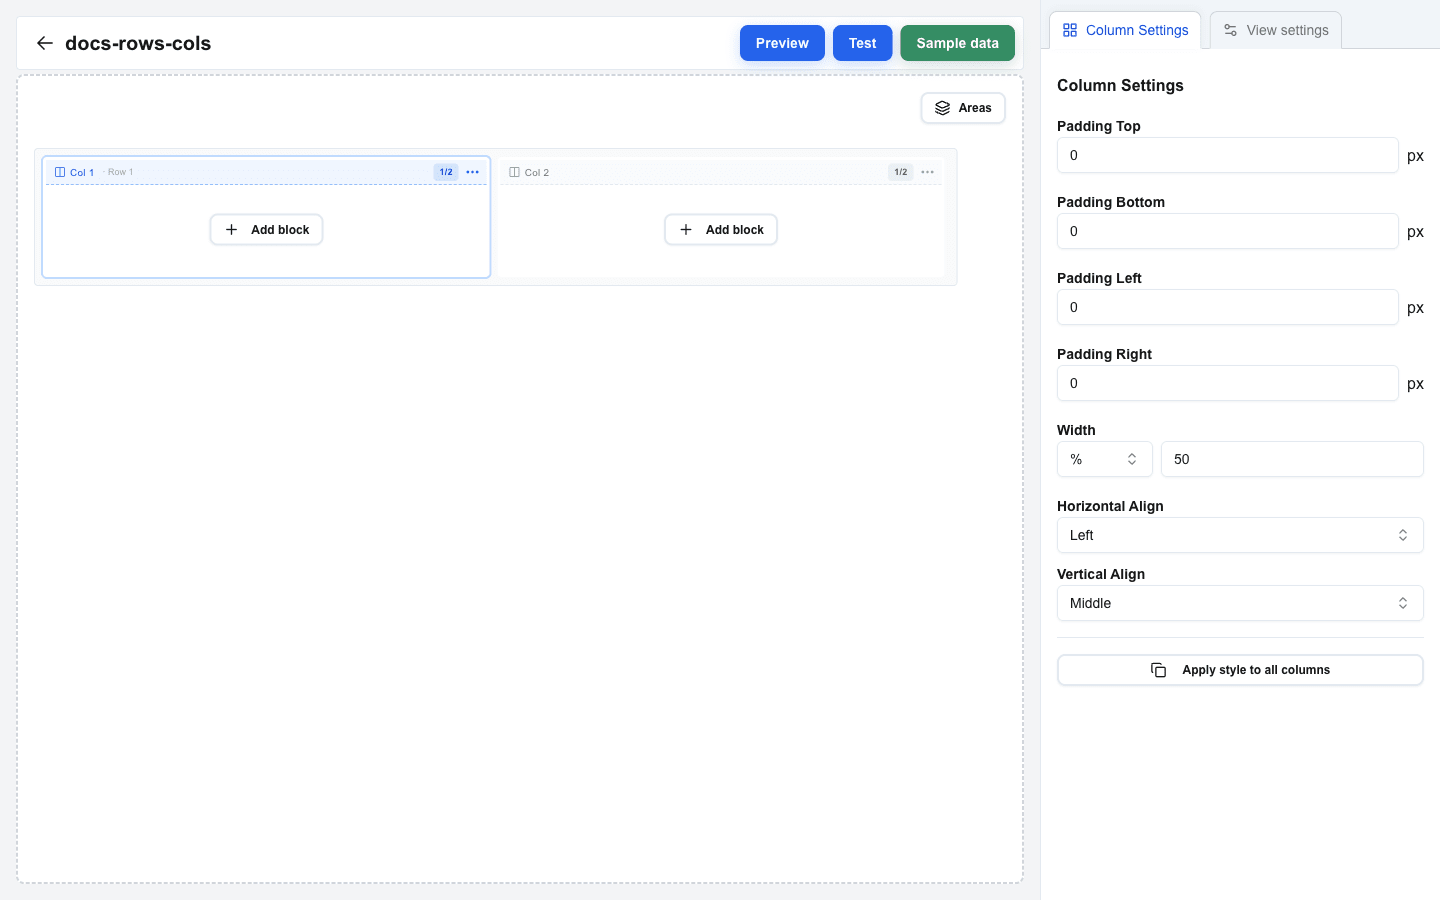
Each column has a small indicator bar above it that shows the column number and width. Click the indicator bar to select the column and open **Column Settings** in the right sidebar. You can also open the column's **"…" menu** on the right side of the indicator bar and pick **Settings**.
## Column Width
In **Column Settings**, the **Width** control has three modes:
1. **Auto** — the column sizes itself automatically.
2. **%** — a percentage of the row's width (1 to 100).
3. **px** — a fixed width in pixels (minimum 10).
Pick the mode from the Width dropdown, then type in the value.
## Column Padding
Every column has its own inner padding, set from Column Settings:
- **Padding Top** (px)
- **Padding Bottom** (px)
- **Padding Left** (px)
- **Padding Right** (px)
 ## Column Alignment
Two dropdowns in Column Settings control where inside the column its block sits:
- **Horizontal Align** — **Left**, **Center**, or **Right**.
- **Vertical Align** — **Top**, **Middle**, or **Bottom**.
When the row has multiple columns, click **Apply style to all columns** at the bottom of Column Settings to copy this column's padding, width, and alignment onto the other columns in the row.
## Adding More Columns to a Row
Two ways to add a column to an existing row:
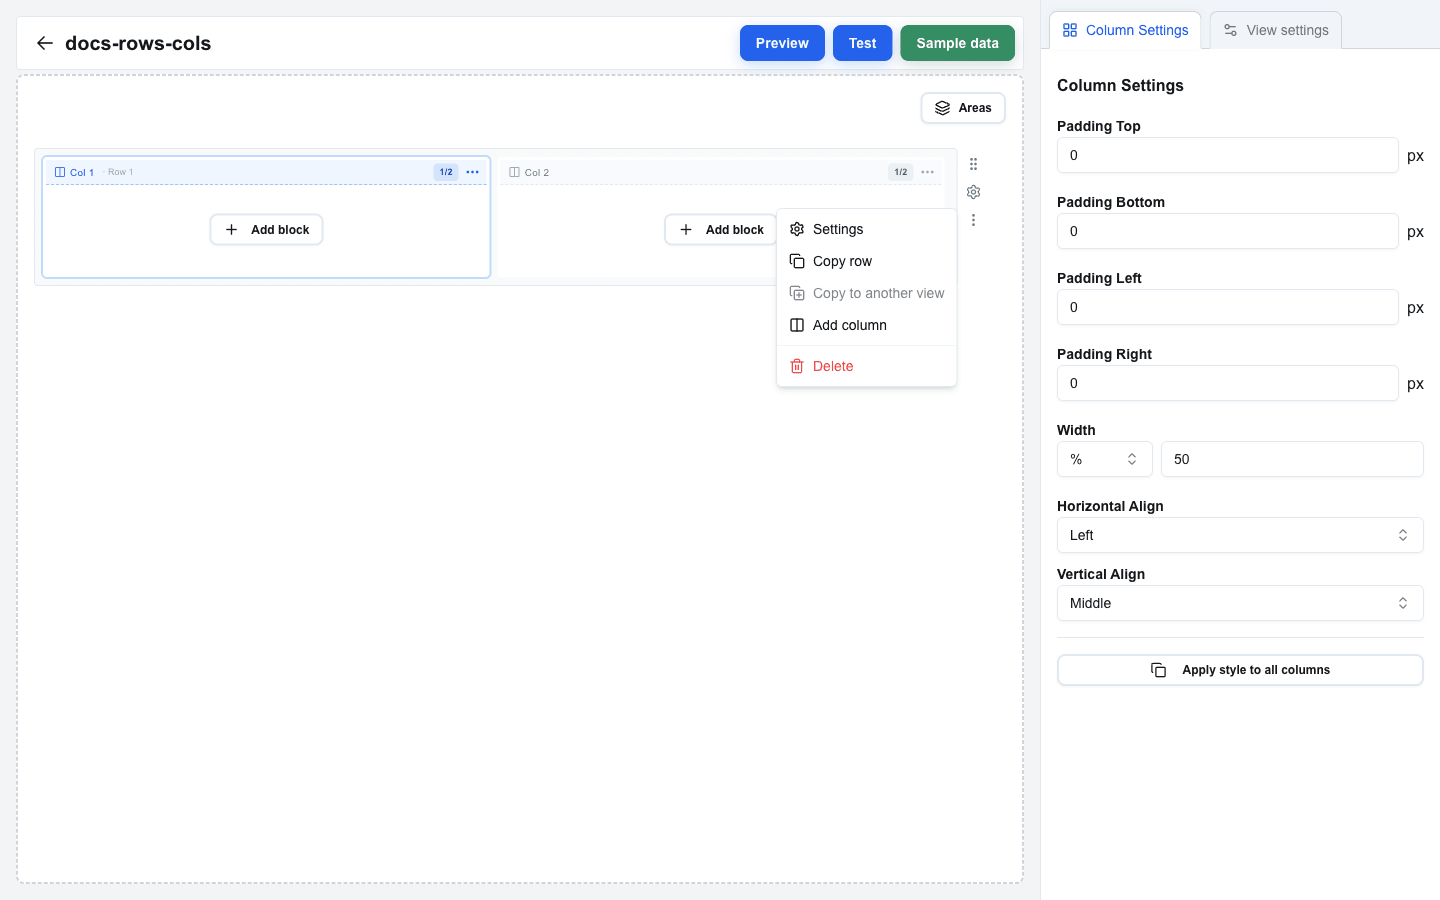
- **From the row's "…" menu** — open the row's dropdown menu (the three-dot button on the row label) and pick **Add column**. A new column is appended to the row.
- **From a column's "…" menu** — open a column indicator bar's dropdown menu and pick **Add column left** or **Add column right** to insert the new column relative to the selected one.
Existing columns keep their widths; the new column is added at Auto width, which you can adjust from its Column Settings.
 ## Row Padding
Rows have their own padding too. Open the row's **"…" menu** (the three-dot button on the row label) and choose **Settings** to open **Row Settings**. You can also click the row label directly. The four **Padding Top / Bottom / Left / Right** fields apply around all columns in the row.
## Moving Blocks Between Columns
Drag a block from one column onto another column to move it. The original column becomes empty and the destination column shows the moved block.