## Action Button
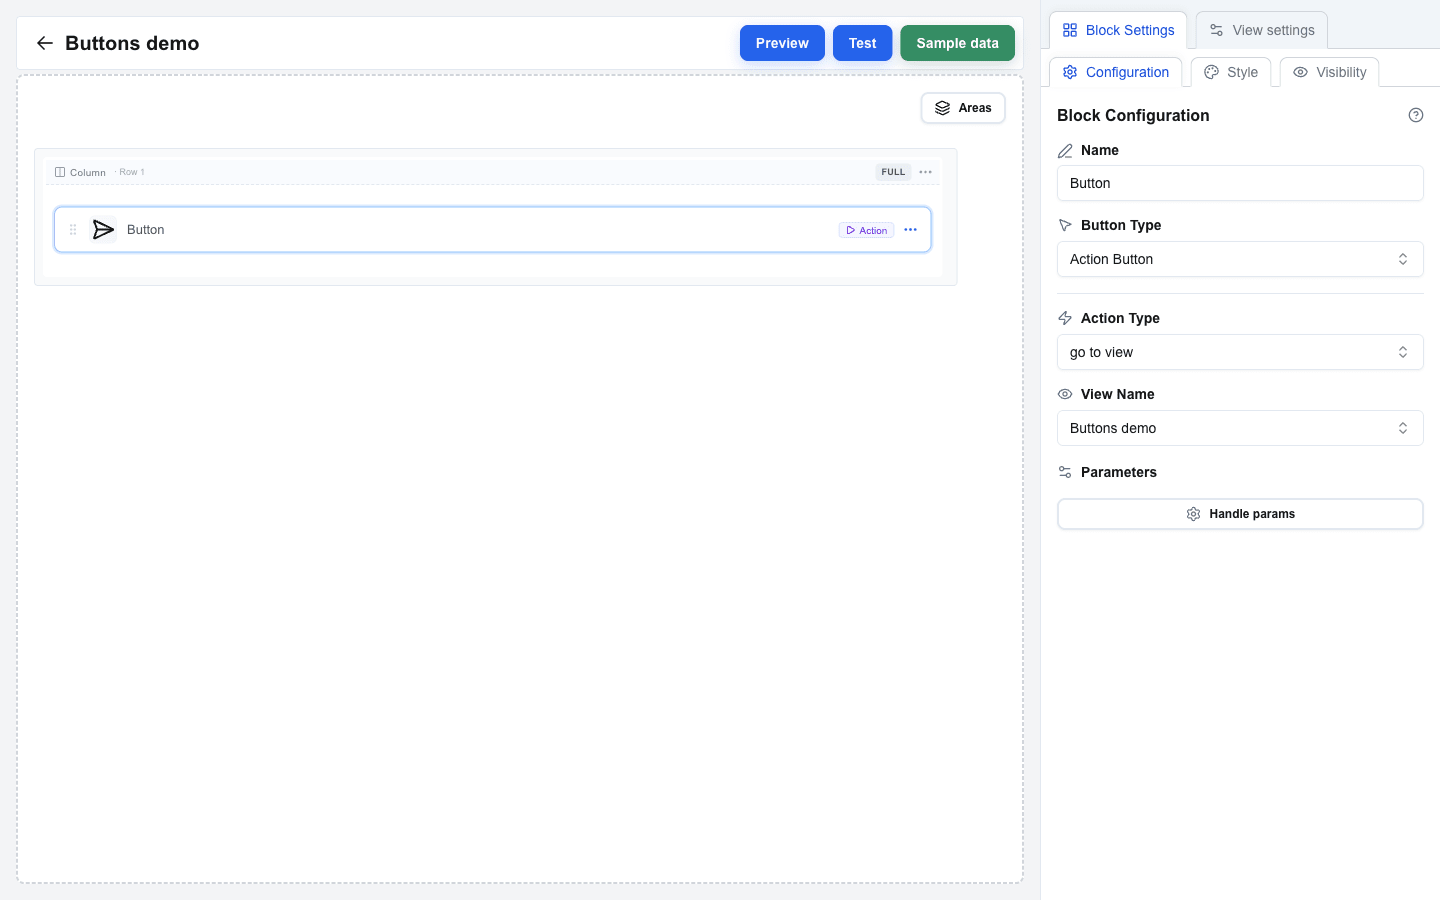
The Action Button is the primary way to navigate between views.
1. Add a **Button** block to your view.
2. Set **Button Type** to **Action Button**.
3. Choose an **Action Type**:
- **go to view** -- navigates to a selected view. A **View Name** dropdown lists every view in the interface.
- **back** -- returns to the previous view.
4. Optionally click **Handle params** under **Parameters** to add key/value pairs that get forwarded to the target view. Values support the Data Picker.
 ## Navbar Links
The **Navbar** block supports interface-type links for view navigation:
1. Add a **Navbar** block to your view.
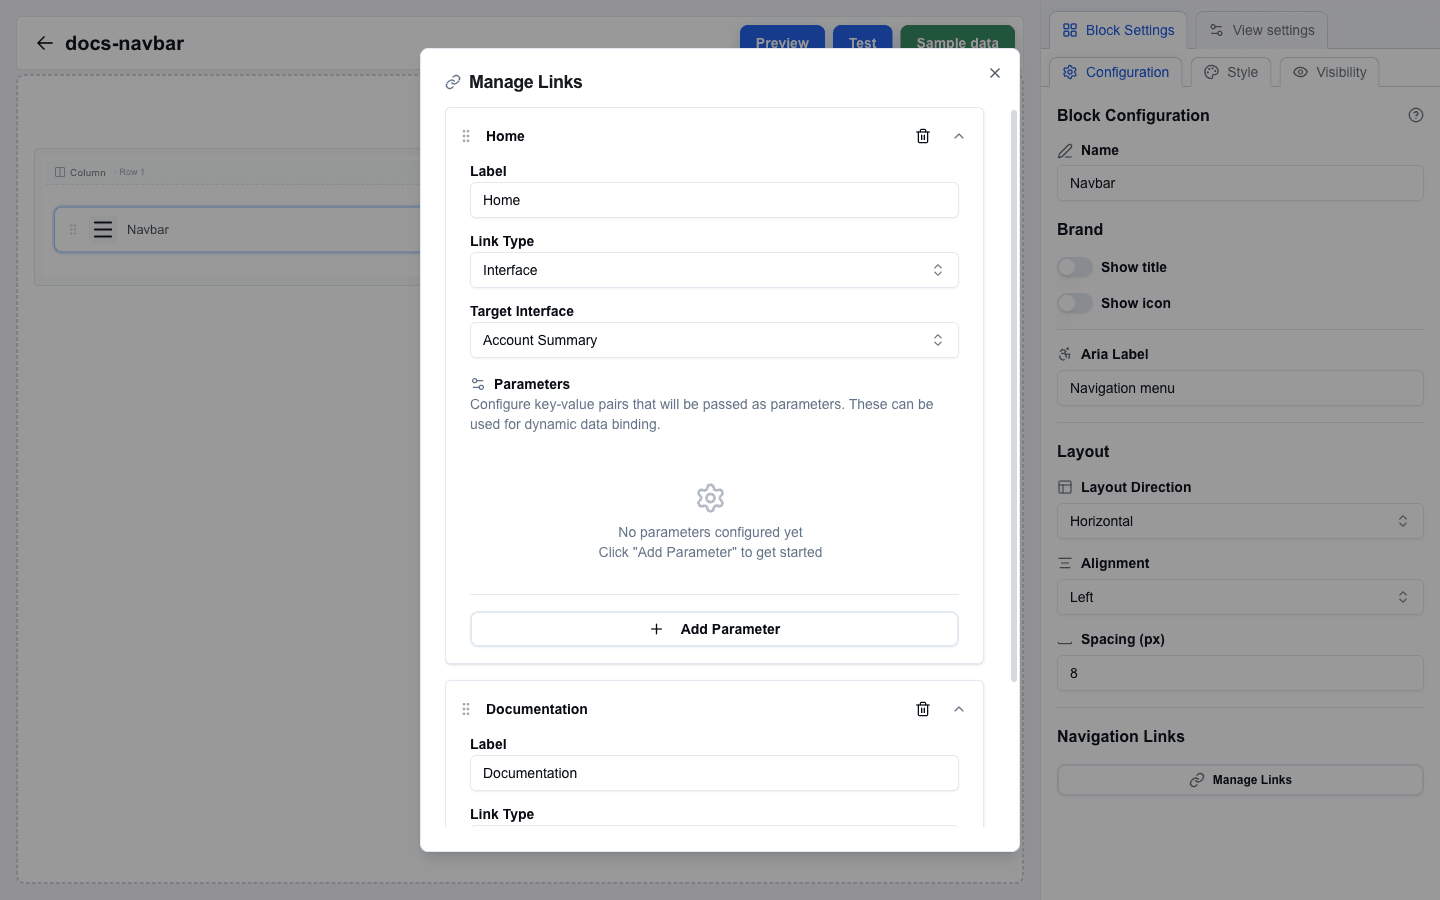
2. Click **Manage Links** in Block Settings to open the link manager dialog.
3. Click **Add** and configure the new link:
- **Label** -- the clickable text shown on the navbar.
- **Link Type** -- pick **Interface** for in-interface navigation (or **External URL** for an outside link).
- **Target Interface** -- the destination view dropdown. Shown when **Link Type** is **Interface**.
- **Parameters** -- key/value pairs passed to the target view. Click **Add Parameter** to add rows.
 ## Table Actions
Table blocks can include row action columns that navigate to views. Configure a column as an action column, add an action with **Action Type = Go to view**, pick a **View Name**, and optionally add **Params** -- the action will navigate to the chosen view with those params, alongside the row's data, when a user clicks the icon.
## Form After Submit
When a form is submitted, you can navigate to a different view:
1. Set the submit button's **After submission** to **Select view**.
2. Pick the target view from the **View ID** dropdown.
3. Optionally add **Parameters** -- key/value pairs passed alongside the navigation.
4. Turn on **Use input values as search params** to automatically forward every form field value as a URL search parameter on the navigation.
Alternatively, set **Form Type** to **Open view with form data** to skip the HTTP submission entirely. The submit button hides its Submit URL and After submission settings, forwards every form input value as a search parameter to the chosen view, and navigates immediately when the user clicks submit.
## Passing Parameters
All navigation methods support passing parameters:
- **Action Button** -- click **Handle params** under **Parameters** and add key / value entries.
- **Table action column** -- each action has its own **Params** key / value editor.
- **Navbar links** -- each link has its own **Parameters** section inside the Manage Links dialog.
- **Form Submit Button** (After submission = **Select view**) -- use **Parameters** for explicit pairs and / or **Use input values as search params** to forward every form field.
The target view receives these as URL search parameters, accessible from the Data Picker's `searchparams` tab (icon-only) and compiled to `{{searchparams.key}}` placeholders at render time.