## Opening the Application
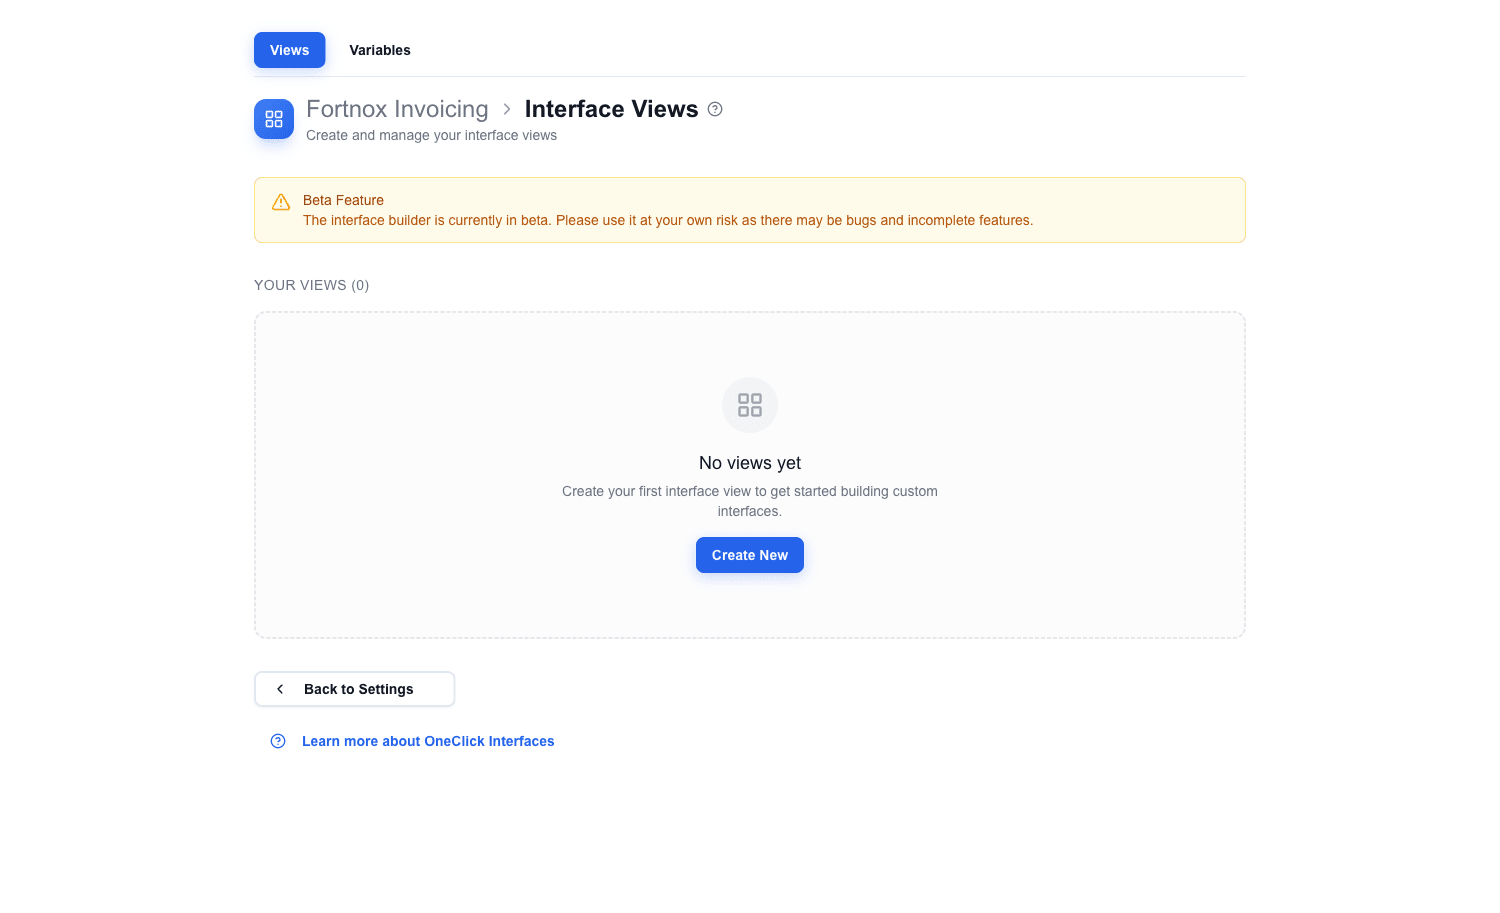
Interface Builder is accessed from Pipedrive via a OneClick button. When the app loads, you land on the **Interface Selection Page**, which lists all views belonging to this button. You will see two tabs at the top: **Views** and **Variables**.
 ## Creating a New Interface
1. On the Interface Selection Page, click the **Create New** button next to the **Your Views** heading.
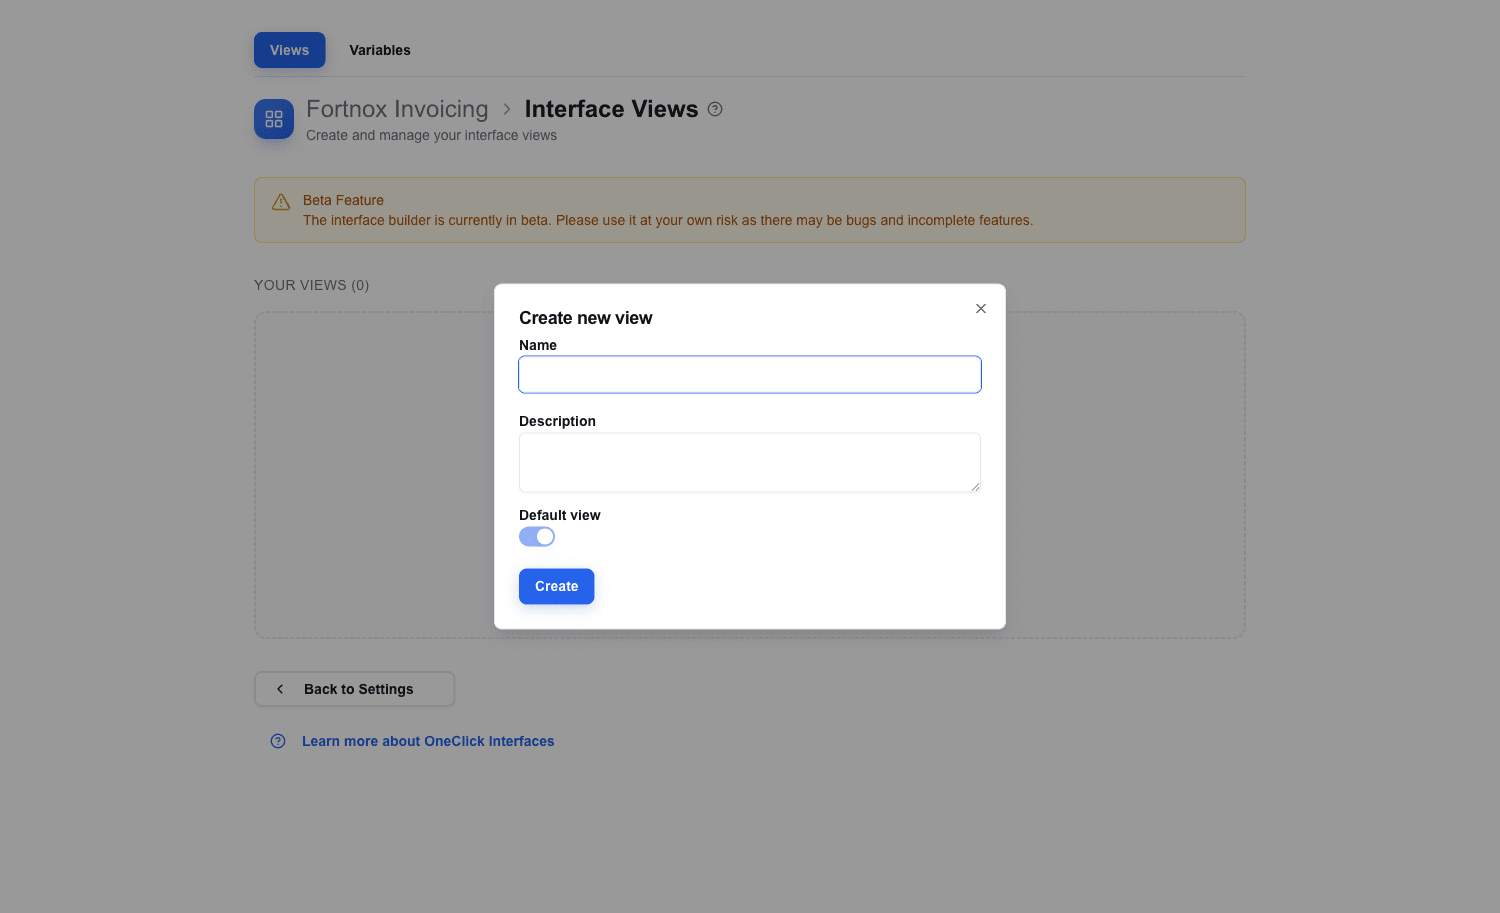
2. The **Create new view** dialog opens.
3. Enter a descriptive **Name** — this name is how you will reference it later when setting up navigation between views. The optional **Description** and **Default view** toggle can be left at their defaults.
4. Click **Create**. The new view opens in the Builder.
 ## Understanding the Builder
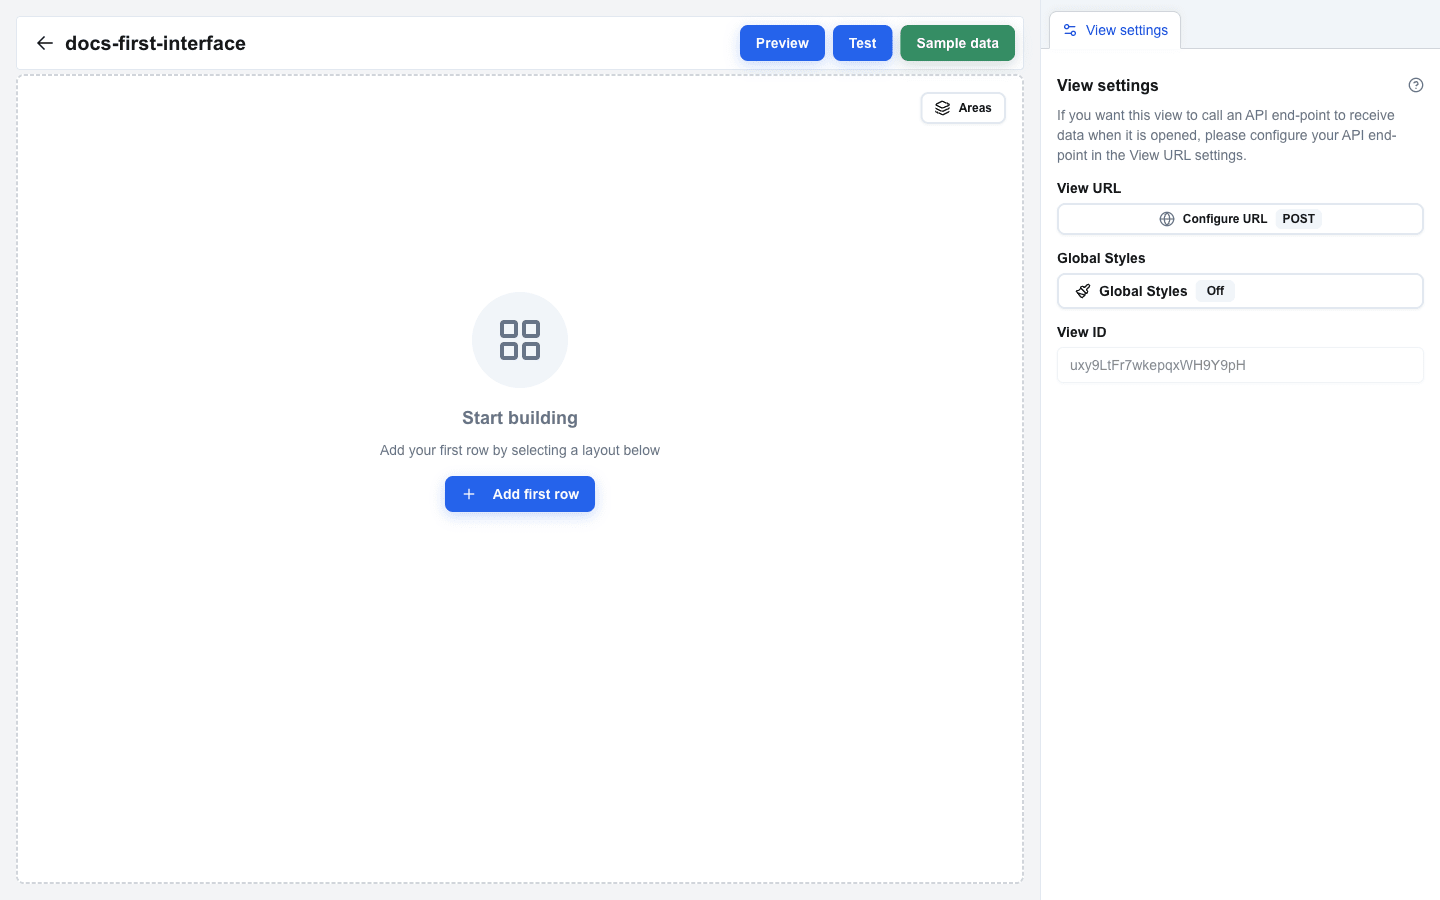
When you open a view, the Builder loads with three main areas:
- **Canvas** (left side) — the main working area where you build your interface by arranging rows and blocks.
- **Sidebar** (right side) — shows configuration options for whatever is selected. It has two main tabs at the top: the current selection tab (Block Settings, Row Settings, etc.) and **View settings**.
- **Top Bar** — a navigation bar at the top of the canvas with the interface name, a back arrow to return to the view list, and three buttons on the right: **Preview**, **Test**, and **Sample data**.
The top bar also shows a **Saving...** spinner indicator whenever your changes are being auto-saved.
 ## Adding a Row
Before you can place any content blocks, you need a row. Rows define the column layout of your interface.
1. On an empty canvas, click the **Add first row** button. On a non-empty canvas, hover the gap between two rows and click the `+` button that appears.
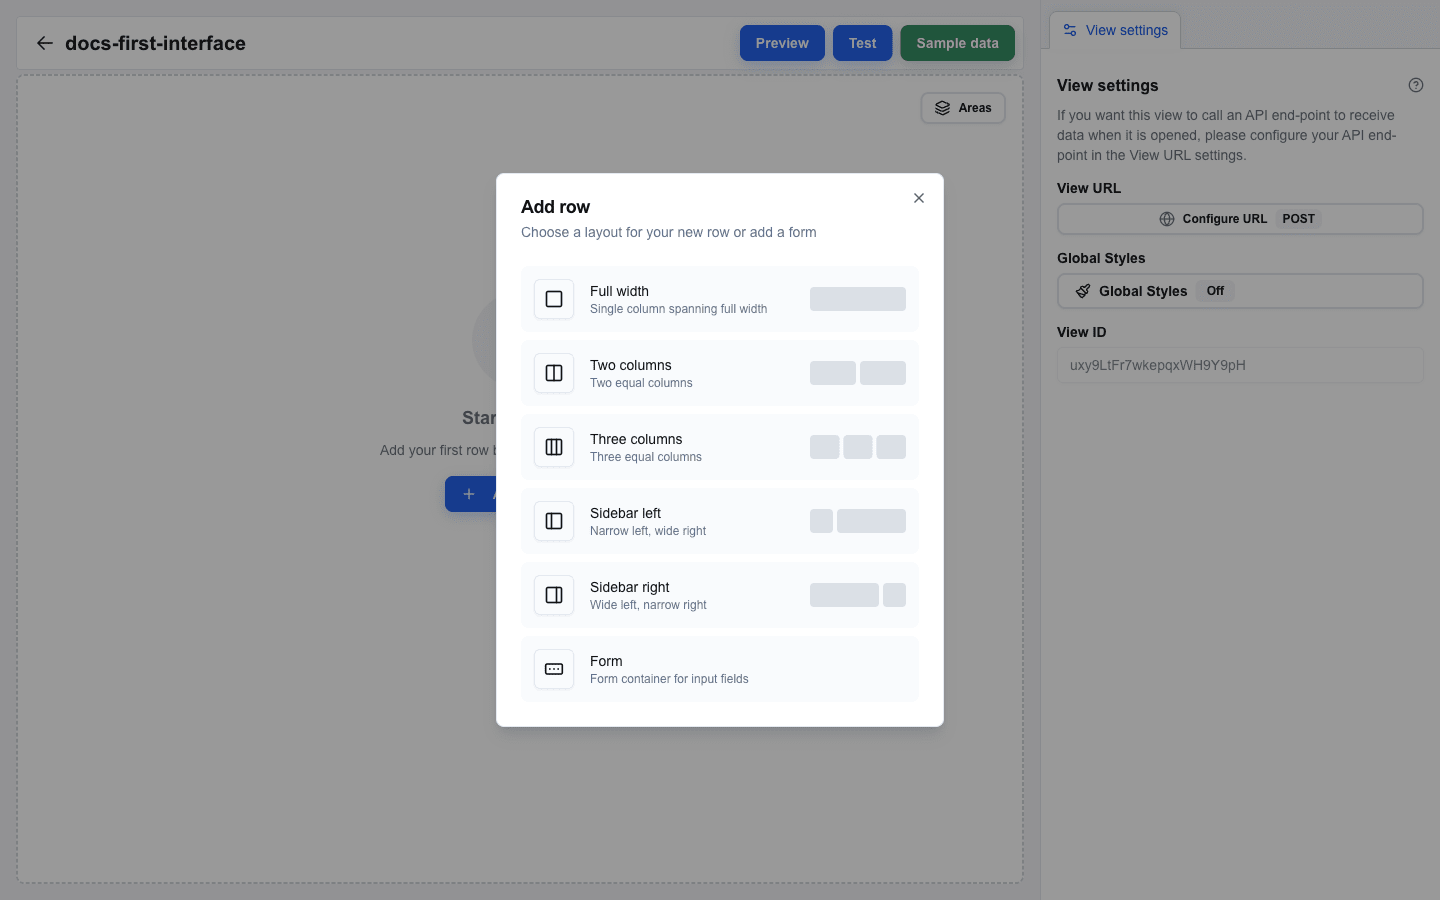
2. The **Add row** dialog opens.
3. Pick a layout:
- **Full width** — a single column at 100% width
- **Two columns** — two equal 50/50 columns
- **Three columns** — three equal 33/33/33 columns
- **Sidebar left** — 25/75 split
- **Sidebar right** — 75/25 split
- **Form** — adds a Form Start + Form End marker pair (covered in [Building a Form](/docs/buttons/interface-button/interface-builder/tutorials/03-building-a-form))
4. The dialog closes and the new row appears on the canvas as an empty container with a grey column placeholder.
 ## Adding a Title Block
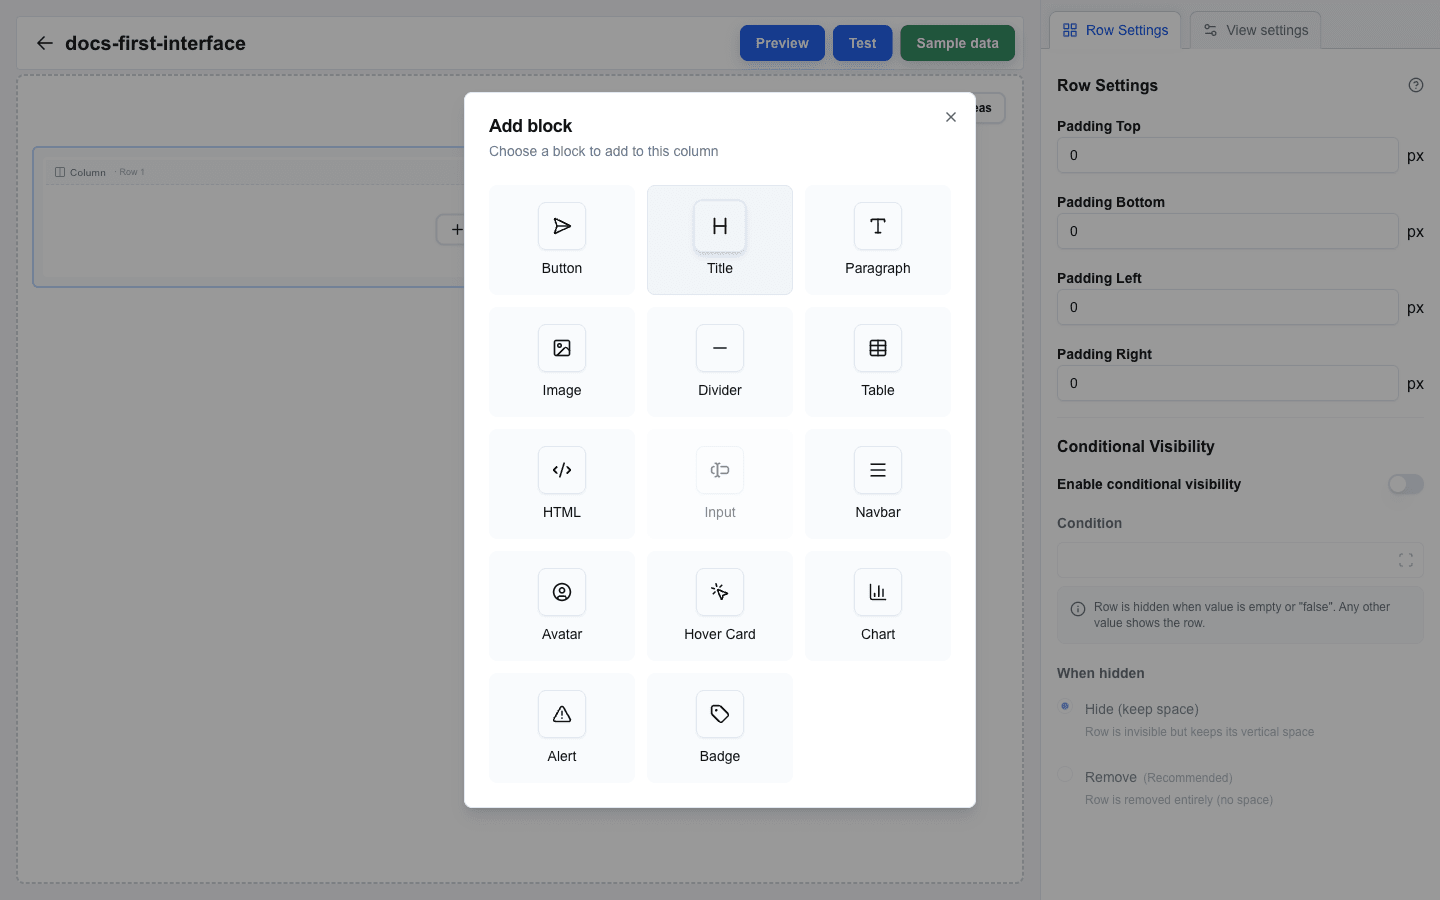
1. Click an empty column inside the row you just created. The **Add block** dialog opens.
2. Pick **Title** from the list.
3. The block appears on the canvas with an empty text value.
 ## Editing Block Content
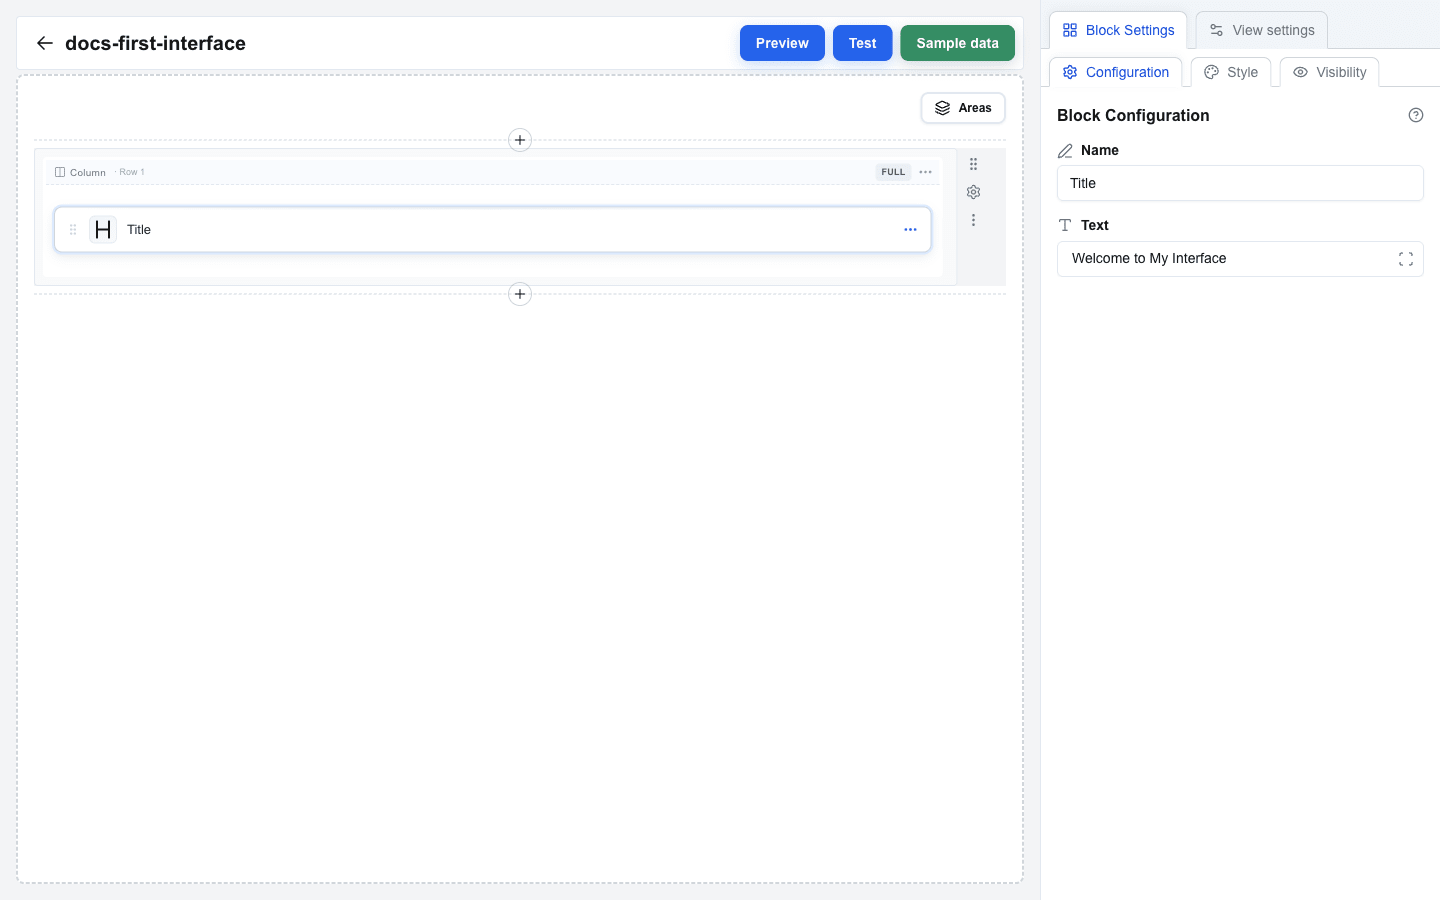
1. Click on the Title block in the canvas to select it.
2. The sidebar switches to the **Block Settings** tab.
3. You will see a **Text** field. This is a Data-Picker-enabled input that supports both static text and dynamic data placeholders.
4. Type your title text, for example: `Welcome to My Interface`.
5. The canvas updates in real-time to reflect your changes.
 ## Adding a Paragraph Block
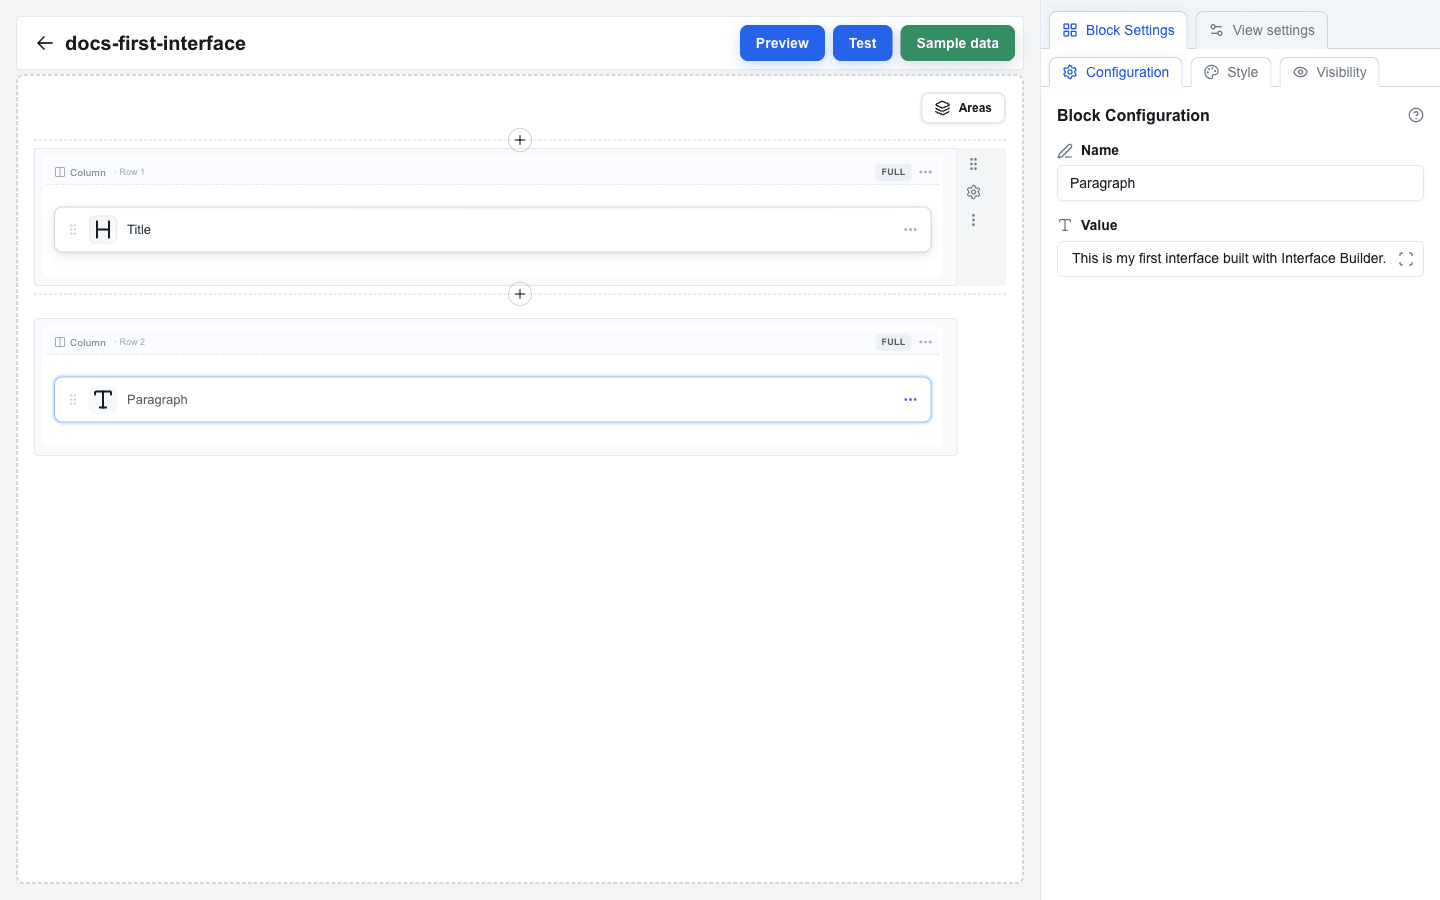
1. Add another row using the `+` button (or use a multi-column row from before).
2. Click an empty column to open **Add block** and pick **Paragraph**.
3. Click the new Paragraph block to select it.
4. In the **Block Settings** tab you will see a **Value** field — the same Data-Picker-enabled input as the Title block's **Text** field.
5. Type your paragraph text, for example: `This is my first interface built with Interface Builder.`
 ## Previewing Your Interface
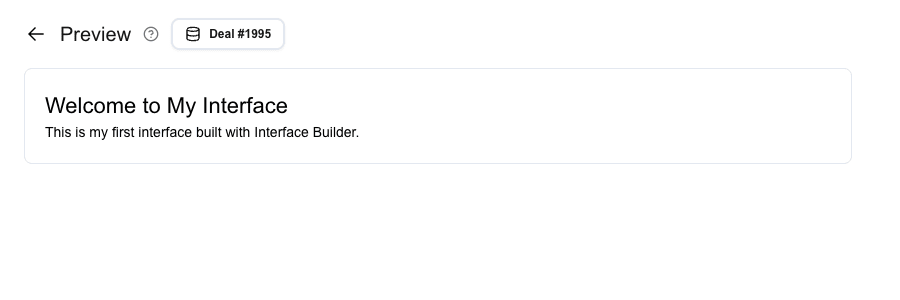
1. Click the **Preview** button in the top bar.
2. The view switches from the Builder to Preview mode.
3. In Preview mode, you see your interface rendered as it will appear to end users. Click the **Pipedrive resource** button at the top to pick a specific deal, person, or organization to test with.
4. To return to the Builder, click the back arrow at the top-left of the Preview screen.
 ## Saving
Your work is saved automatically. After a brief pause in editing, the Builder saves your latest changes to the server. You will see a **Saving...** indicator with a spinner in the top bar while the save is in progress.
There is no manual save button — just keep building and your changes are persisted.
## Summary
In this tutorial you learned to:
- Open Interface Builder from the Interface Selection Page
- Create a new view via the **Create New** button and the **Create new view** dialog
- Understand the Builder layout: canvas, sidebar, and top bar
- Add rows from the **Add row** dialog and pick column layouts
- Add Title and Paragraph blocks from the **Add block** dialog
- Edit block content via the sidebar
- Preview your interface
- Rely on auto-save for persisting your work