Using data fields with Make
A Make scenario blueprint for the outcome of this example can be downloaded here
Introduction
In this example we're going to add data fields to a OneClick button and utilize them in a ready made Make scenario which catches the button click with a Webhook and creates a note on the deal from which it was triggered from. We'll use the data fields values in the note to showcase how to obtain and use them in Make.
The data fields feature is very useful to make sure users review the data before they trigger a button, and also ensures the necessary data is available when your scenario starts. It also lessens the need to fetch Pipedrive data separately in your scenarios. Read all the details about data fields in this article.
Add data fields to a button
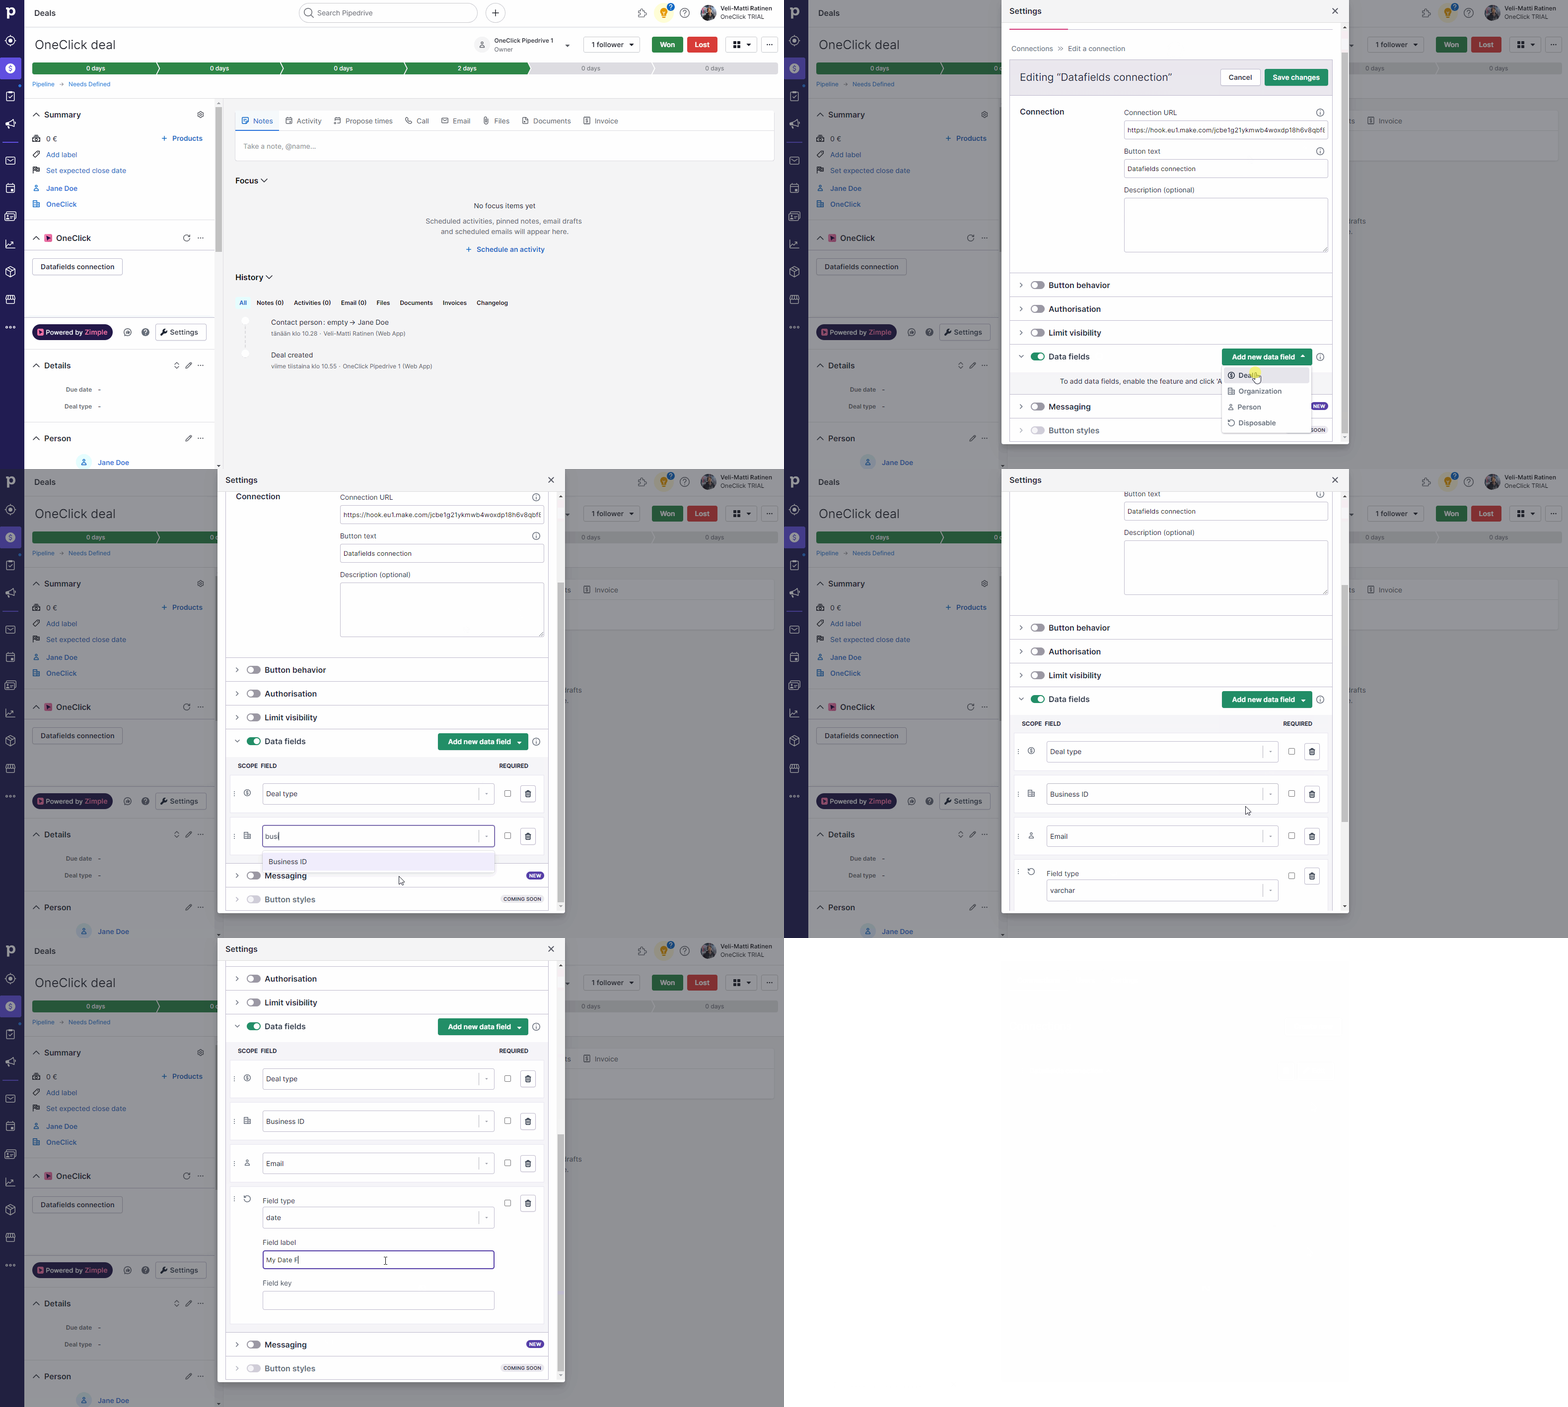
First let's add some data fields to our existing button. Edit your button and enable the Data fields feature toggle. Add your fields of choice by clicking on Add new data field and first choose the field type. Then browse for the correct field in the dropdown menu. In this case there's two custom fields, and the first one (deal field, "Deal type") is a single option field.
Let's also add a disposable data field, in this case a date field. As you can see the field key will be automatically generated once you click outside the selection.
Save your button.
"Run once" your scenario
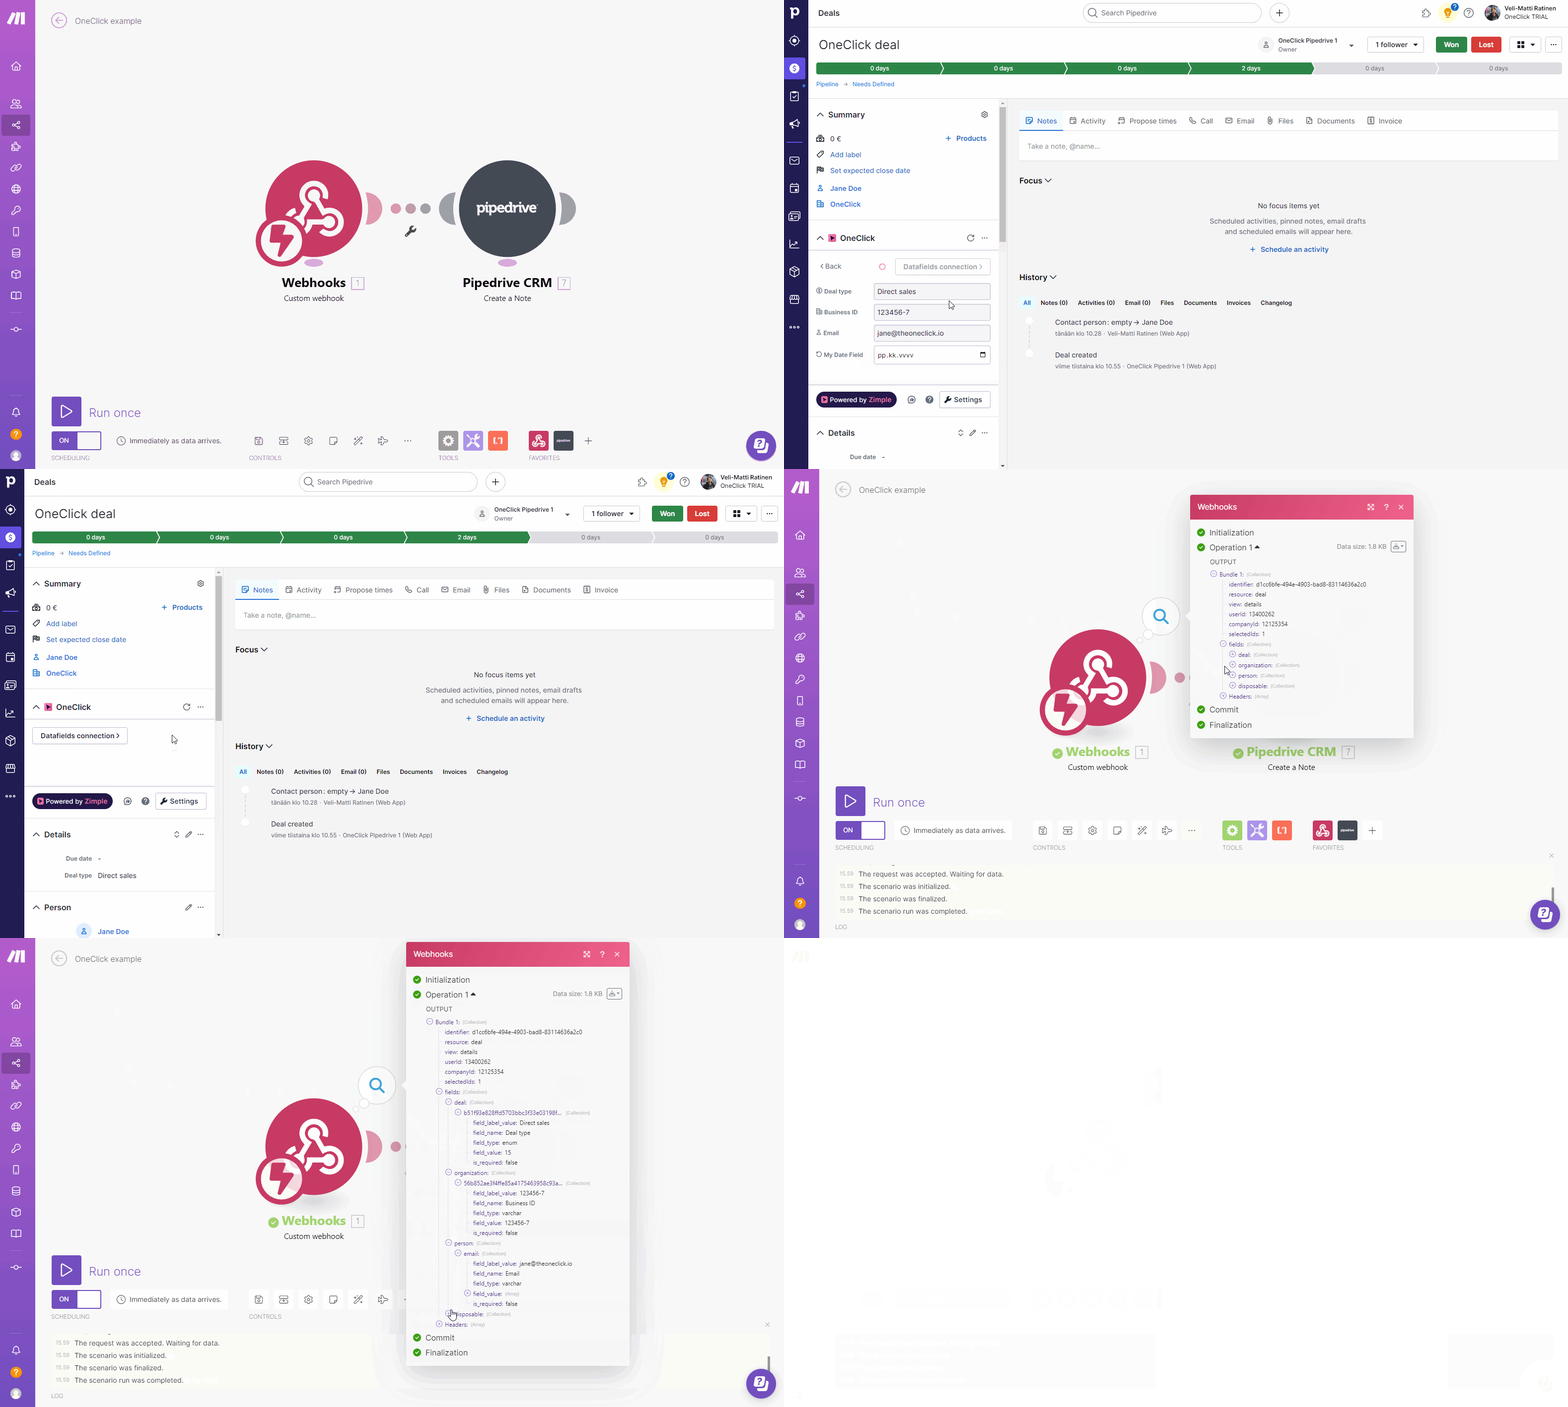
Head back to Make and select Run once to listen for scenario triggers. Go and click your button and observe the results. You should see plenty of things under the fields collection which has previously been empty. Each of the field object types are their own collections, under which you'll find arrays of fields and values.
The field keys are explained here in more detail.
Sometimes it may take some fiddling around to get updated attributes to show up in your scenario. You can also try to redetermine the data structure of your Webhook if the fields collection seems empty. Read more here
Utilize the data
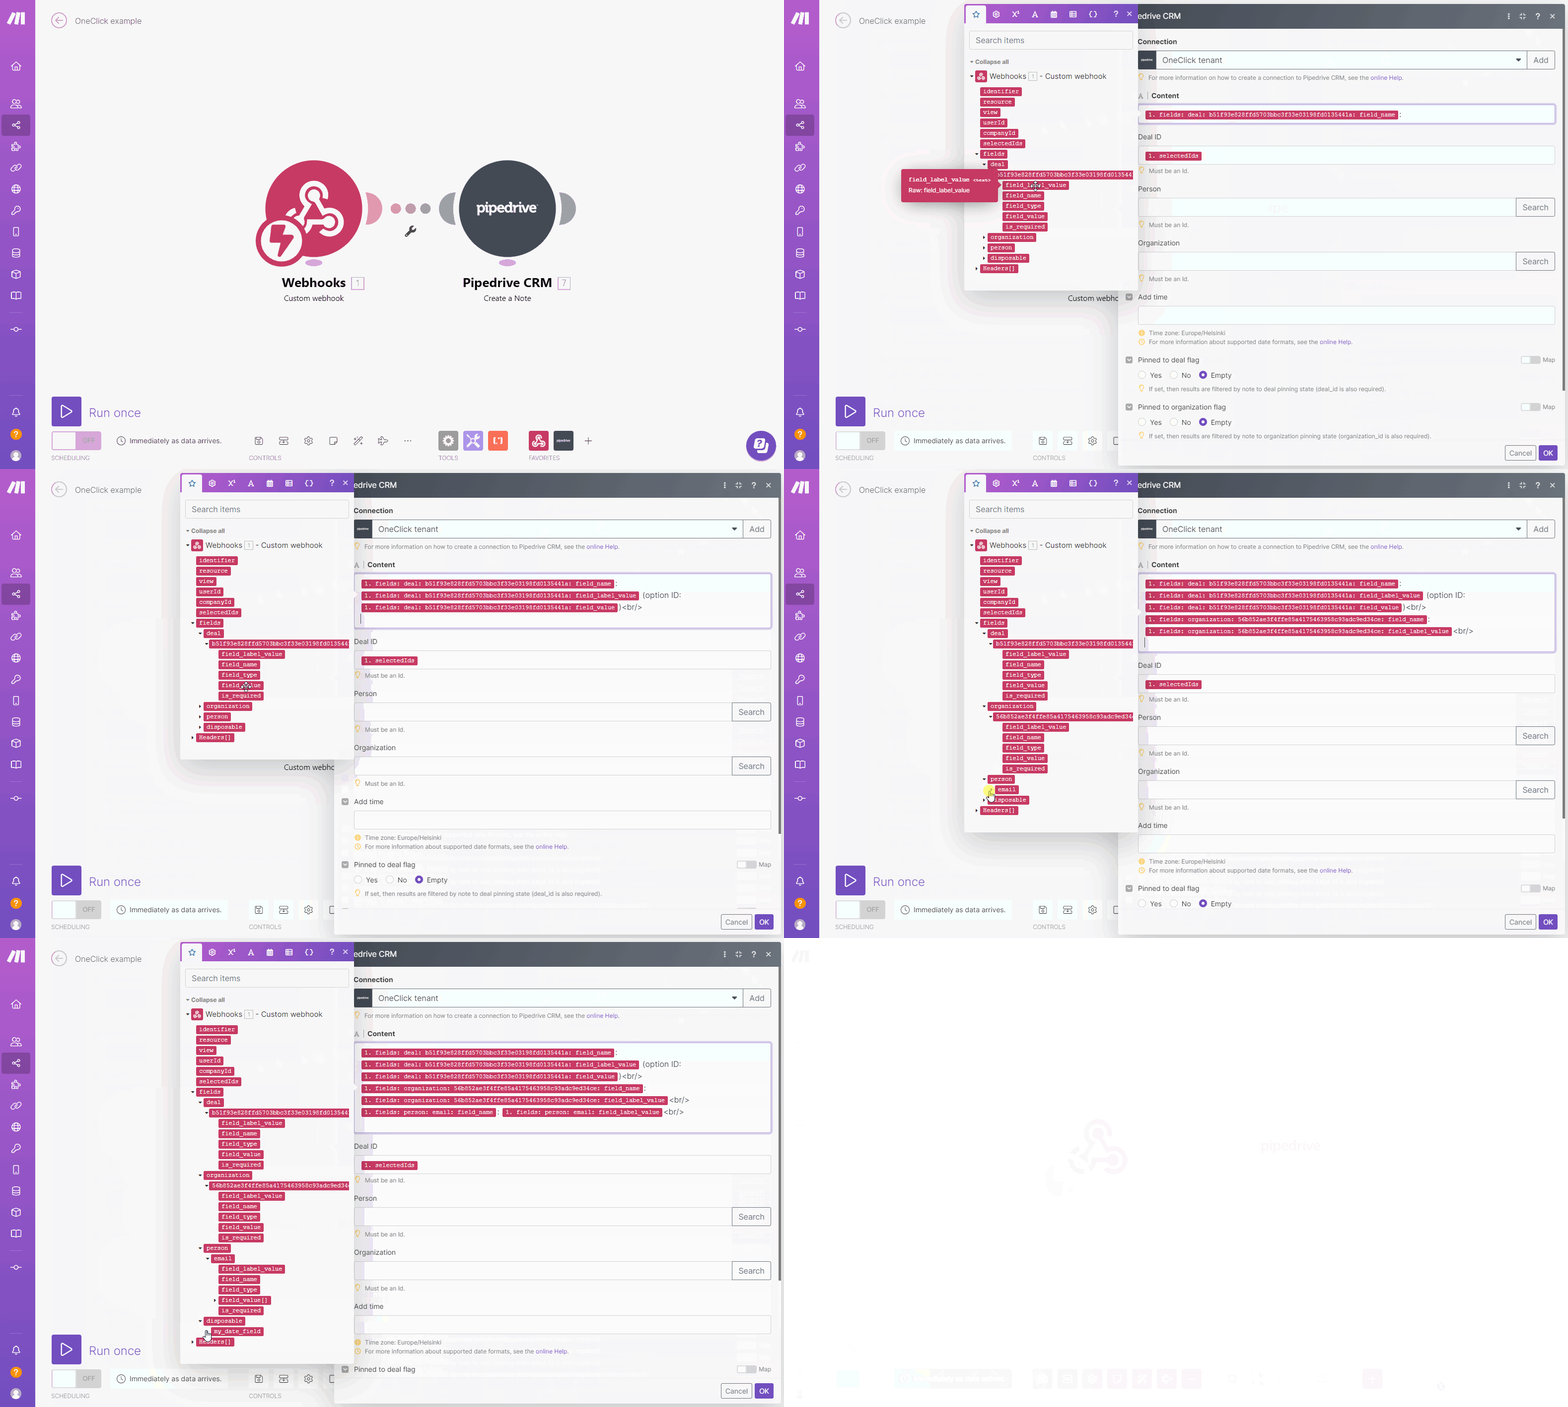
Next let's edit our Pipedrive note. Add the the field_name field_name and and field_label_value variables to see the results. As mentioned earlier, the "Deal type" custom field is a single option field, so let's also add the the field_value to get the selected option ID in the note. As a remainder, usually the label value and value are the same, but single and multiple options fields for example hold the selected option ID in the value attribute and selected option text in the value attribute.
Remember to save your scenario!
Test your scenario
Time to see the results! If all went well you should see a note with the field names and values. Happy days!


