
How to migrate my buttons to Pipedrive API v2
Pipedrive API v2 offers better performance and reliability compared to v1, which is reflected generally as better performance of OneClick. Migrating your buttons to v2 is a manual process, as the v2 field data schema is partially different from v1. This document explains the steps and best practices for migrating you buttons from v1 to v2.
While there is no hard deadline at the time being for v2 migration, it is generally recommended to start to migrate your buttons as soon as possible. We will be sharing more information on the timeline as we get more detailed information from Pipedrive.
1. Make a copy of your button
To ensure seamless migration to v2, it is recommended to first make a copy of your button, hide it from others and then migrate the copied button to v2. Afterwards you can publish the new migrated button to others and hide/delete the old button.
Make a copy of your button in the button list view by clicking on the copy icon:
screenshot
Go and edit your button, and head to the Limit Visibility tab: (enable visibility with the toggle in the menu, if not previously enabled)
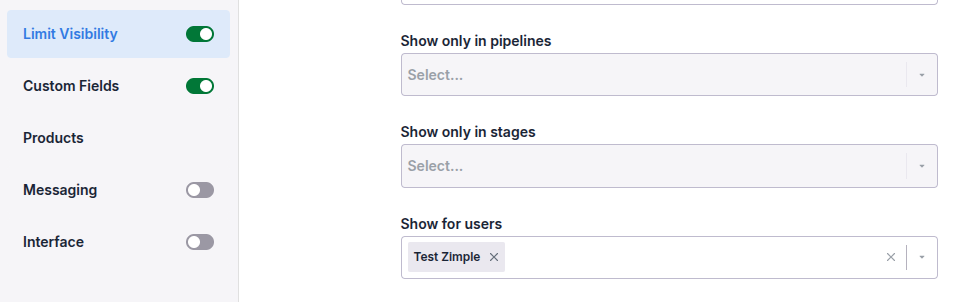
Select only yourself (or the users you want to) in the "Show for users" selection to hide the button from others. Remember to save for the visibility settings to be effetctive.
2. Switch to v2
To migrate your button to v2, switch the toggle in the "Button" section in your button settings:
screenshot
3. Check your data field mappings
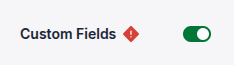
3.1 Workflow buttons
If there are any fields that need to be re-mapped, this is indicated with a red error icon in the menu on the Custom Fields tab:
If no errors are being indicated save your button and continue to the next step
If errors are being indicated head to the Custom Fields tab and locate the fields that have been marked with the same error icon:
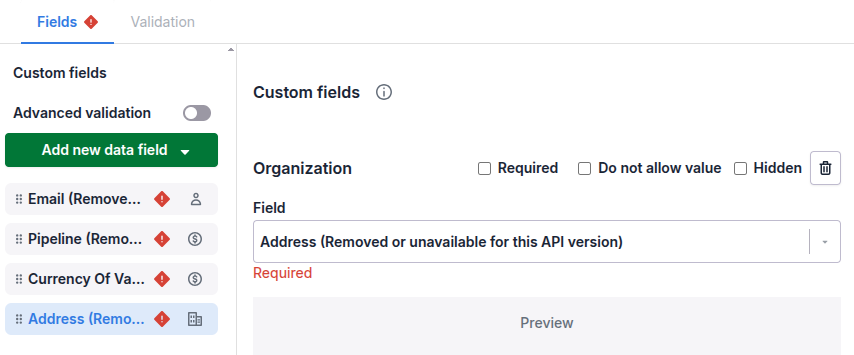
Select the field on the left sidea and re-map the field in the Field selection input. Repeat until all fields have been corrected. Remember to save your button.
Re-mapping the fields also affects Advanced validation. If you use Advanced validation rules please check your configuration and re-select the fields in the validation rules accordingly
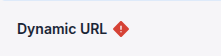
3.2 Link buttons
If any fields need to be re-mapped, this is indicated with a red error icon on the Dynamic URL tab:
If no errors are being indicated save your button and continue to the next step
If errors are being indicated head to the Dynamic URL tab and locate the fields that have been marked with the same error icon:
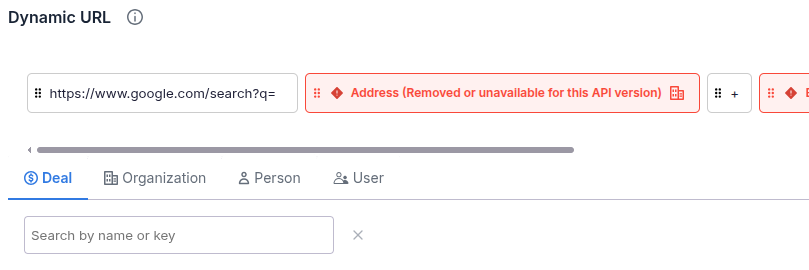
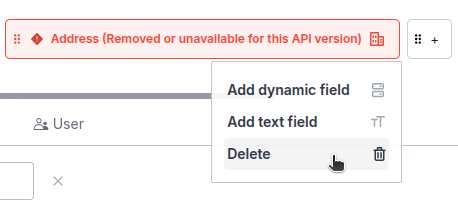
Select a field with an error from the dynamic URL blocks and delete the block:
Add a new block at the same position and select the re-mapped field in case from the field list:
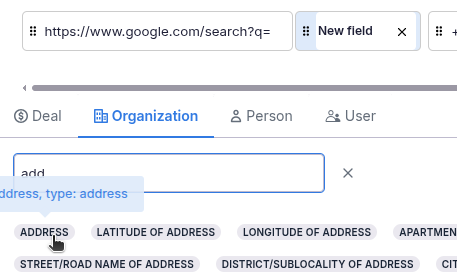
Repeat until all fields have been corrected. Remember to save your button.
4. Test with your back-end process
Now that your buttons has been migrated to v2, it should be tested with your existing back-end process.
The recommended procedure is to first capture the data received at your back-end with the original v1 button and then do the same with the v2 button. Compare the differences and adjust your process and logic accordingly.
If your received payload differs from the original: While we do not publish specific instructions for each platform separately (such as Make.com, Zapier, n8n etc.) it is generally recommended to make a copy of your process/workflow, adjust it according the new button payload and point your migrated button to this copied process/workflow. This allows you to have the original v1 button/process combination running until your new v2 button/process has been fully tested and proved to work.
5. Publish the migrated button
asd