Data fields
Don't forget to check out our Make and Zapier Data fields examples once you've read this article!
This feature is not available for Link buttons
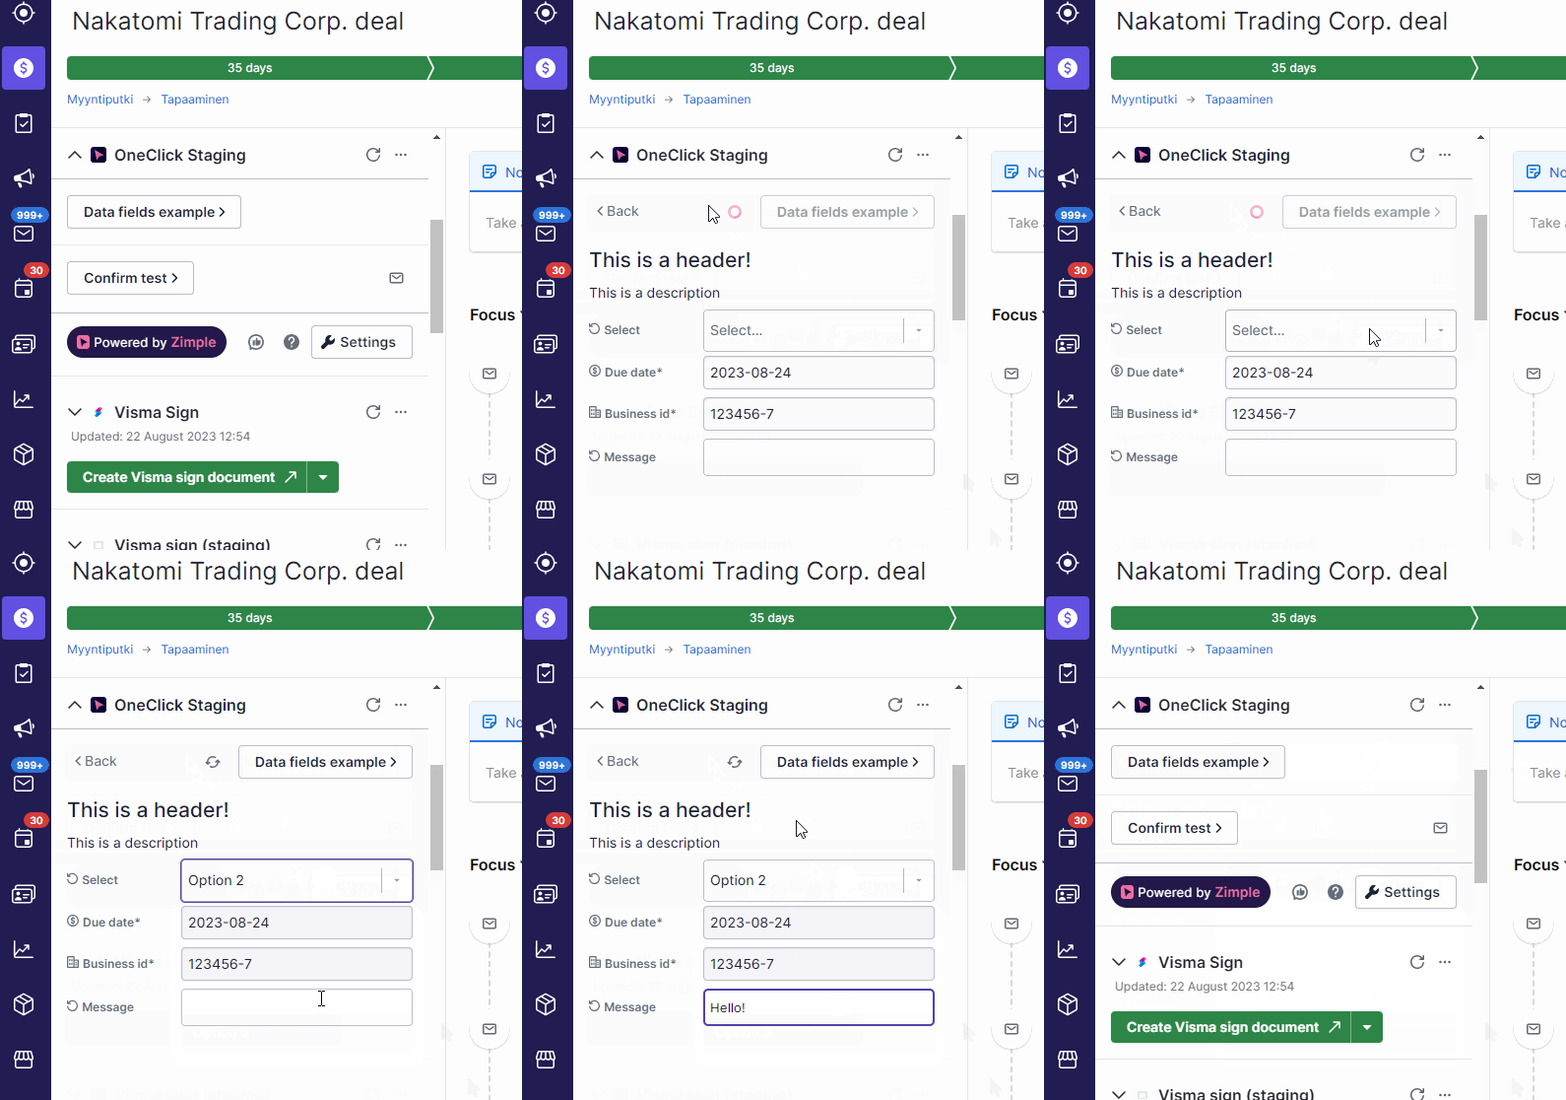
The Data fields features allows you to add Pipedrive's fields to your OneClick trigger data. On top of that it presents users the data fields that they are sending, and you can also make the fields required. When needed you can utilize so called "disposable" fields, that are OneClick specific one-time fields. You can also organize your button or give users instructions with additional UI elements.
Add fields
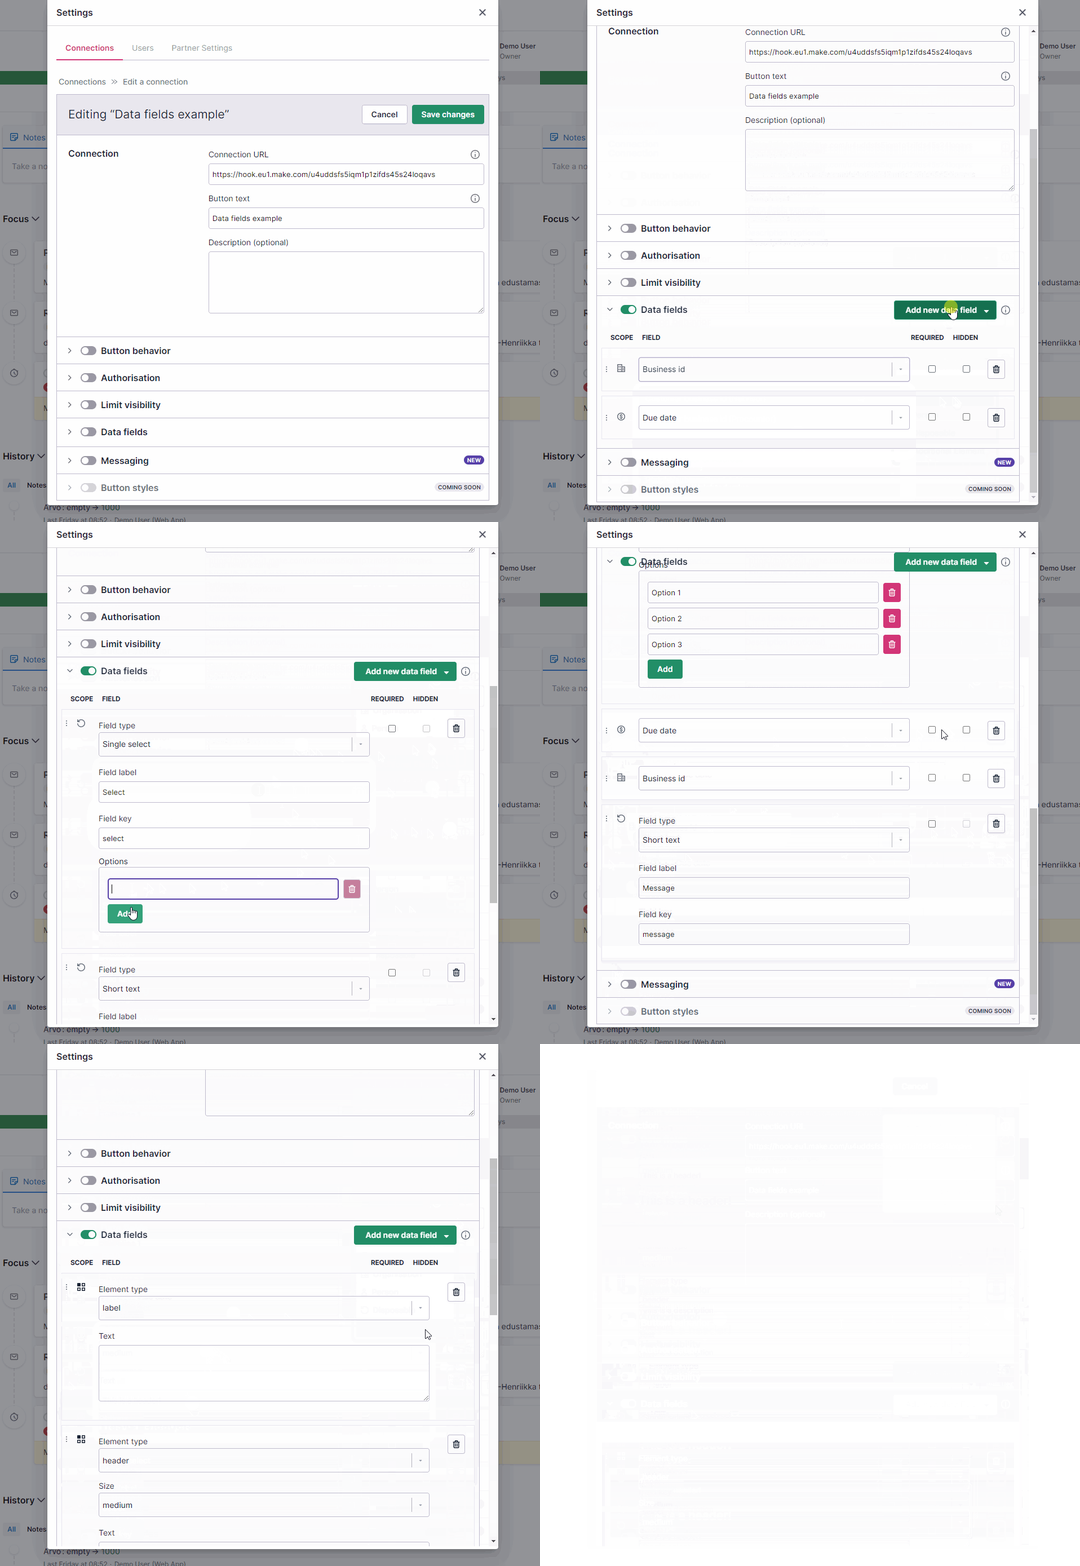
First enable the Data fields feature and add your fields. You need to select the field type and then browse or search for a field by name. You can mark the fields as required, and sort by drag and drop:
Pipedrive fields
You can add deal, organization or person fields to your button. The field selection includes Pipedrive standard and custom fields. The field selection also contains some fields that are not user editable (e.g. Total activities, Update time etc.).
Disposable fields
Disposable fields are editable fields within OneClick, and can be filled in by the user before triggering the button. Disposable field values will be one-time, so on the next trigger the value will be empty again.
Field type
Disposable fields can be type of boolean, date, email, number, short text, long text, multi select and single select.
Please note, that if you add a boolean disposable field and mark it as required, in practise this means that the user needs to set the boolean field to true before the button can be triggered.
Field label
The field name, visible to end user
Field key
The field key name which will be used in the button data payload (please read more below). Field keys will be generated automatically based on the label, but can be changed. Please note that keys need to be unique.
Options
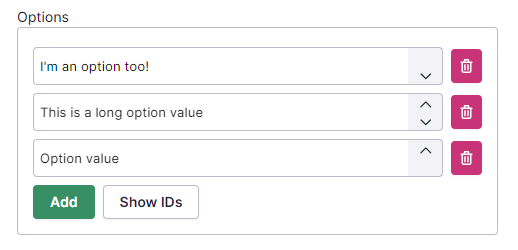
If your disposable field is type of single or multi select, you need to add the predefined selectable options. Add new options with the Add button, and delete existing ones with the trash bin icon. You can sort the options with the arrows on the right hand side of each option:
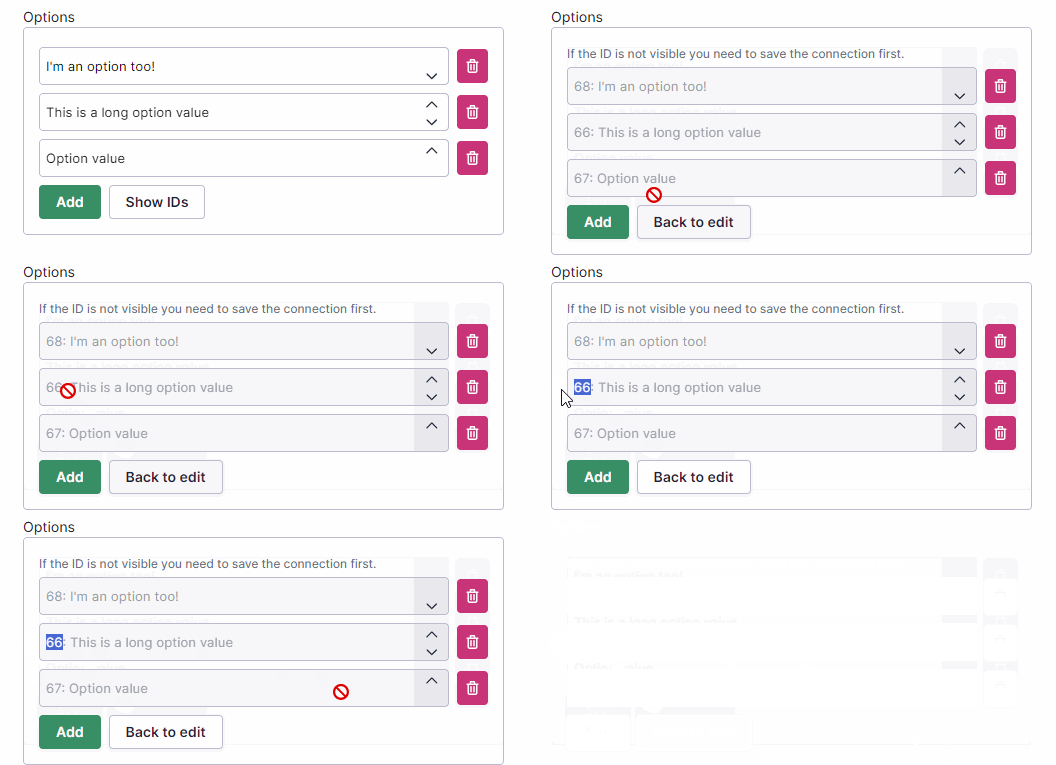
When you have added your options and saved your button, you can come back and click on the Show IDs to see the option's ID values. ID's are convenient if you ever need to change your option label. For example if your automation would just use the option value to see which options are selected, changing the option label would break your automation. When using ID's instead the label would not matter:
Additional elements
Additional elements allows you to customize the UI of your data field button
Please note that an Additional element cannot be the only field type in a button
Header
Select the header font size in the Size dropdown menu and add the header text in the Text field.
Label
Add the label text in the Text field.
Divider
Select the divider color with the Color picker, you can always revert back to the default color with the Set default button.
Hidden fields
You can mark a data field hidden if you want to get the field value in your button payload, but don't want to present the field and value to the user.
Field visibility
Data fields are aware of the Pipedrive context, so if your button has for example deal fields enabled but you trigger the button from a Pipedrive organization the deal fields will not be presented. Only a button triggered from a deal can present all 4 field types (deal, organization, person and disposable). A button triggered from an organization or a person can only present fields of it's own type and disposable. It is recommended to use the data fields feature together with the Limit visibility feature to avoid unexpected results.
Using a button with data fields
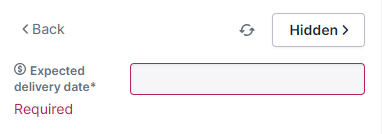
When you click on a button with data fields, the fields an values will be presented. If the button contains disposable fields you can (or have to) fill them in. When ready click on the button again in the top right corner. If a required field is missing you cannot continue before the field value(s) have been set. If you need to fill in field values go to the deal, person or organization (depending on the field type) and fill in the value, then click on the refresh icon next to the button.
Data sent with button click
When you trigger a button which has data fields enabled, the fields will be added to the JSON payload:
{
  "identifier": "741eaac7-b717-4c66-9f70-2e8sddb7ced",
  "resource": "deal",
  "view": "details",
  "userId": "12104077",
  "companyId": "7354412",
  "selectedIds": "21224",
  "fields": {
    "deal": {
      "0fc4b8500dc9b79403e607a1fc8bd350a2fe6261": {
        "field_label_value": "2023-08-24",
        "field_name": "Due date",
        "field_type": "date",
        "field_value": "2023-08-24",
        "is_required": true,
        "is_hidden": false
      }
    },
    "organization": {
      "a46ff54d3aead6f5db210fe6d6f80160cf09a8b1": {
        "field_label_value": "123456-7",
        "field_name": "Business id",
        "field_type": "varchar",
        "field_value": "123456-7",
        "is_required": true,
        "is_hidden": false
      }
    },
    "disposable": {
      "select": {
        "field_label_value": "Option 2",
        "field_name": "Select",
        "field_type": "singleSelect",
        "field_value": {
          "name": "Option 2",
          "key": 28
        },
        "is_required": false,
        "is_hidden": false
      },
      "message": {
        "field_label_value": "Hello!",
        "field_name": "Message",
        "field_type": "varchar",
        "field_value": "Hello!",
        "is_required": false,
        "is_hidden": false
      }
    }
  }
  "products": {...}
}
In the payload, under fields, you will find a collection for each of the field types. In each of these collections you will find an array of fields, identified by the field key.
Please note that the disposable field property field_value will be an array in case of a single or multi select field, containing the selected option name and it's corresponding unique id
Field keys
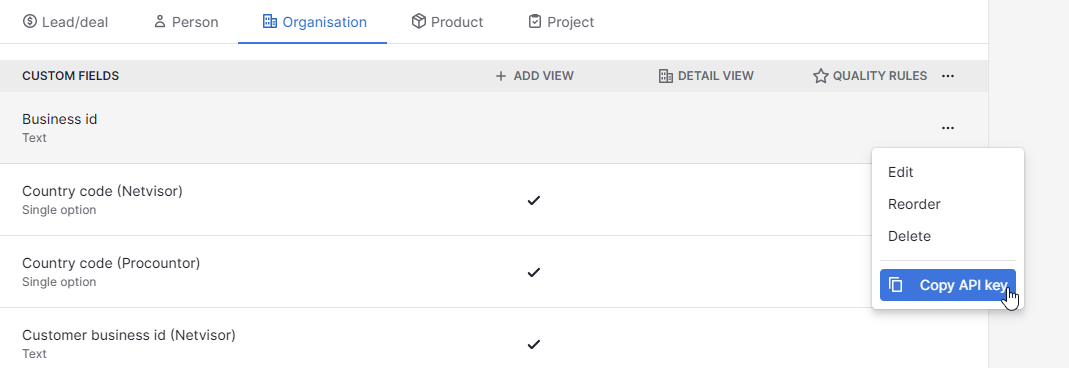
Pipedrive default field keys are dictated by Pipedrive. You can obtain field keys from the Pipedrive settings (Company settings -> Data fields). Click on the three dots next to your field name and select Copy API key (read more about Pipedrive data fields here).
Pipedrive custom field keys are hard to remember and recognize, but you can always see the field name in the field_name property (read more below)
Disposable field keys are automatically generated but they can be changed if necessary.
Field label value
The field_label_value property contains the visible value of the field, as seen in Pipedrive
Field name
The field_name property contains the field's name in Pipedrive
Field type
The field_type property contains the Pipedrive or disposable field type
Field value
The field_value property contains the field value. This may be the same as field_label_value, but in some cases (for example single select field) it is the option id
Is required
The is_required property contains the information if it is marked as required in OneClick.

