
Headers
Don't forget to check out our Make Authorisation example once you've read this article!
This feature is not available for Link buttons
OneClick can send custom HTTP headers with your button click. Typically this is used as an authorisation mechanism to ensure that only authorized parties can trigger your automation or end-point. Headers can also be used to deliver other static data with your button click.
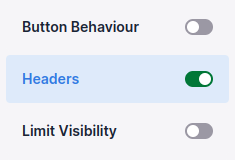
To set custom headers you need to enable the feature first on the left hand menu:
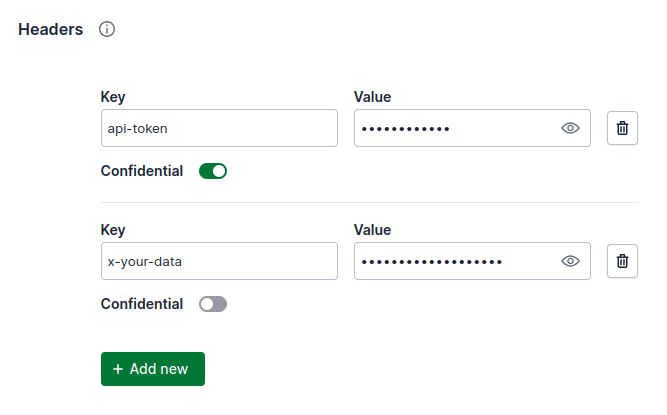
Insert your header name and value in their corresponding Key and Value fields. You can add new headers by clicking on the Add new button, and remove them by clicking on the trash bin icon. Headers can also be set as Confidential, which makes the header value visible only to the user who added it. Please note that this has many implications, read the details below.
Please note that underscores "_" are generally not recommended to be used in the header names, as it may lead to disappearing headers at your back-end depending on the server configuration it runs on. More information here
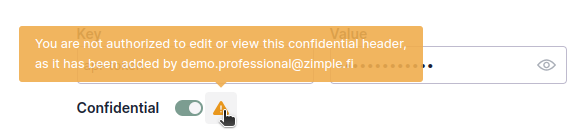
Implications of confidential headers
A user other than the one who added a confidential header cannot:
- See or change the header value
- Change the URL of the button
- This is to prevent exposing the header values by changing the URL to an other end-point which allows inspecting the received headers
- Duplicate the button with the Copy feature in the button list view
Please note that the confidential headers can still be deleted by a user other than the one who added the header. This is to prevent "locking" a button in situations where for example a header was added by a user who's account has been deleted, or a button has confidential headers added by several users.
Data sent with a button
When you trigger your button that has Headers enabled, new custom headers will be added to the HTTP POST call. As an example:
"headers": {
	"api-token":"123456",
    "x-your-data": "Hello world"
}