Authorization with Make
A Make scenario blueprint for the outcome of this example can be downloaded here
Introduction
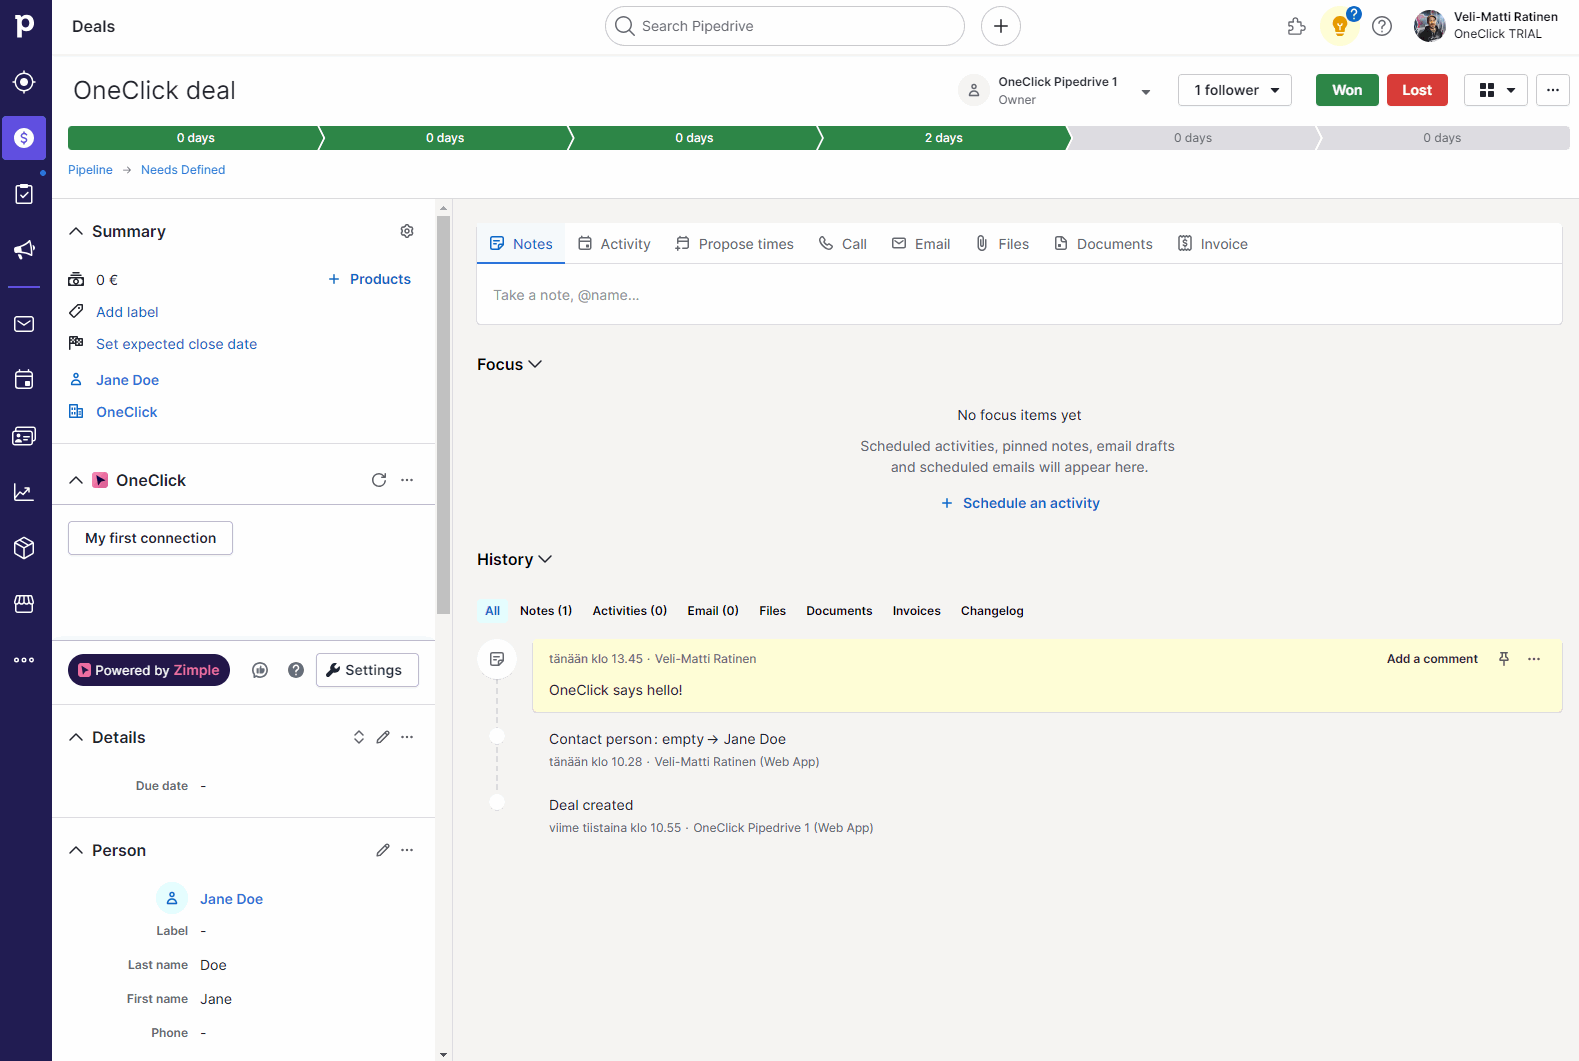
In this example we're going to add authorization to an existing Make scenario which catches the button click with a Webhook and creates a note on the deal. Authorization helps to prevent unauthorized triggering of your scenario. Read more about authorization in this article.
Enable Webhook headers
OneClick uses HTTP headers to provide authentication information, so first we need to make sure we receive them in our Make.com scenario. Click on your Webhook module in Make scenario, click on Edit next to the button dropdown and enable the Show advanced settings toggle. Choose Yes in the Get request headers selection and click on Save and then OK. Save your scenario
Set authorization token
Next we need to add the authorization information to the OneClick button, so head to any Pipedrive deal. Open Settings and edit your button. Open the Authorization section and enable it by clicking the toggle. In the Header authorization type field enter your authorization header name (for example "Authorization" etc.) and in the Header authorization value field enter your authorization token, the more complex the better (123456 in this example). Click on Save and exit the Settings dialog
Validate token
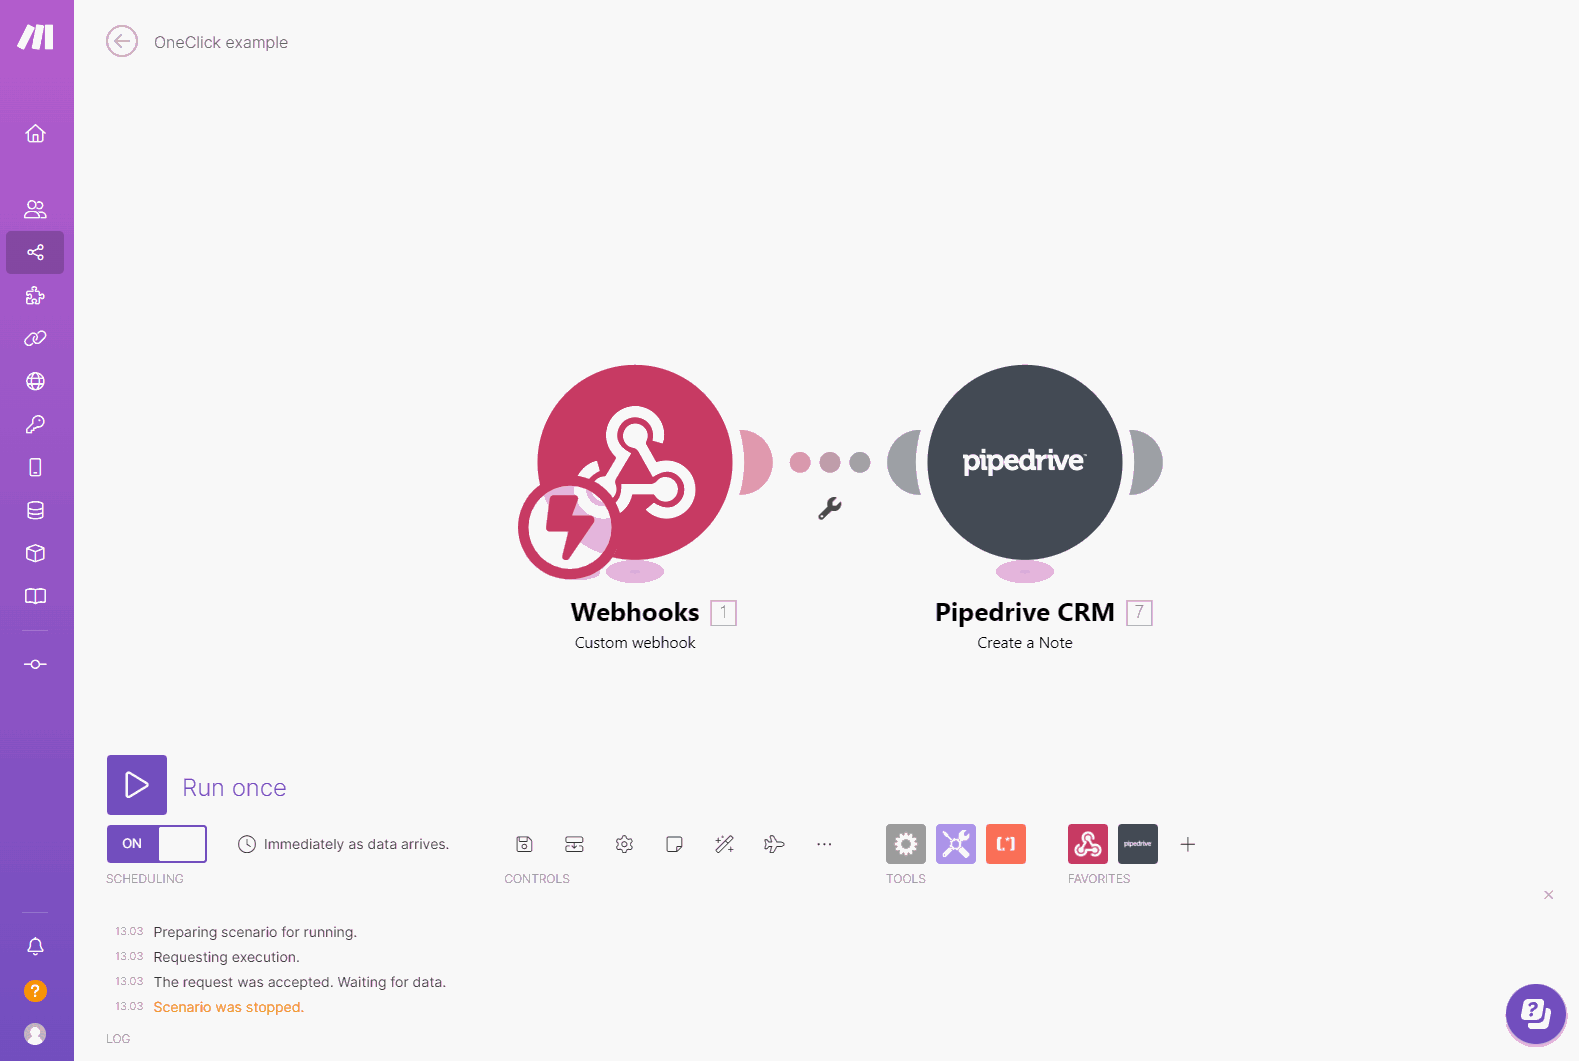
Now your button will send the authorization information in the HTTP request headers, which will be then received by your Make.com webhook. In order to validate the authorization information let's edit the filter between our two modules.
Edit the filter between the two modules and enter the following in the first field of the condition (please make sure that the headers variable is correct, we recommend picking it directly from the Webhook variable list, Headers[], please refer to this article for more information. Also change the authorization text to whatever you chose for the token label):
{{get(map(1.`__IMTHEADERS__`; "value"; "name"; "authorization"); 1)}}Choose Text equal to and in the last field enter your token which you configured in the OneClick button. Click on OK and save your scenario

Test your scenario
Now your scenario will only start if the incoming request has the correct authorization header with it. First test that everything works as it should:
Then deliberately change the authorization token to an incorrect one and check that the filter in your scenario didn't pass: