
Using messaging with Make
A Make scenario blueprint for the outcome of this example can be downloaded here.
Introduction
In this example we're going to walk through how to set up and utilize OneClick messaging feature with Make. Messaging is a handy way to keep your users aware of the status of your Make scenario, and inform them about errors or warnings (not to forget about successes). Read all the details about messaging in this article.
We will enable both HTTP status response messages and custom messages in the same scenario to demonstrate the options you have to make your workflows better! We'll start with a ready made scenario that will simply catch the OneClick button click and then create a note and an activity on the deal.
Enable messaging for a button
First we need to enable the messaging feature for a button in OneClick. Head to Pipedrive, open OneClick settings and enable the feature under you button settings:
Redetermine Webhook data structure
Next let's determine the data structure of the scenario Webhook, as we need to get the event_id attribute in order send out custom messages from our scenario. Head to your Make scenario, open your Webhook module and click on Retedermine data structure.
Then head back to Pipedrive and click on your button
If you see the green Successfully determined message all went right:
You should now see the event_id attribute in the variable list:
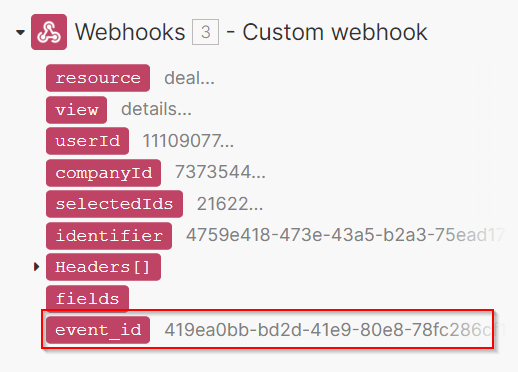
Please note that sometimes you may need to use the Run once feature in the Make scenario to get all new properties to show in the UI. You can try this if the event_id attribute does not show up.
Add HTTP success and error responses
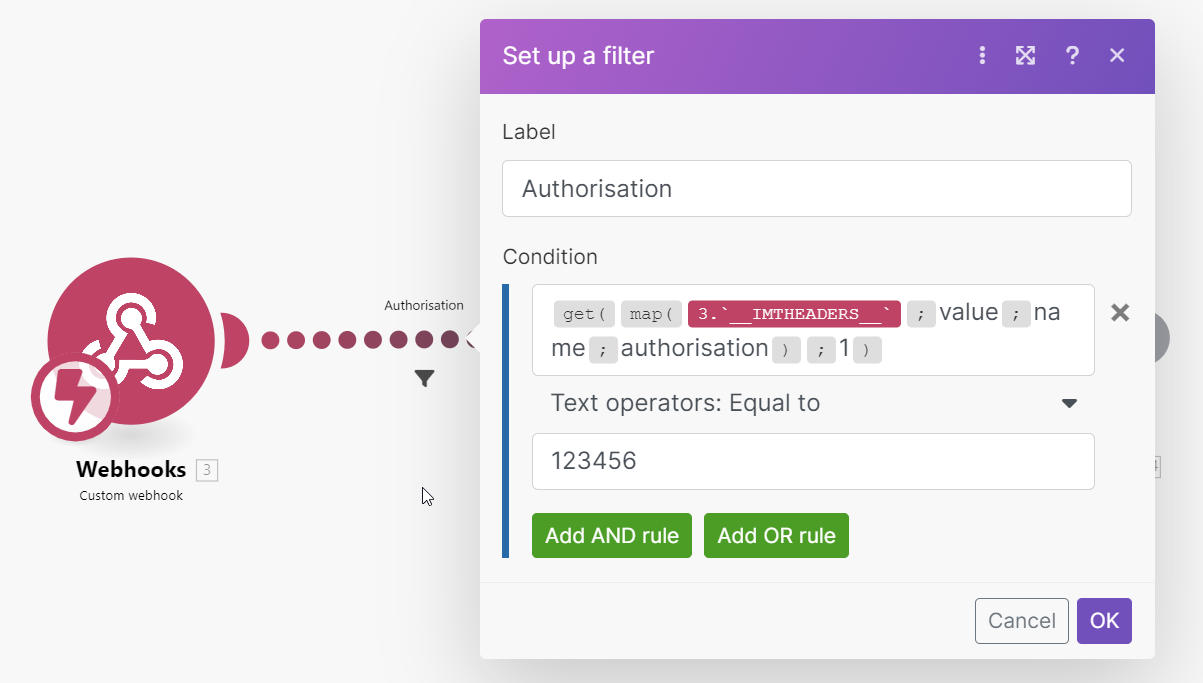
We have set up authorisation in our scenario earlier (please see previous Make examples to learn more about the authorisation options) as a filter in front of our first action module:
Let's add another route which will be the error route in case the authentication wasn't successful:
Now let's add a Webhook response module on both of these routes. The error response should be HTTP 401 (unauthorized) and the success route HTTP 200. For the error route you can write a plain text response (all statuses except 20x will be regarded as error messages), but for the success route let's format the message properly.
{
  "message_type": "info",
  "message": "Scenario started successfully"
}
Add custom messages
Now it's time to keep your users up to date how things are progressing. In our scenario we have two Pipedrive modules, one creates a note on the deal and the second an activity. Let's add a HTTP module after each one that will send out a custom message to the OneClick messaging end-point with an HTTP POST call:
https://app.theoneclick.io/api/trigger-messageAlso remember to format your message properly. You will need to add the button click event ID that is received by your webhook (remember, we needed to redetermine the data structure earlier to get it). The event ID is used to deliver the message back to the correct button, Pipedrive object and user:
{
  "event_id": "{{3.event_id}}",
  "message_type": "info",
  "message": "I have many things to tell you"
}
Finally, don't forget to save and enable your scenario :)
Test your scenario
We should be all set up! Let's give it a go:

Using custom messages in error handlers
You can also add messaging as part of your error handling routine in your scenario. Just add the HTTP module before your error handler module of choice. This way you can for example store the incomplete scenario execution but also let the user know that something didn't go right:
Tweak your settings
One of the handy features with messaging is that you can prevent the user to click on the button again until they've read any unread error messages. This prevents unnecessary triggering of your scenario which would most likely end up with the same error again.
Next let's enable this feature and cause an intentional authentication error to showcase this by setting an incorrect authorisation password:
Don't forget to read the full documentation article on the messaging feature so you won't miss any useful details!