Using messaging with Zapier
Introduction
In this example we're going to walk through how to set up and utilize OneClick messaging feature with Zapier. Messaging is a handy way to keep your users aware of the status of your Zap, and inform them about errors or warnings (not to forget about successes). Read all the details about messaging in this article.
We will use custom OneClick messages to demonstrate the options you have to make your Zaps better! We'll start with a ready made Zap that will simply catch the OneClick button click and then create a note and an activity on the deal.
Enable messaging for a button
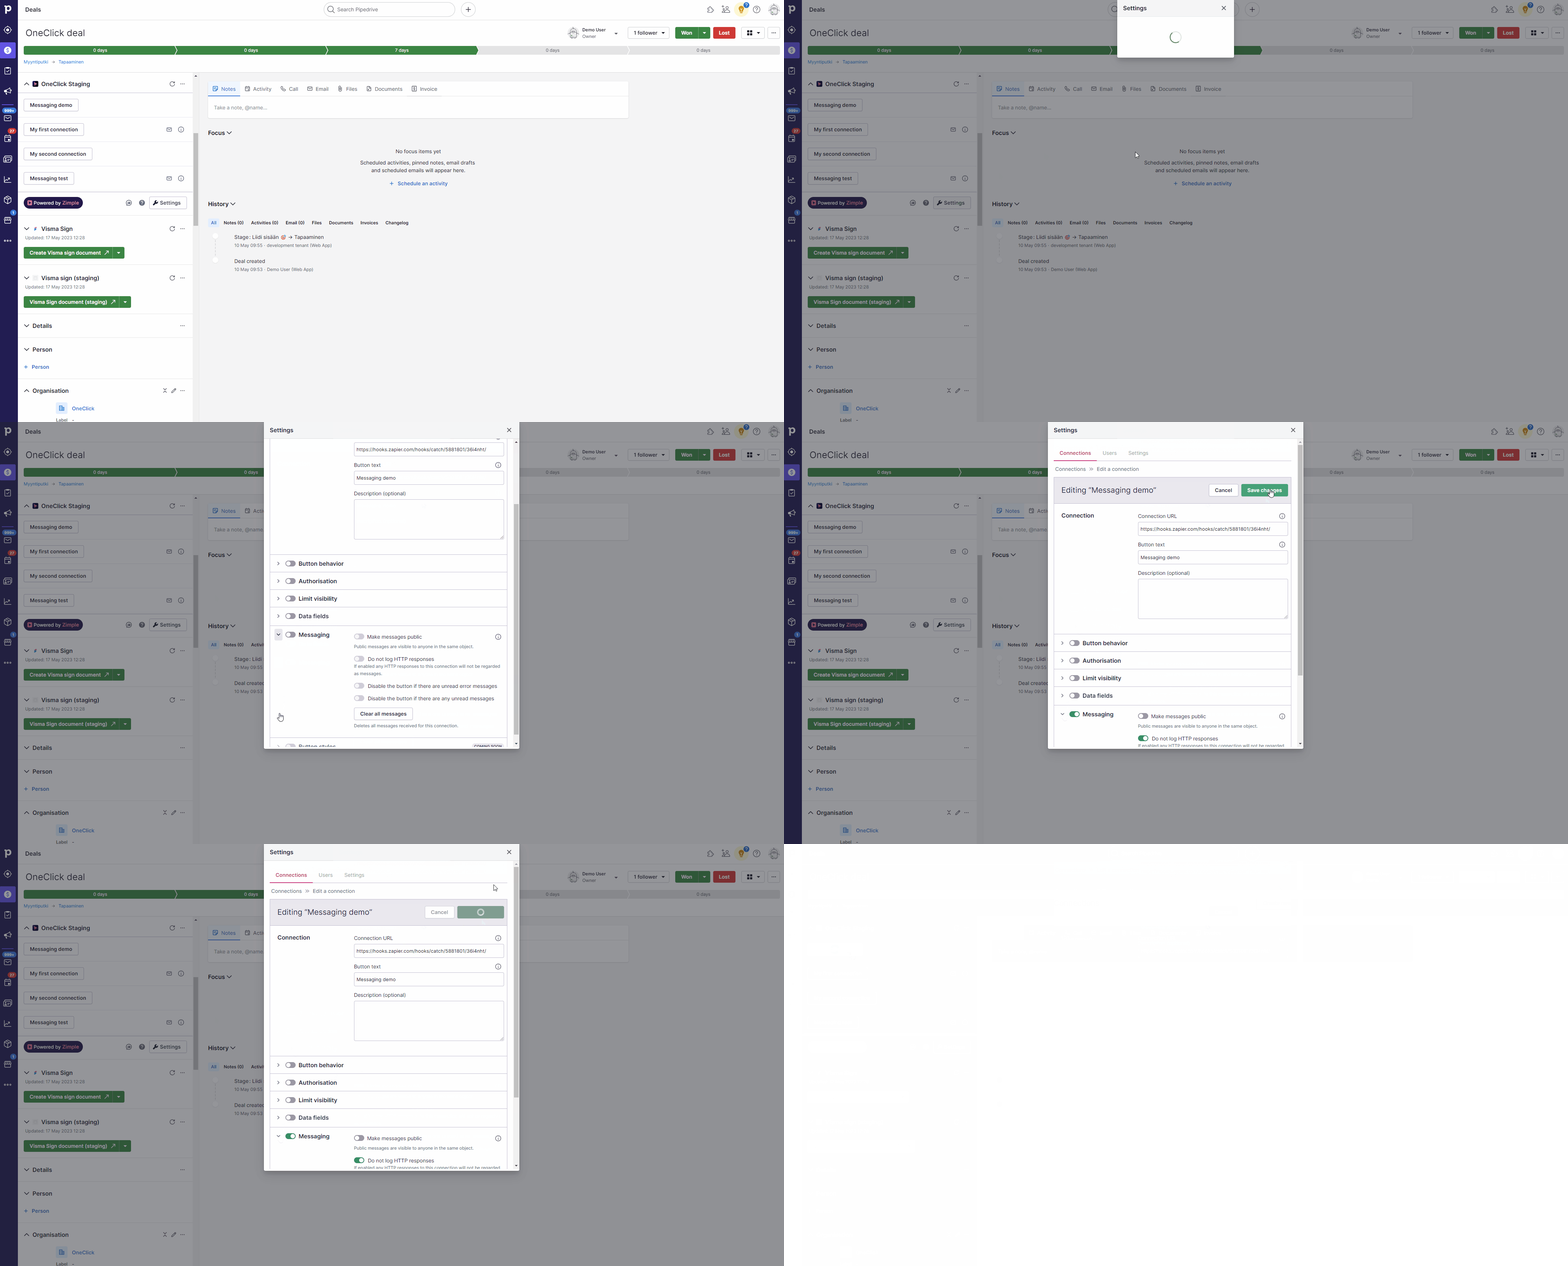
First we need to enable the messaging feature for a button in OneClick. Head to Pipedrive, open OneClick settings and enable the feature under you button settings. Also enable the Do not log HTTP responses option, as this is not applicable with Zapier:
Remember to trigger your button once after enabling the messaging feature!
Retest your Zap webhook trigger
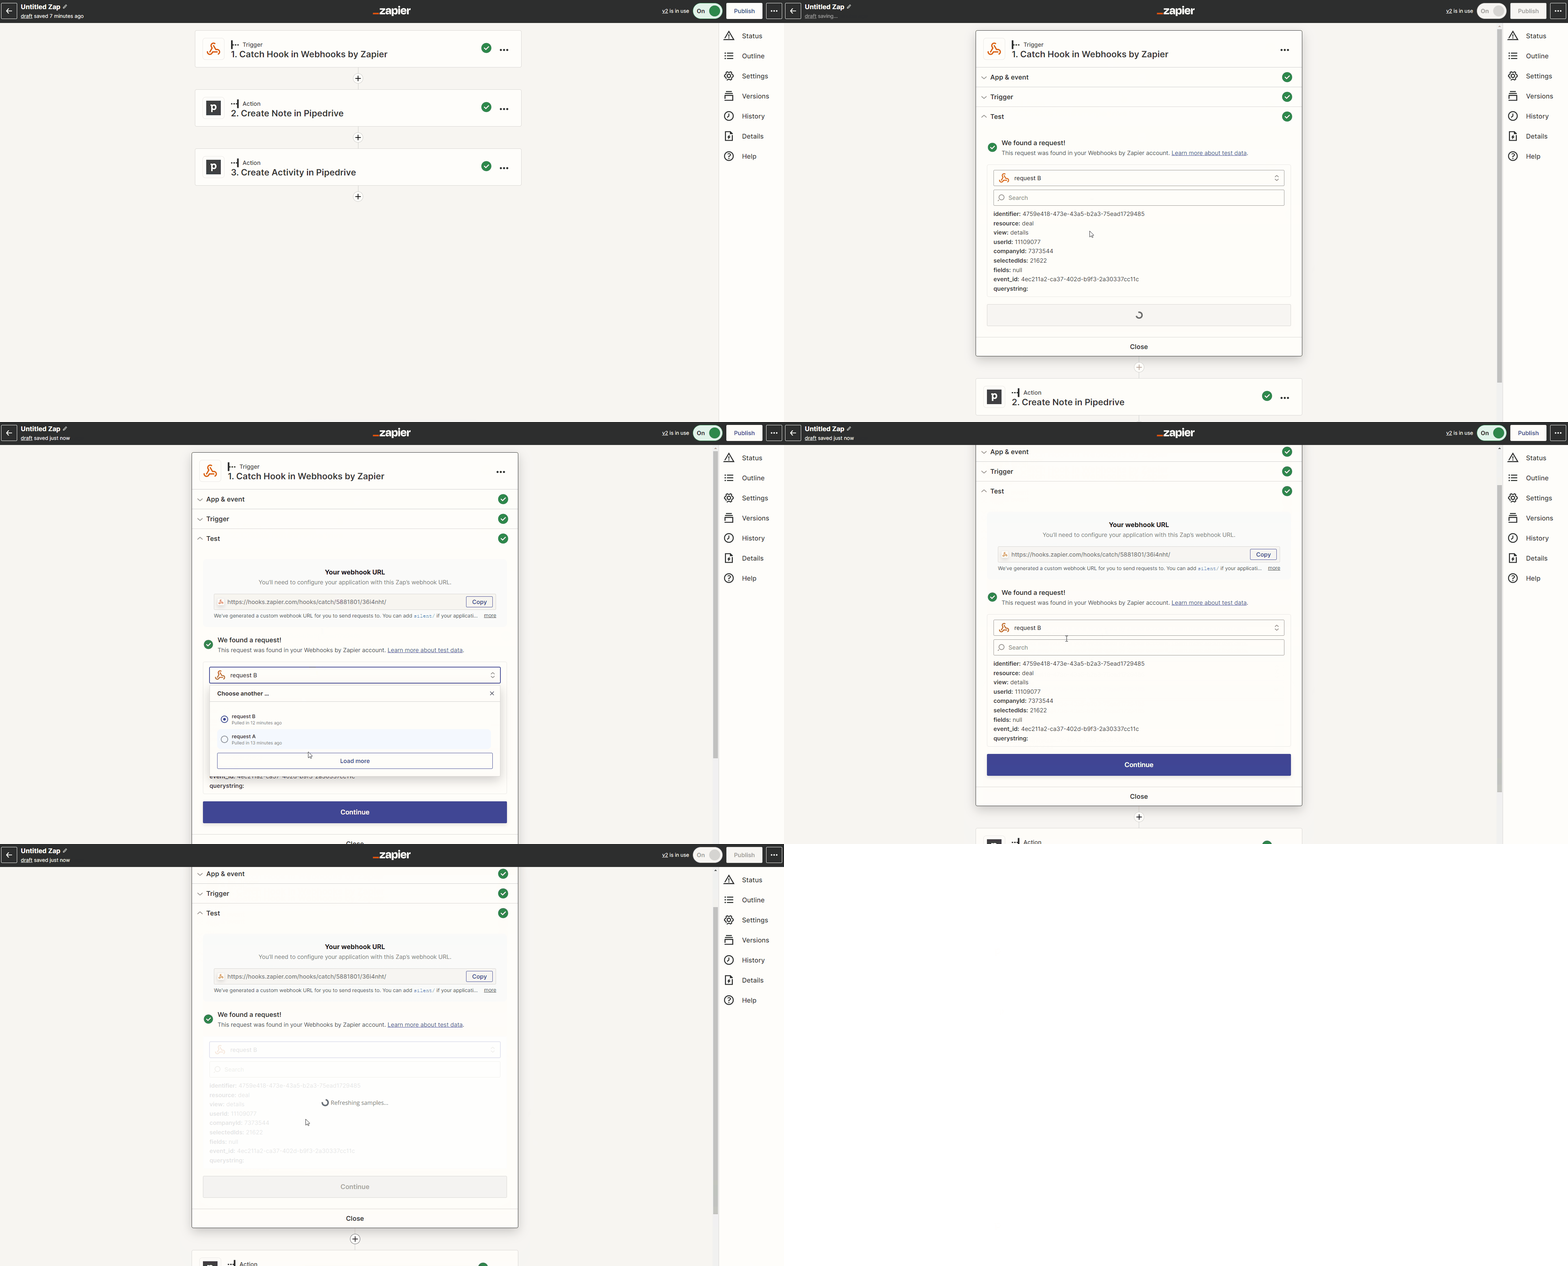
When messaging is enabled it will include the button click event_id in the data. This is needed later when we send the messages, so retest your webhook to obtain the variable:
Add custom messages
Now it's time to keep your users up to date how things are progressing. In our Zap we have two Pipedrive modules, one creates a note on the deal and the second an activity. Let's add a Webhook module after each one that will send out a custom message to the OneClick messaging end-point with an HTTP POST call:
https://app.theoneclick.io/api/trigger-messageAlso remember to format your message properly by adding the JSON message and message_type properties. You will need to add the button click event ID (event_id) that is received by your webhook . The event ID is used to deliver the message back to the correct button, Pipedrive object and user:
Finally, don't forget to publish your Zap :)
Test your Zap
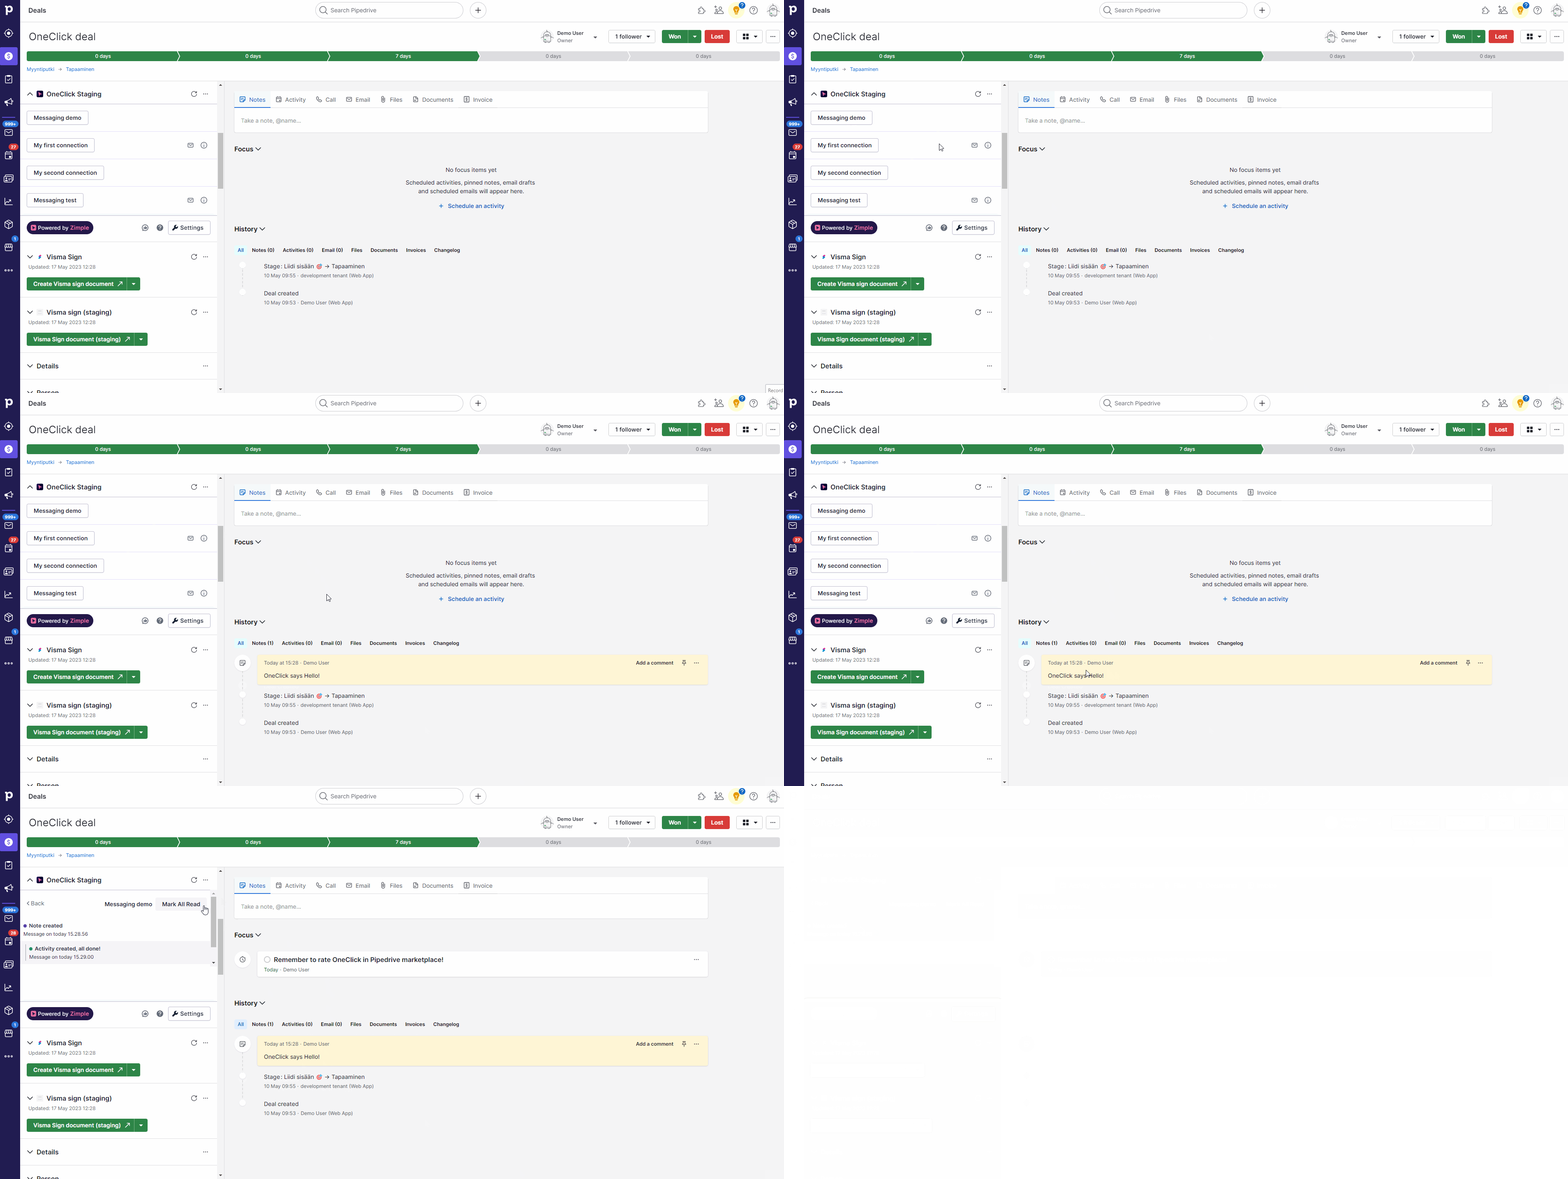
We should be all set up! Let's give it a go:
Tweak your settings
One of the handy features with messaging is that you can prevent the user to click on the button again until they've read any unread error messages. This prevents unnecessary triggering of your Zap which would most likely end up with the same error again.
Next let's cause an intentional error message by changing the message_type attribute in the Webhook to error in order showcase this:
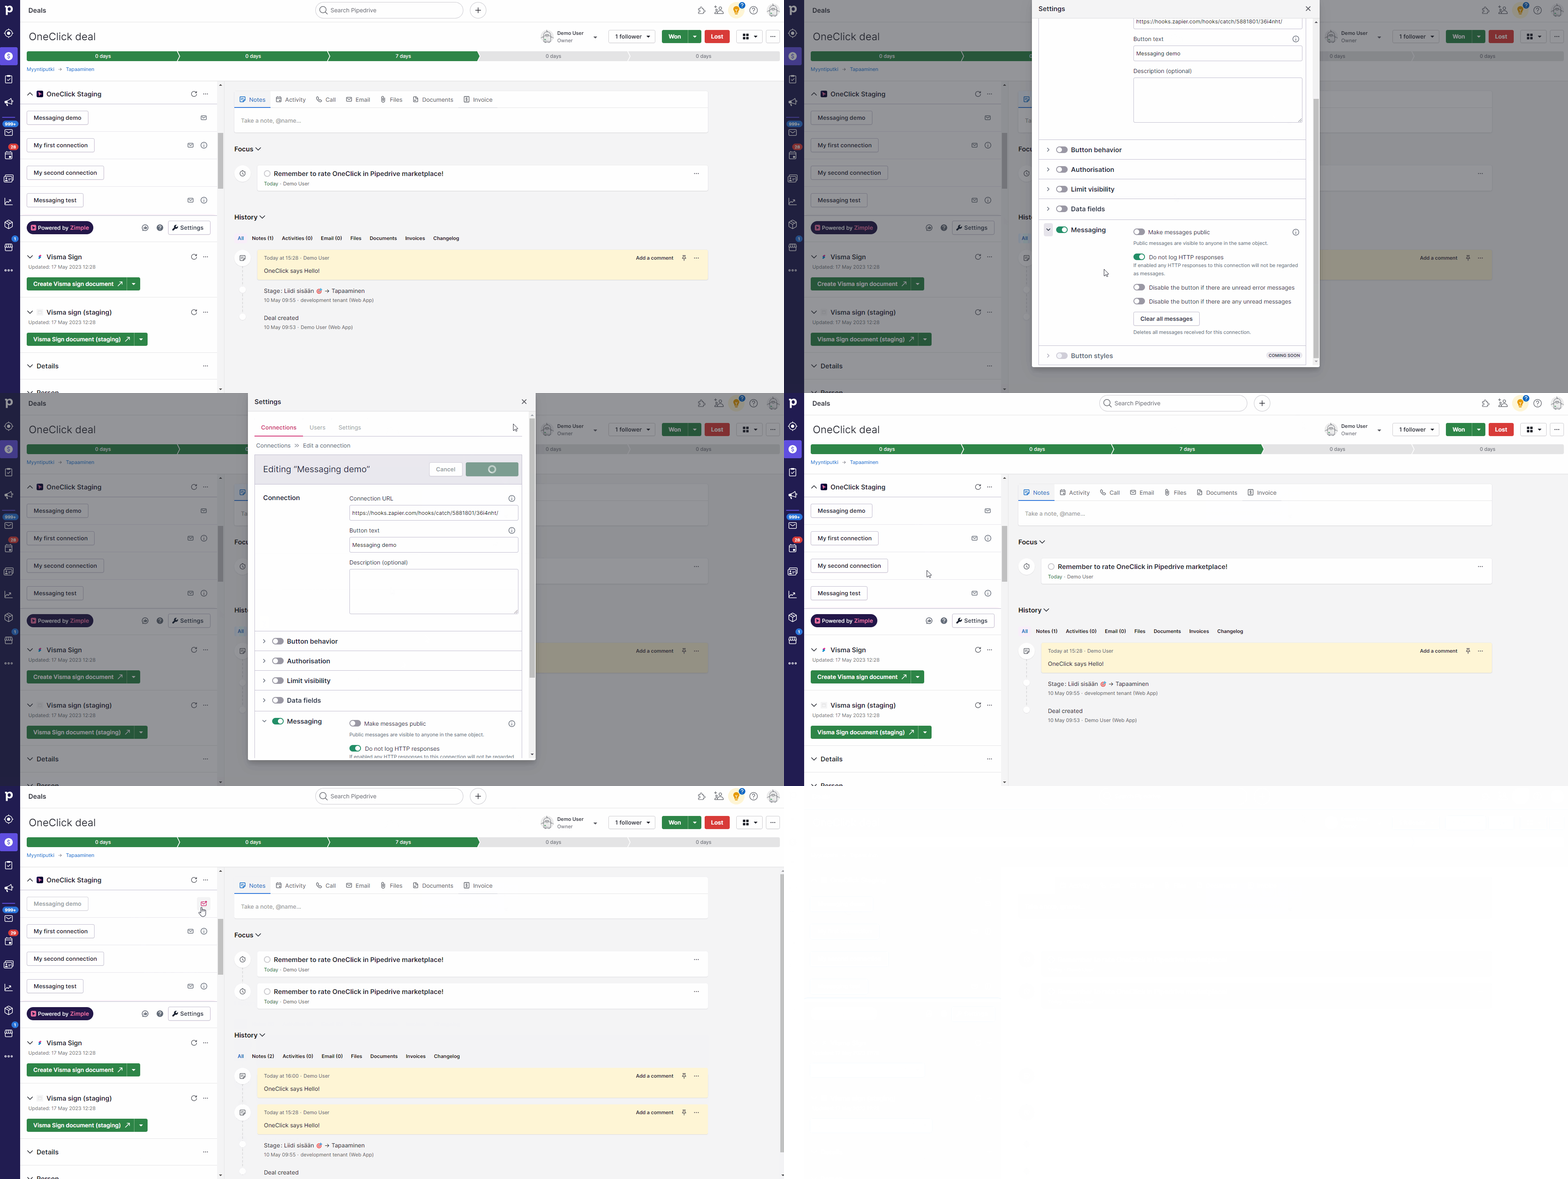
Then enable the feature and check the results:
You can utilize success / error messages for example with Zapier paths the send out conditional messages.
Don't forget to read the full documentation article on the messaging feature so you won't miss any useful details!


