
Custom fields: Advanced validation
This feature is not available for Link buttons
The Advanced validation feature allows you to ensure that your data fields are filled in according to your workflow's requirements. You can do all from simple validation to require fields to be filled in, all the way to making sure that field values are in certain format or dates are in the given timeframe etc. Read more in this article how to configure your validation. If your fields do not pass the validation the user clicking the button will be stopped and presented with a customizable error message(s)
Getting started
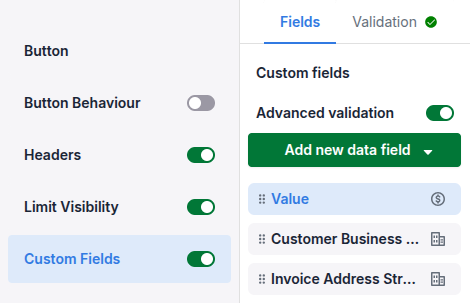
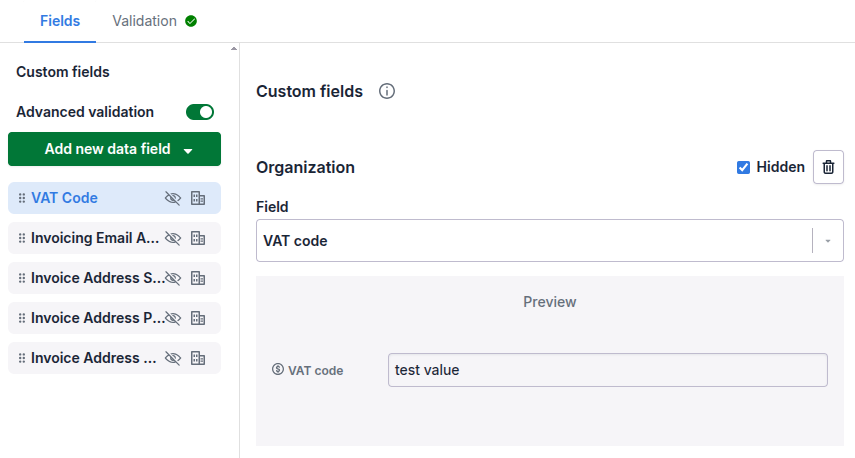
The Advanced validation feature needs to be enabled from the Custom Fields section in your button settings, above the "Add new data field" button. When enabled you can notice the green check mark icon on the Validation tab:
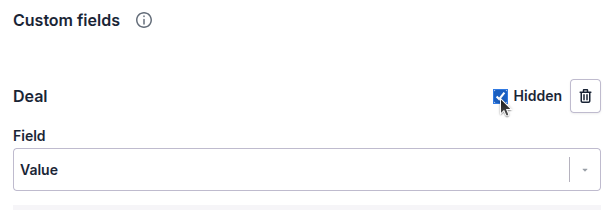
Please note that you need to add the fields you want to validate on the Fields tab before you can configure your validation in the Validation tab. If you wish to hide your fields when the button is triggered (unless they have an error) you still need to configure to hide the field in the field's settings:
Once you enable Advanced validation, all validations has to be configured in the Validation tab. As you can see from the screenshot above, the "Required" and "Do not allow value" options are removed from the field's settings and are ignored even if previously enabled
Validation rules
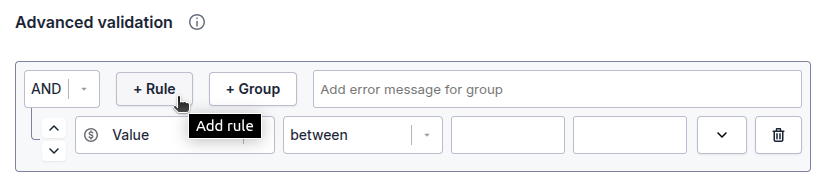
A validation rule defines a single field's validation logic. Typically a button validation scema consists of several rules, but you need to add at least one. To get started click on the "+ Rule" button, select your field for the rule and then select the validation type:
You can add multiple rules for a field, i.e. even if a field has been selected in a rule it can be selected again in another rule
Validation types
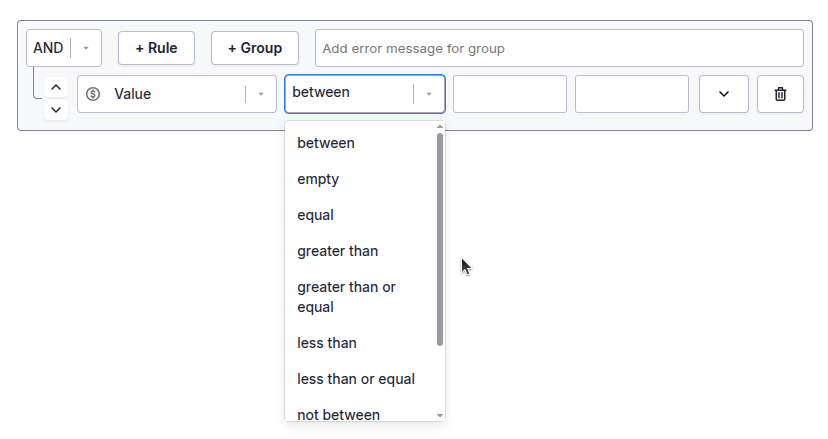
The validation types vary depending on the Pipedrive field type you have selected in your rule. Once you have selected your field in your rule you can see the available validation types in the drop down menu:
As most of the validation types are more or less self explanatory this guide will not list them all.
When you have selected the type of your validation rule, in most cases you then need to define the values or boundaries for the rule to pass validation. E.g. deal value has to be greater than 100:

Using regular expressions
Some field types allow you to use regular expressions to validate your field value. E.g. customer business ID needs to be alphanumeric and between 8-9 characters long:

It is highly recommended to use an online regular expression tester (such as regex101.com) to confirm your expression works as intended. Please make sure to use ECMASCript (Javascript) as your regex flavor.
Rule groups
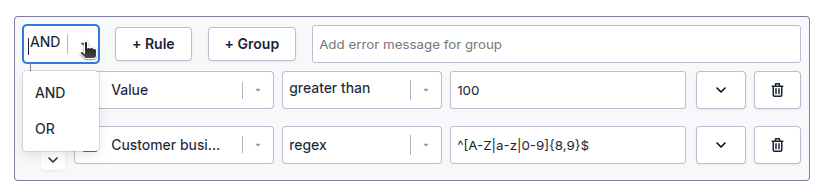
By default there is only 1 rule group in place, in which you add your rules. In the default group you need to define if your rules should all pass (AND), or one of them needs to pass (OR):
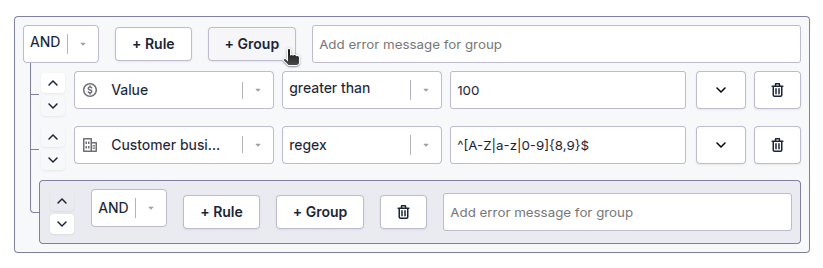
You can also create sub groups, which have an internal validation logic of their own. To add a new group click on the "+ Group" button:
The maximum number of nested groups is 3
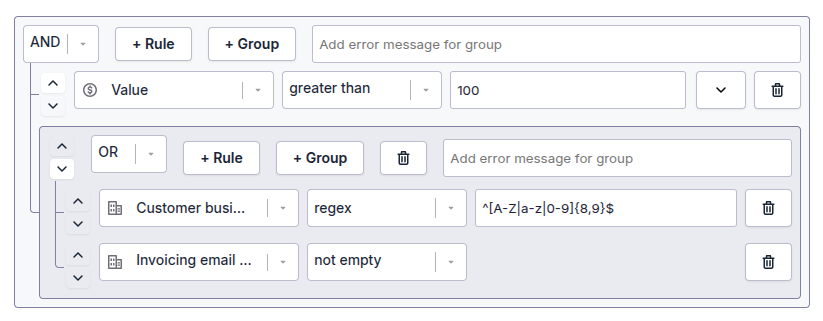
The sub groups will hold rules of their own, and the AND/OR logic can defined at the group level, e.g.:
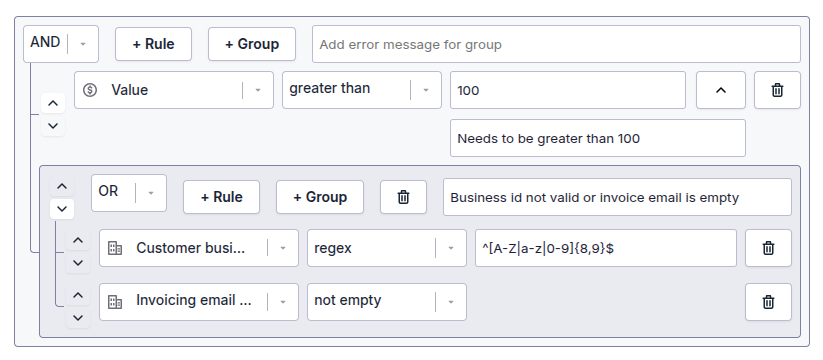
The sub groups will be considered basically as a single rule in the parent group. As an example, as seen above, the validation will pass if the deal value is greater than 100, and also either the customer business id is 8-9 characters long or the invoicing email is not empty.
Error messages
You can add custom error messages to explain users why the validation did not pass. Error messages can be defined either at field or group level. Field level error messages can be defined only in the first group level:
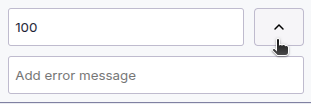
Please note that you often need to click on the expand icon on the rule to reveal the error message field:
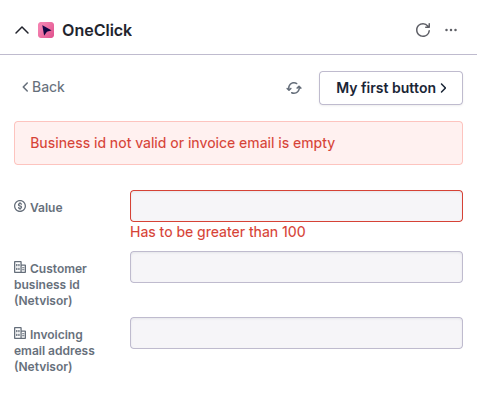
Depending on your error message configuration the user will see one or more messages once triggering a button when the validation didn't pass:
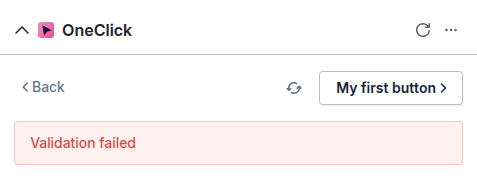
If there are no error messages defined the user will be presented with a generic message instead:
Example
This example demonstrates how you can utilize Advanced validation in an invoicing use case, where the invoice can be delivered either as a physical document or via email.
In this case, in order to be able to send an invoice, we need to ensure the organization to which the invoice will be sent to has a VAT code filled in, and depending on the invoicing method either an invoicing email address has to be filled in, or invoice address street, zip code and city are required.
Also, to make sure the data is valid ("not empty" is not good enough), let's make sure that the VAT code starts with two character (e.g. "GB") and then has at least 6 digits after it. For the invoicing email address let's validate that the value is an actual email, and for the invoicing address zip code we will require it to be numerical value between 5-7 digits.
Let's start with the basics, and configure the rule groups and minimal validation.
Group configuration
First add your fields on the Fields tab, and enable Advanced validation. We've also marked all the fields as hidden in order to not disturb the user if everything is in order when clicking the button:
Then let's add the validation groups and basic "not empty" rules for the fields. We'll need 4 groups in total, configured as explained below:
- The first group is an AND group, so that the VAT code rule and the sub group has to pass validation
- The first sub group is an OR group, so that either one of the sub groups has to pass validation. This group has no rules inside it, just the sub groups
- The two 2nd level sub groups are both AND groups, meaning that all the rules inside them has to pass validation
- The first group validates the email
- The second group validates the address fields
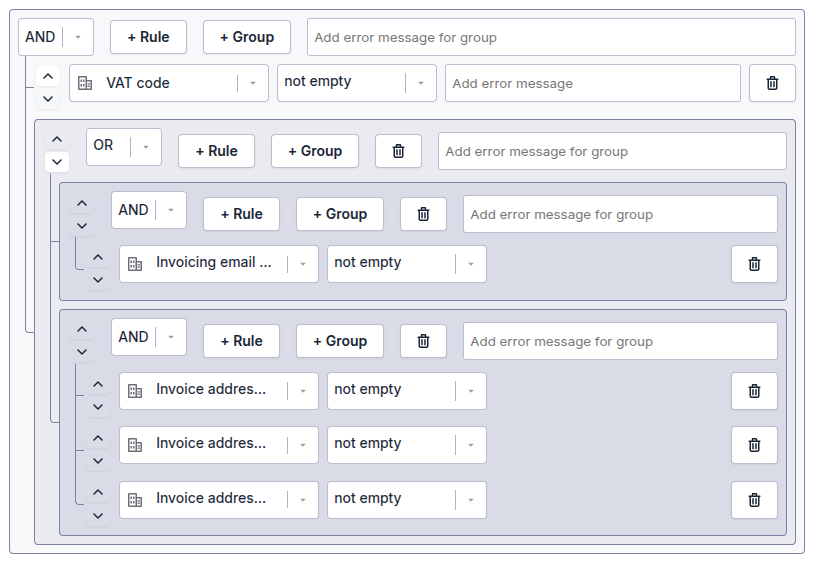
This basic validation logic now ensures that the VAT code is in place, and then either the email or address fields are filled in. Let's fine tune the rules to make sure the data is correct.
Rule configuration
For the VAT code field we need a reqular expression. This simple regex validates the format of "two characters followed by at least 6 digits". You can test it here.
^[A-Z|a-z]{2}[0-9]{6,}$
The email address can be validated in many ways, e.g. with a regular expression like this:
^[^@]+@[^@]+\.[^@]+$But in this case we want to keep it simple and require that the value at least has an @ sign in it to rule out basic typing and copypaste errors:

And finally the zip code, which needs to be between 5-7 digits, let's once again use a regular expression which you can test in here:
^[0-9]{5,7}$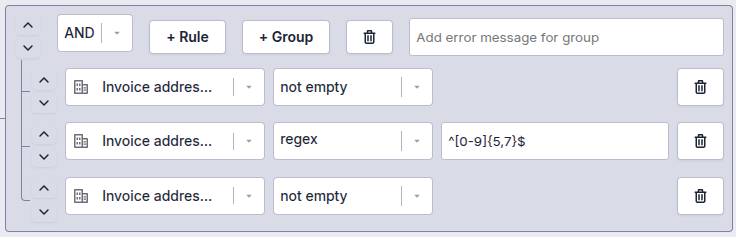
Adding error messages
In order for the user to understand why the validation may fail, let's add some custom error messages
In the first group we can add rule specific error messages, so let's do that for the VAT code field:

The first group dot require a group level error message, as the sub group errors will explain better what is wrong or missing.
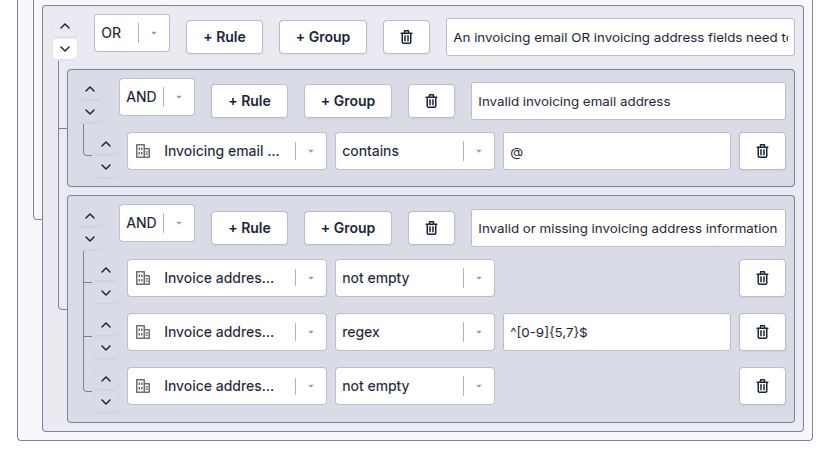
For the rest of the groups let's add group level error messages. Group 2 error message should explain the requirement that either the email or address fields are required. Then groups 3 and 4 should explain why the the email or the address values are not accepted:
Let's try it out
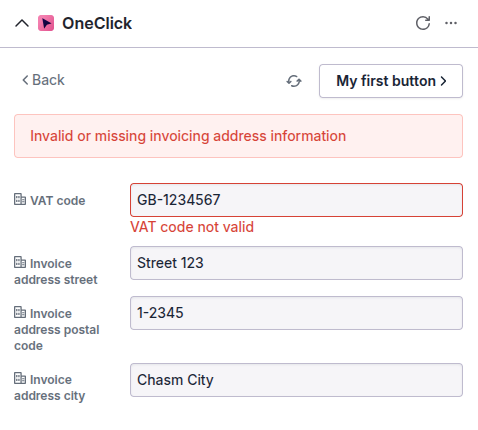
However, if the validation passed your workflow can now start safely without the user even noticing that the data was validated.