Advanced validation
This page is for admins who make Buttons.
Advanced validation examines the fields of a Workflow button with rules before OneClick sends the data. A rule can require a value, a number range, a date range or a text format. When the fields do not agree with the rules, OneClick does not send the data. The user sees your error messages and can correct the values.
Advanced validation is part of the Custom Fields section. First add the fields. See Custom fields.
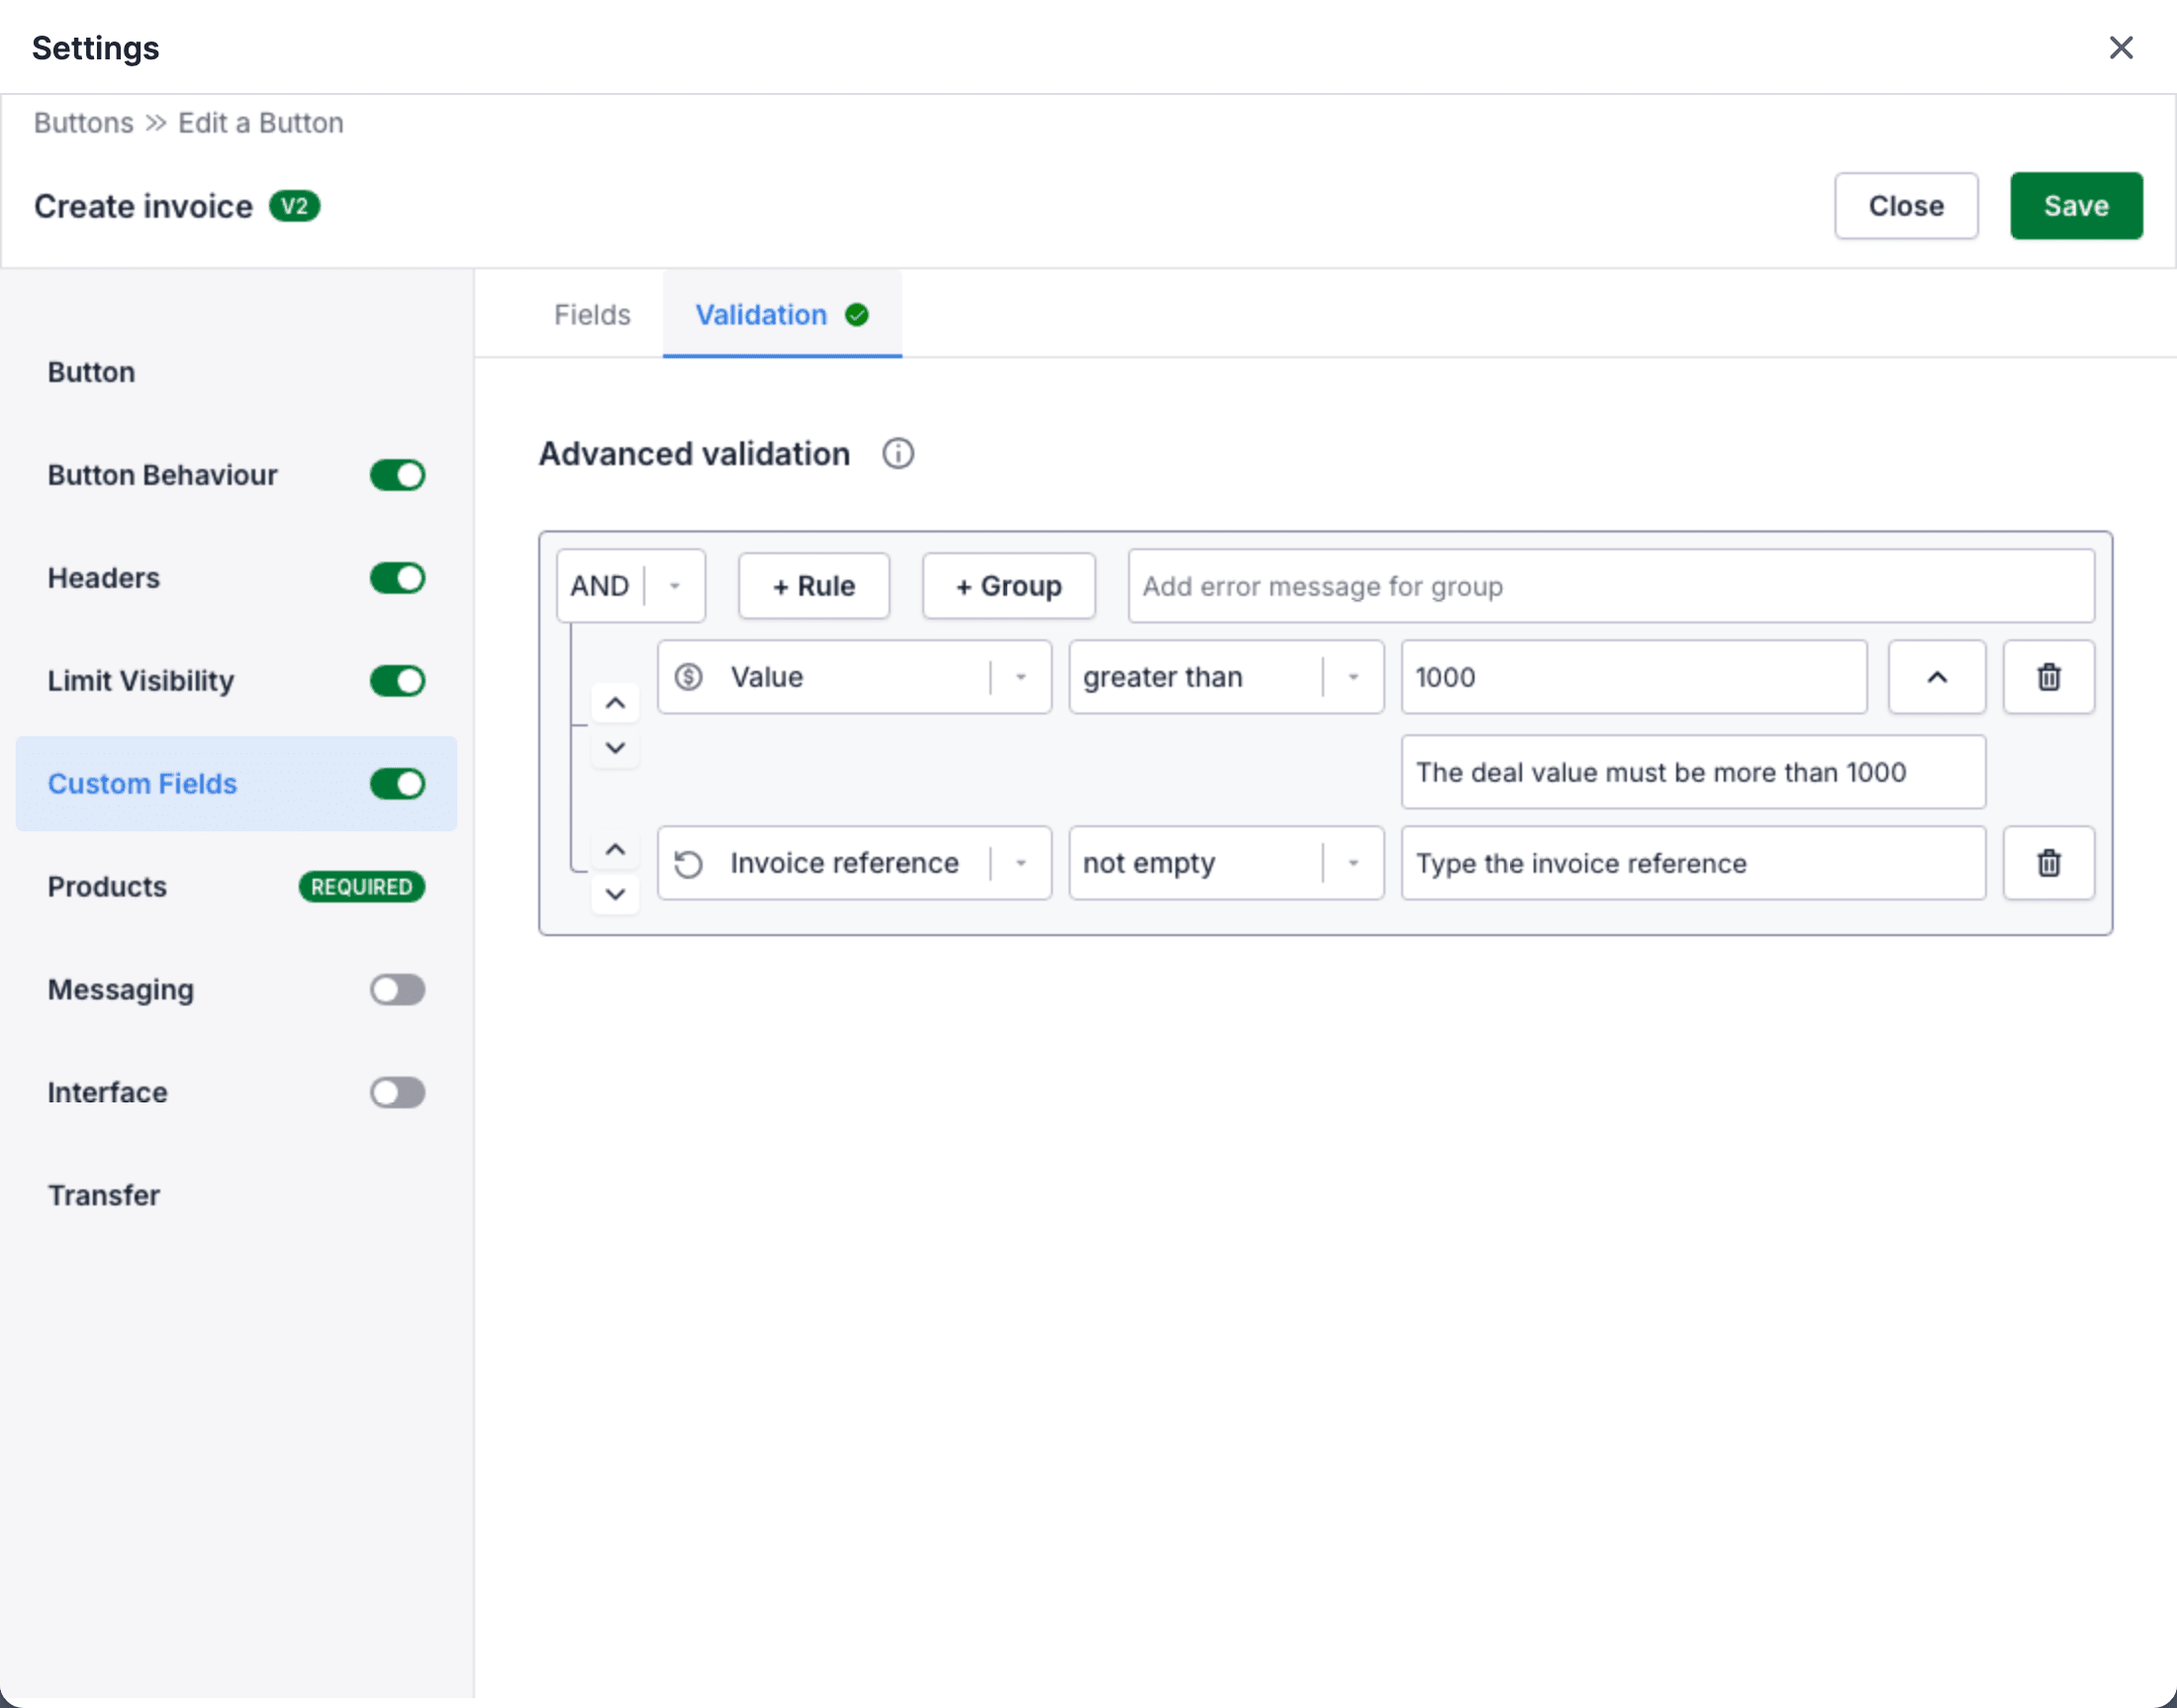
Turn on Advanced validation
Section titled “Turn on Advanced validation”- Open the Button in the Button editor.
- Click Custom Fields in the menu.
- Add the fields that you want to examine on the Fields tab.
- Turn on Advanced validation above Add new data field. The Validation tab shows a green check mark.
- Click the Validation tab.
- Add the rules. See Add a rule.
- Click Save.
When Advanced validation is on, all rules of the Button are on the Validation tab. The fields have no Required and Do not allow value check boxes, and OneClick ignores their old values. Hidden stays on the Fields tab.
Add a rule
Section titled “Add a rule”A rule examines the value of one field. The Validation tab starts with one group. Each group has buttons to add rules and groups.
- Click + Rule in the group. A rule shows in the group.
- Select the field in the first list.
- Select the type of the rule in the second list, for example greater than.
- Type the value of the rule, for example
100. Some rule types, such as empty or this month, have no value.
A field can have more than one rule. To remove a rule, click the bin icon at the right of the rule. To move a rule up or down, click the arrows.
Rule types
Section titled “Rule types”The rule types depend on the type of the field:
| Field type | Rule types |
|---|---|
| Text, email, phone, address, person and organization | begins with, contains, does not begin with, does not contain, does not end with, ends with, empty, not empty, regex |
| Number and monetary | equal, not equal, less than, greater than, less than or equal, greater than or equal, between, not between, empty, not empty |
| Date | The number rule types, and this day, this month, last month, next month, this quarter, last quarter, next quarter, this year, last year, next year, last 7 days, next 7 days, last 30 days, next 30 days |
| Single option, multiple options and users | in, not in, empty, not empty |
| Boolean | equal |
Regular expressions
Section titled “Regular expressions”A regex rule examines a text with a regular expression. OneClick uses JavaScript regular expressions. For
example, ^[0-9]{5,7}$ accepts 5 to 7 digits.
Test the expression before you save the Button, for example on regex101.com with the flavor ECMAScript (JavaScript).
Rule groups
Section titled “Rule groups”A group joins its rules with AND or OR. Select it in the list at the left of the group:
- AND: all rules of the group must pass.
- OR: at least one rule of the group must pass.
To add a group in a group, click + Group. A group in a group counts as one rule of its parent group. Thus you can make conditions such as “A and (B or C)”. You can put groups in groups to a maximum of three levels below the first group.
To remove a group, click the bin icon at the right of the group.
When you save, each group must contain at least one rule or group. Else OneClick shows The group must contain at least one field. If a rule has no value, OneClick shows Validation builder schema is invalid.
Error messages
Section titled “Error messages”Write error messages that tell the user what to correct. You can write a message for a rule and for a group.
- Rule message: click the arrow at the right of the rule value. Type the message in Add error message. Only the rules in the first group have a rule message.
- Group message: type the message in Add error message for group in the group header.
A rule message shows below its field. A group message shows above the fields. When two groups in the same parent group fail, OneClick joins their messages with “AND” or “OR”, as the parent group does.
If a failed rule has no message, OneClick writes a message from the rule, for example is empty or does not match regex pattern with the expression. If a group in a group fails and no group has a message, the user sees Validation failed.
For the view of the user, see Required fields and errors.
Hidden fields with rules
Section titled “Hidden fields with rules”A field can be hidden and have rules. The user then sees the field only when it is not valid. If all fields are valid, the user does not see the fields, and OneClick sends the data. See A Button with hidden fields.
Example: an invoice by email or by post
Section titled “Example: an invoice by email or by post”A Button sends an invoice for a deal. The invoice goes by email or by post. Before OneClick sends the data, the organization must have:
- A VAT number of two letters and at least six digits, for example
GB123456. - An invoicing email address, or a full postal address with a postal code of 5 to 7 digits.
This example uses the organization fields VAT number, Invoicing email, Street, Postal code and City. Use the fields of your Pipedrive company.
Add the fields
Section titled “Add the fields”- On the Fields tab, add the five organization fields.
- Select Hidden for each field. The user then sees a field only when it is not valid.
- Turn on Advanced validation.
Make the groups and rules
Section titled “Make the groups and rules”Make these groups and rules on the Validation tab:
AND├── VAT number regex ^[A-Za-z]{2}[0-9]{6,}$└── OR ├── AND │ └── Invoicing email contains @ └── AND ├── Street not empty ├── Postal code regex ^[0-9]{5,7}$ └── City not empty- In the first group, select AND.
- Click + Rule. Select VAT number, regex and type
^[A-Za-z]{2}[0-9]{6,}$. - Click + Group. Select OR in the new group.
- In the OR group, click + Group two times. Select AND in the two new groups.
- In the first AND group, add the rule Invoicing email, contains,
@. - In the second AND group, add the rules Street, not empty; Postal code, regex,
^[0-9]{5,7}$; and City, not empty.
The validation passes when the VAT number is correct, and the email or the full address is correct.
Add the error messages
Section titled “Add the error messages”- At the VAT number rule, click the arrow and type
VAT number is not validin Add error message. - In the OR group, type
Add an invoicing email or a postal addressin Add error message for group. - In the email group, type
Invoicing email is not valid. - In the address group, type
Postal address is missing or not valid. - Click Save.
The first group needs no message. The messages of the rule and of the groups below it tell the user what is wrong.
The result
Section titled “The result”The user clicks the Button on a deal of the organization. The organization has no VAT number, no email and no postal code. OneClick does not send the data. It shows the VAT number field with VAT number is not valid, and the messages of the groups above the fields.
When all values are correct, OneClick sends the data. The user does not see the hidden fields.