Groups
This page is for admins. A group is a list of OneClick users. You use groups in Show for groups to show a Button only to some users. See Limit visibility.
Only a user who installed OneClick can be a member of a group.
The group list
Section titled “The group list”- Click Settings at the bottom of the OneClick Panel.
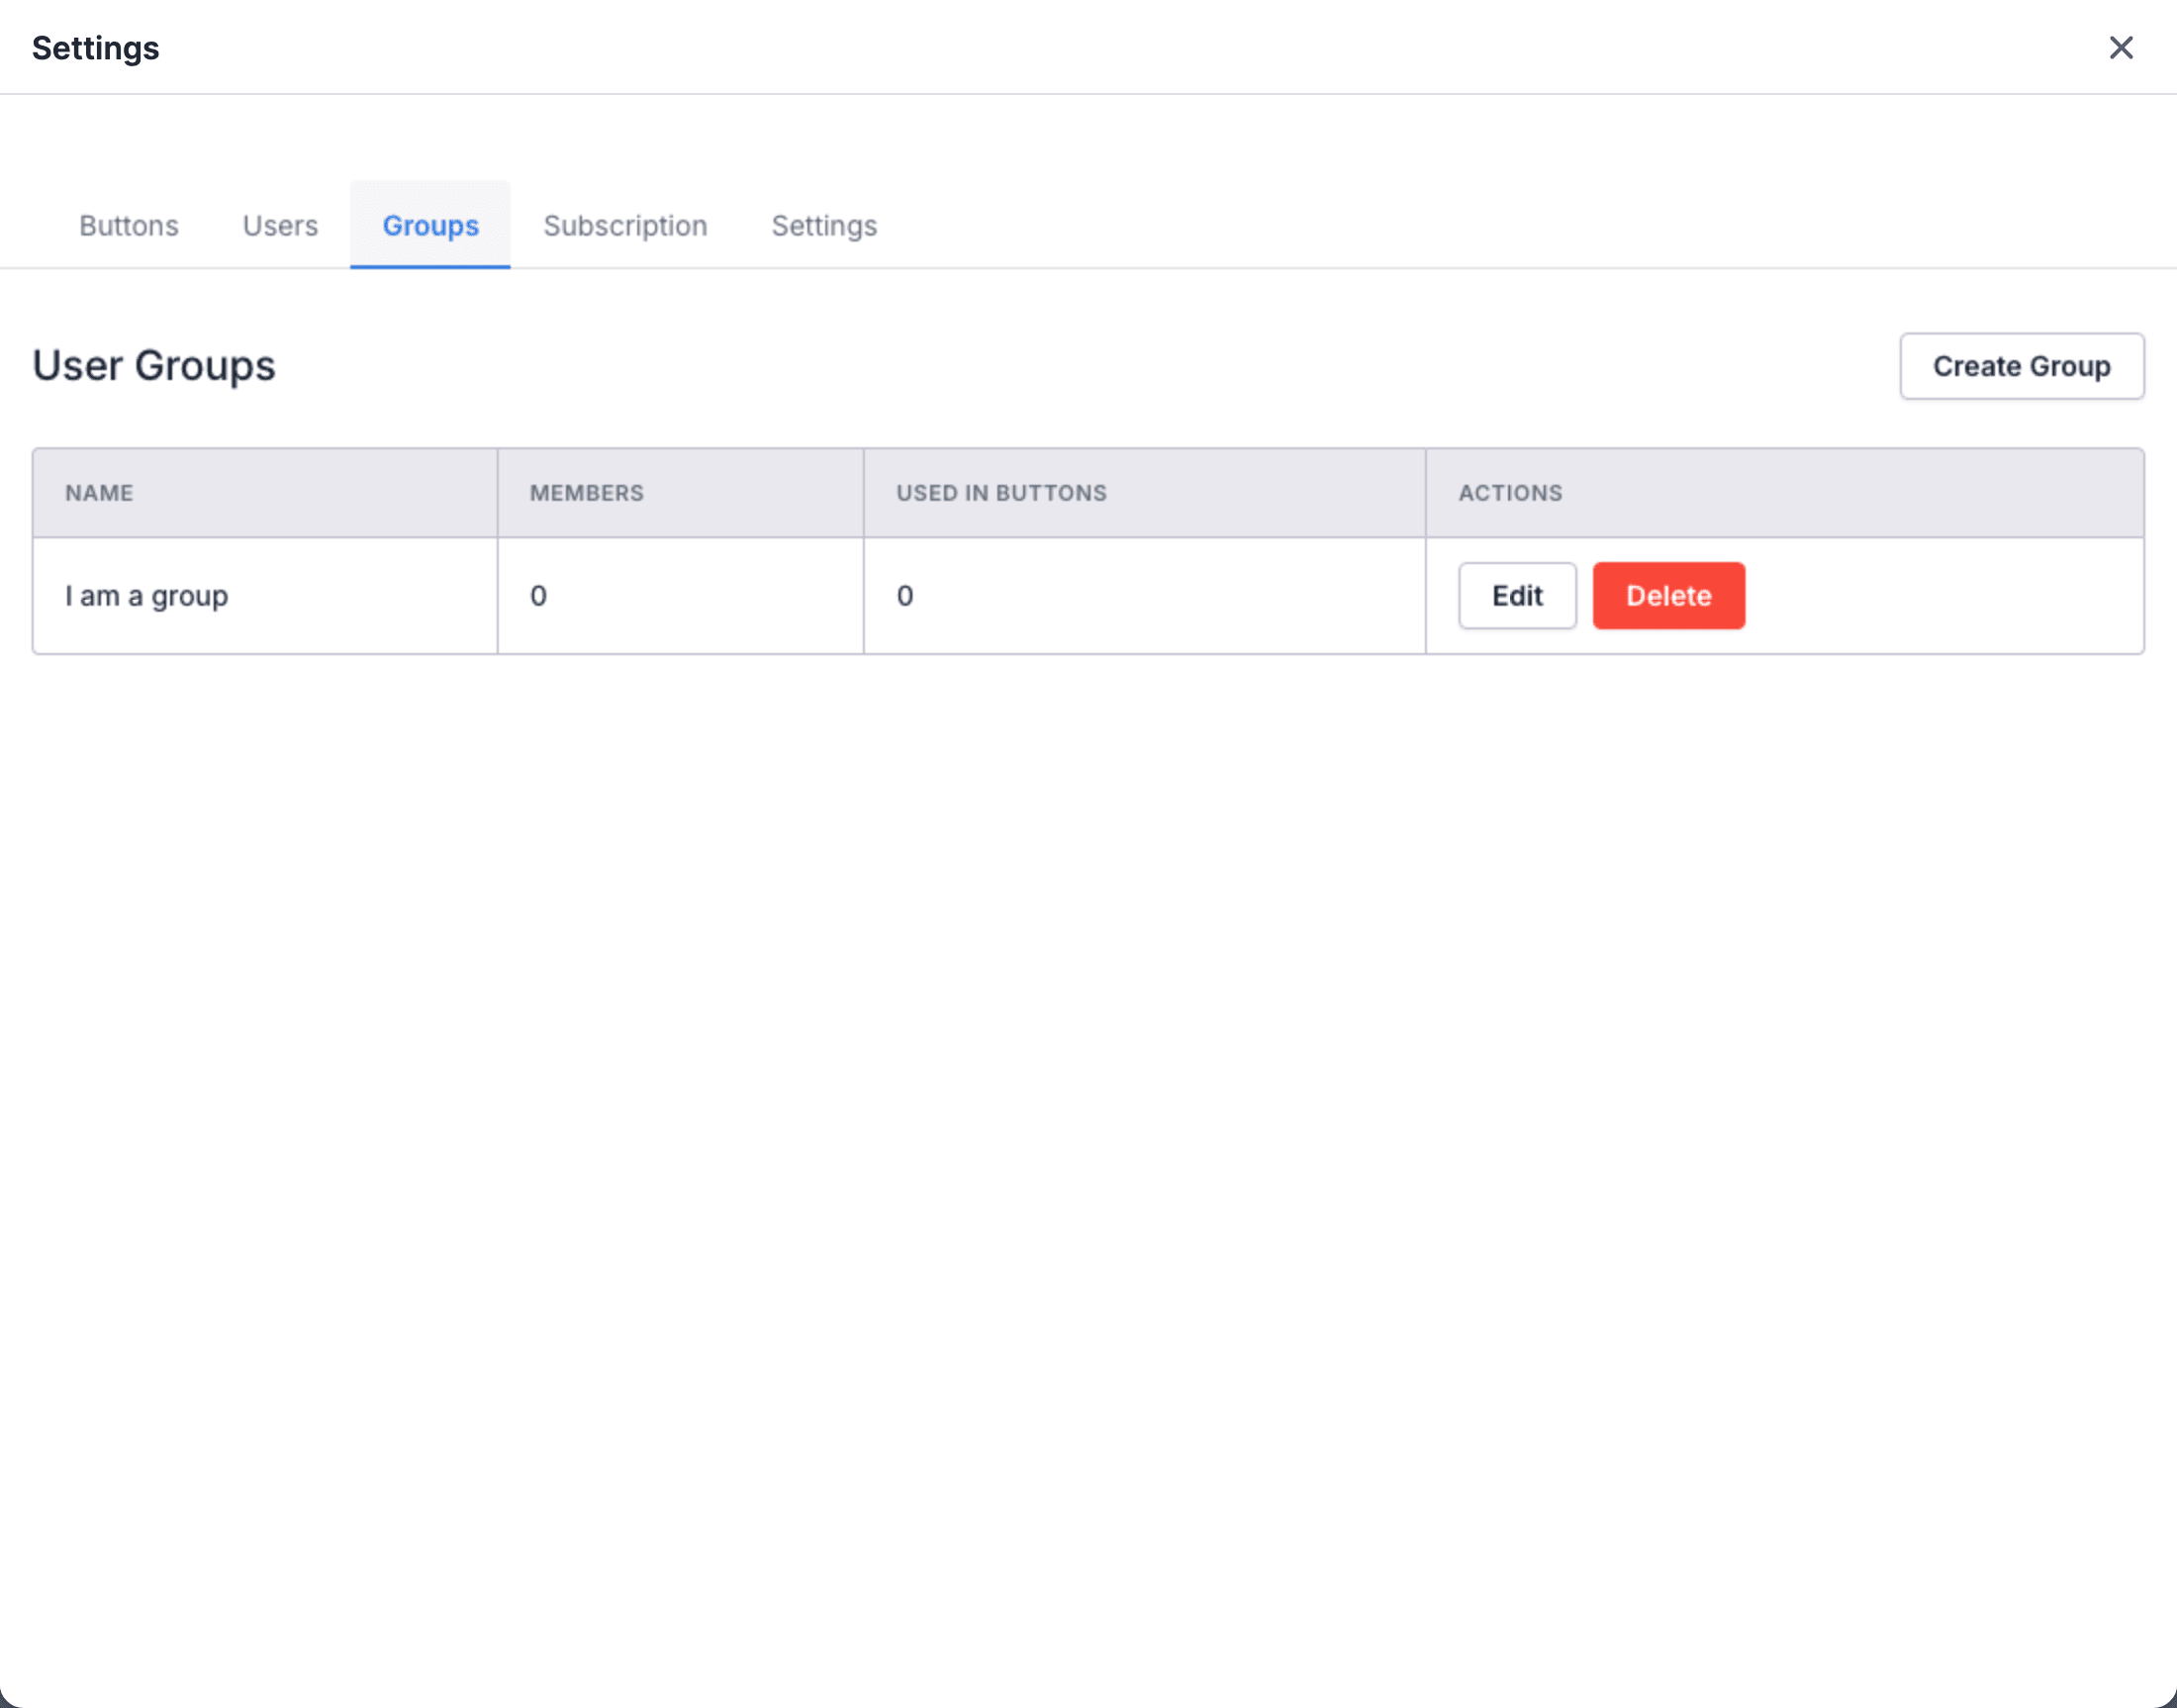
- Click the Groups tab. The list User Groups shows.
| Column | Contents |
|---|---|
| Name | The name of the group. |
| Members | The number of users in the group. |
| Used in Buttons | The number of Buttons that use the group. |
| Actions | The buttons Edit and Delete. |
Make a group
Section titled “Make a group”- Click Create Group. The dialog Create Group opens.
- Type a name in Group Name.
- Click Create. The list shows the group with no members.
- Add the members. See Change the members of a group.
Change the members of a group
Section titled “Change the members of a group”- Click Edit in the row of the group. The dialog Edit Group opens.
- To add a user, find the user in the list Available Users at the left. Click the add button of the user. The user moves to the list Group Members at the right.
- To remove a user, find the user in the list Group Members. Click the remove button of the user. The user moves back to Available Users.
- Click Save.
Each list has a search field. Add All adds all users that the search finds. Remove All removes all members that the search finds.
You can also change the name of the group in Group Name.
Delete a group
Section titled “Delete a group”- Click Delete in the row of the group. The dialog Delete Group opens.
- Read the dialog. If Buttons use the group, the dialog shows their names.
- Click Delete.
When you delete a group, the Buttons that use it lose the group in Show for groups. A user who saw such a Button only through this group does not see it anymore.