Send messages from a Zap
This page is for admins who make Buttons.
In this guide, a Zap tells the user about its steps. After each step, the Zap sends a custom message to OneClick. The user reads the messages in the OneClick Panel. For all the details of messaging, see Messaging.
Start with a Zap that a Workflow button starts, for example the Zap from Start a Zap. The Zap gets the request with a Catch Hook trigger.
Turn on messaging for the Button
Section titled “Turn on messaging for the Button”Zapier cannot send its own HTTP answer to OneClick. The Zap sends custom messages instead.
- Open the Button in the Button editor.
- Turn on the switch at the right of Messaging in the menu.
- Click Messaging.
- Turn on Do not log HTTP responses. The answer of the webhook then does not make a message.
- Click Save.
- Close the Settings.
- Click the Button in the OneClick Panel of a deal. The request now contains
event_id.
Get the event ID in the Zap
Section titled “Get the event ID in the Zap”- Go back to the Zap.
- Open the test of the Catch Hook trigger.
- Load the new requests of the webhook.
- Select the request of your last press. The data now contains
event_id.
OneClick uses the event ID to show the message to the correct user, on the correct Button and record.
Add a custom message
Section titled “Add a custom message”Add a message after each step of the Zap that the user must know about.
- Add an action after the step.
- Select Webhooks by Zapier as the action app.
- Select POST as the action event.
- Type the URL of the messaging end-point in the URL of the action. The Messaging page gives the URL.
- Set the payload type to
json. - Add the key
messagewith the text of the message. - Add the key
message_typewith the type of the message, for examplesuccess. - Add the key
event_id. Selectevent_idfrom the data of the trigger as its value. - Publish the Zap.
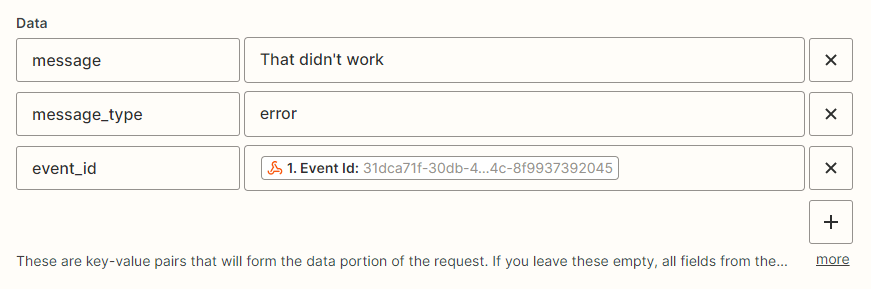
The type of a message is info, success, warning or error. For the keys and the rules of a custom message, see
Custom messages.
Test the Button
Section titled “Test the Button”- Open a deal in Pipedrive.
- Click the Button in the OneClick Panel.
- Make sure that the Panel shows the messages of the Zap. See Read messages.
Stop a second press after an error
Section titled “Stop a second press after an error”A Zap that stopped with an error usually stops again at the next press. You can block the Button until the user reads the error message.
- Send the message of an error step with the
message_typeerror. - Open the Button in the Button editor.
- Click Messaging in the menu.
- Turn on Disable the button if there are unread error messages.
- Click Save.
The user can press the Button again after the user reads the error message. See Disable the button if there are unread error messages.
To send a different message for a success and for an error, use Zapier paths.